1. Introduction
  2. Getting Started
  3. Theme option
  4. Elementor
  5. Content
  6. How to customize
  7. Source and Credits
  8. Frequently Asked Questions
  9. Support & Custom service

Sobeau - WordPress Theme - Documentation


Introduction


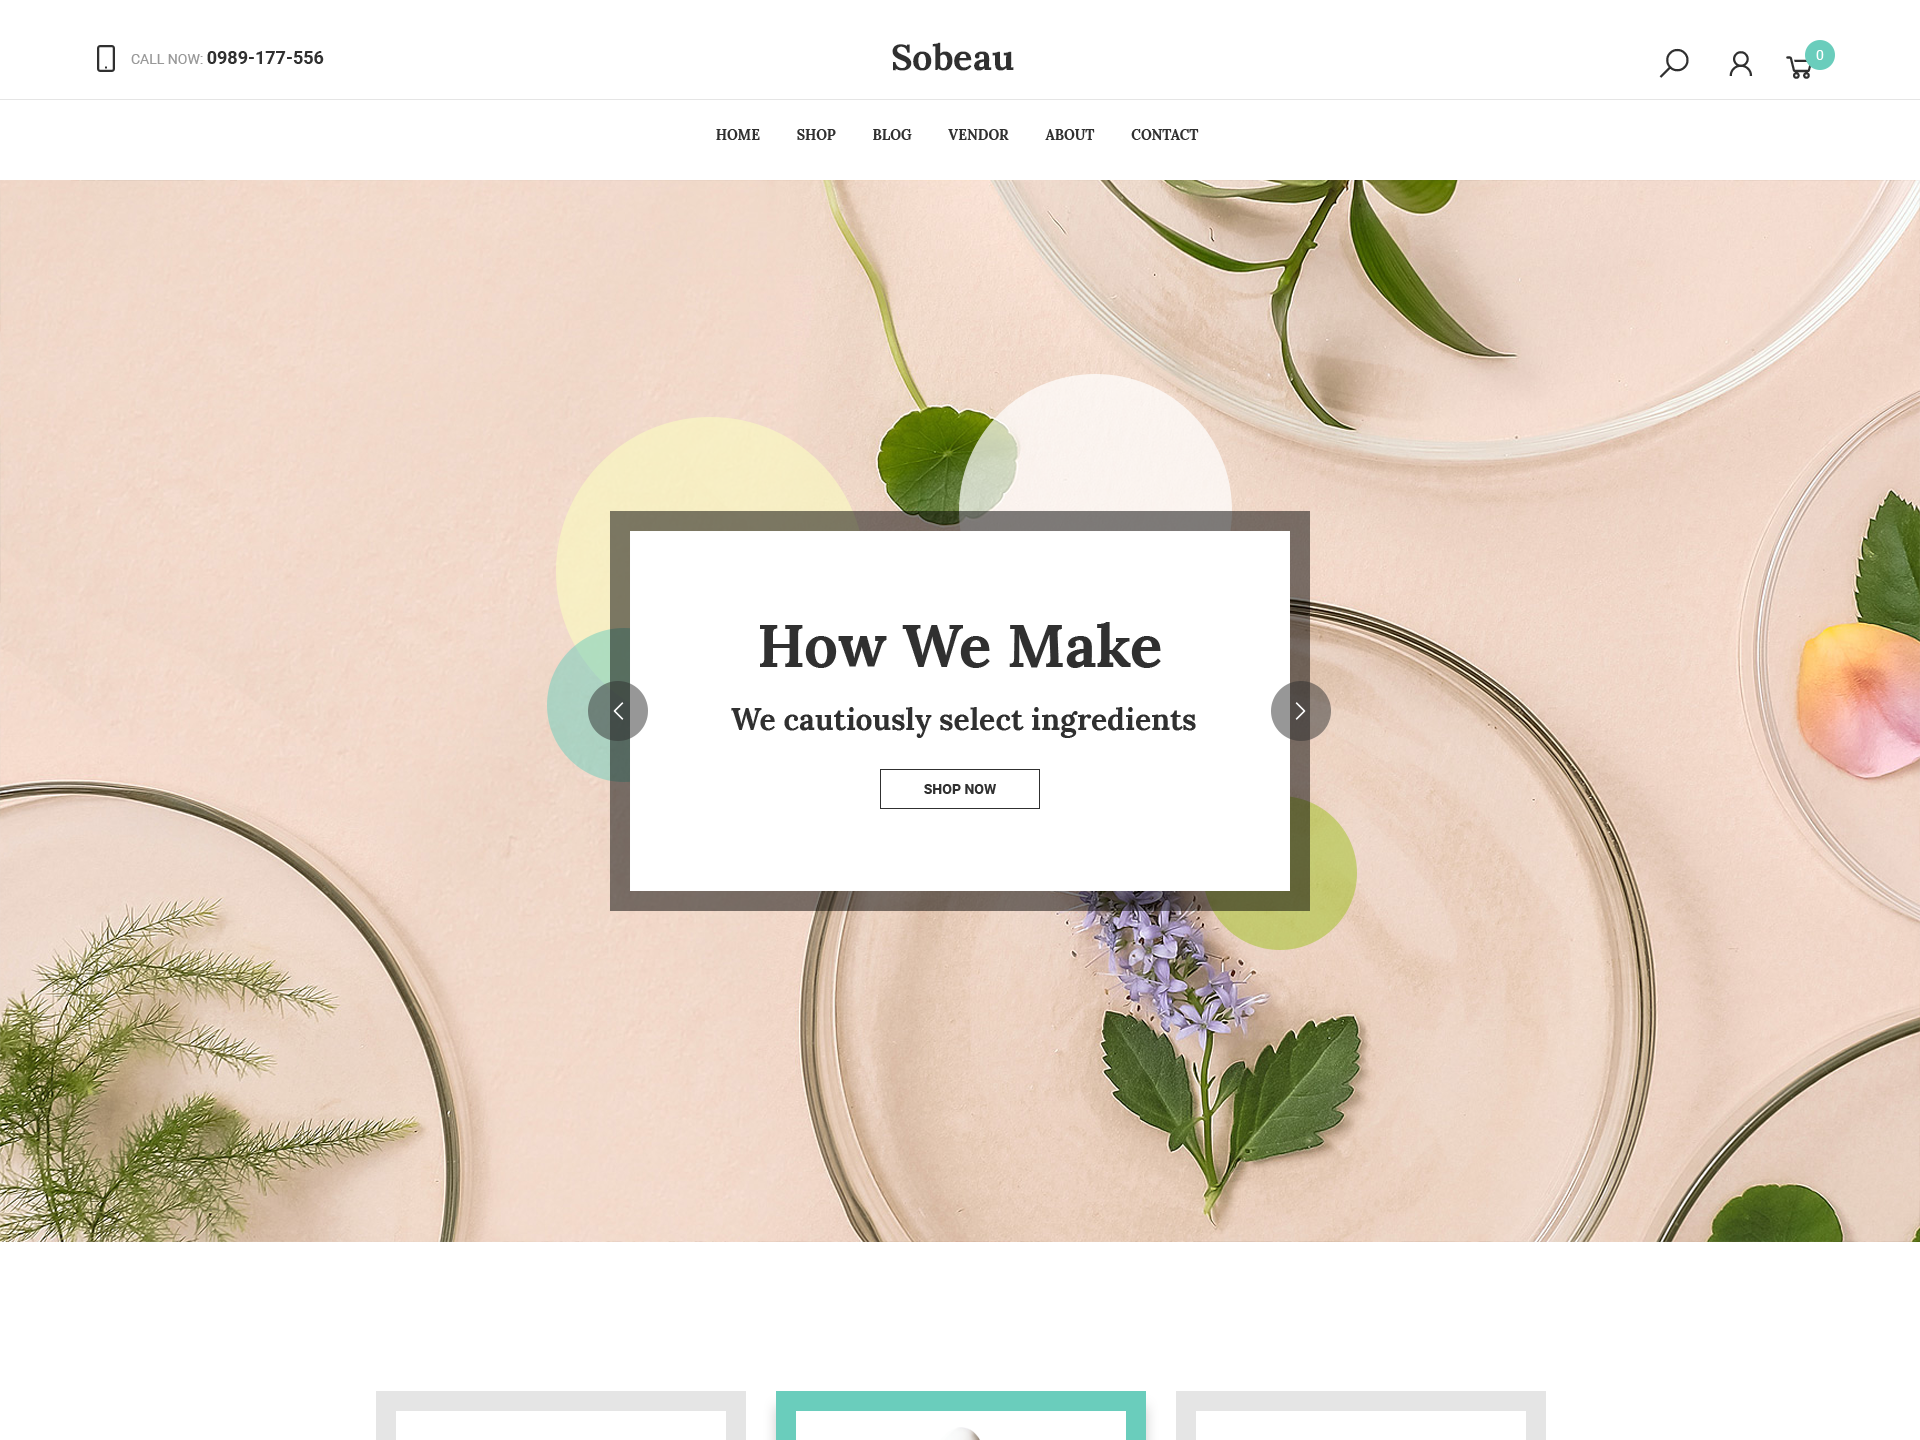
Sobeau – many unique and creative designs of us. Surely, it’s will be great experiences! Because, the organic food and fruit store is designed perfectly for websites and mobile applications. Especially, there are more options for you to easily manage according to your business or your ideals.

Thank you for purchasing my theme.

Getting Started


1. System Requirements

To use Sobeau, you need to have a WordPress 4.9 (or higher version) site with PHP 5.4 or more running on your hosting server. If you’ve already installed WordPress on your server and your site is up, that’s great. For help regarding WordPress installation, please see this WordPress Codex link. To learn about some important stuff you should do after installing WordPress.

Some more resources from WordPress Codex:

Host config

Sometimes you may encounter problems like:

  • Can not upload theme to host for installation.
  • Can not upload large xml files to import.
  • Import demo data failed.

The main reason may be that your host config is not suitable, you can check the following parameters in your host config file (php.ini)

  • max_input_time at least 6000.
  • memory_limit at least 128M.
  • max_execution_time at least 6000.
  • post_max_size at least 64M.
  • upload_max_filesize at least 32M.

WordPress config

You can add code into wp-config.php: set_time_limit (600);

2. Installation & Update

2.1. WordPress Installation (Recommended)

Step 1. 

- After downloading the package(zip file) from templatemonster you need to unzip the file and find the file Sobeau.zip.

- That is the theme package file for installation.

- Note: If you choose to download "Installable WordPress file only" then the zip file you get will be the file you used to install the theme.

Step 2. In WordPress Dashboard, Go to Appearance -> Themes.

Step 3.

Click to Add New

After that, click to Upload Theme

Then, click to Browse or Choose file and find to Sobeau.zip and finally click Install Now.

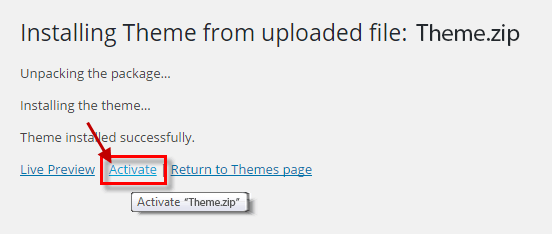
Step 4. Click Activate to finish.


2.2. Manual Installation.

Step 1. Download ZIP package file from templatemonster as step 1 of install with WordPress.

Step 2. In unzipped folder you will find a folder named "Package" find Sobeau.zip file unzip it.

Step 3. Simply upload the unzipped "Sobeau Theme" folder to /wp-content/themes/ folder on your server via FTP.

Step 4. Login to your Dashboard, go to Appearance/Themes menu and active Appearance theme

2.3. Update theme

You can update our products in the following two ways:

1. Download the latest package from templatemonster, delete the old theme and reinstall the new package.

Note: Make sure you do not modify any files in our theme directory before updating to make sure your customizations are not lost when updating. If you need to backup your theme before updating. You should use the Child Theme to customize the theme.

4. Install Needed Plugins

After successful activation of the theme, you need to install the necessary plugins for the site

Step 1. In WordPress Dashboard, click to Begin installing plugins in installation notification

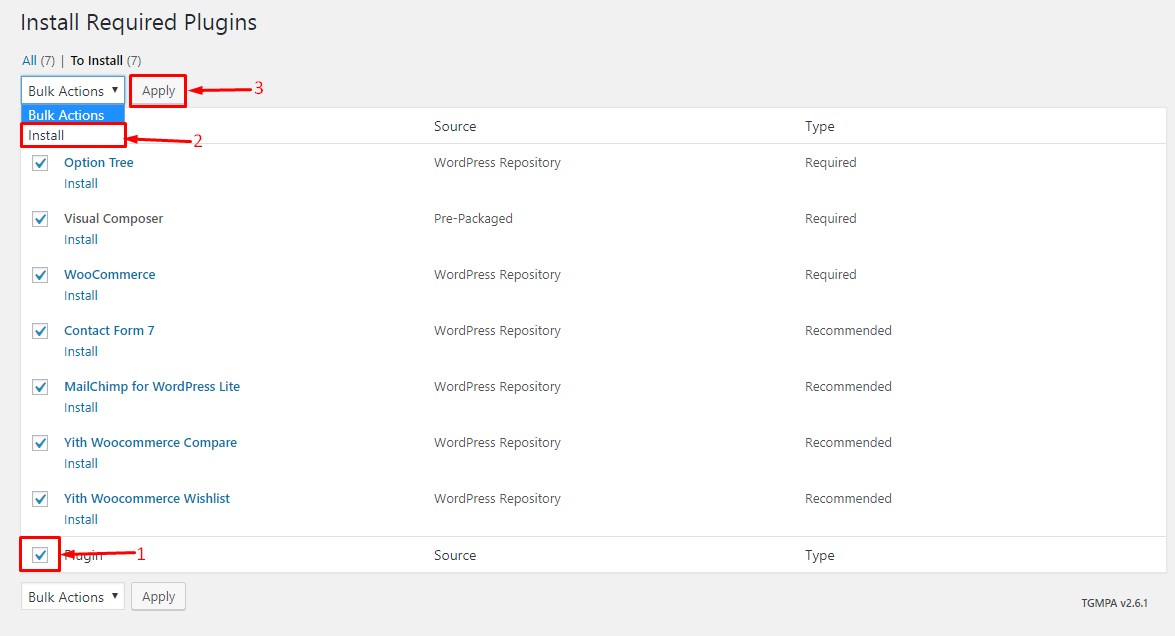
Step 2.

1 - Choose check all plugins

2 - Choose Install action

2 - Click Apply and wait

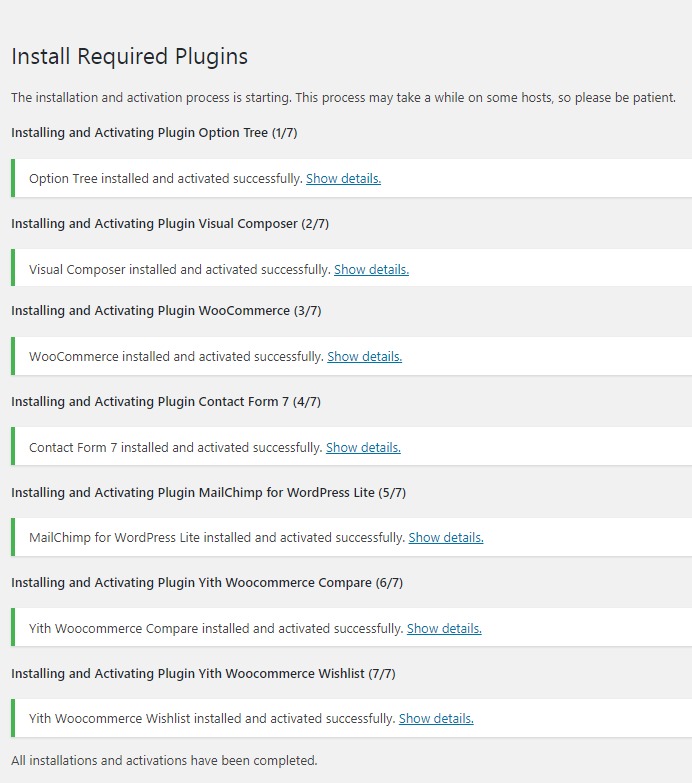
Successful install and active required plugins.

5. Import demo data

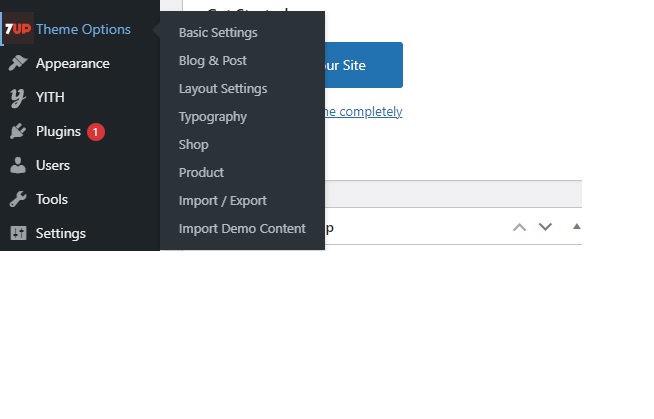
Step 1. In WordPress Dashboard, Go to Theme Option -> Import Demo Content

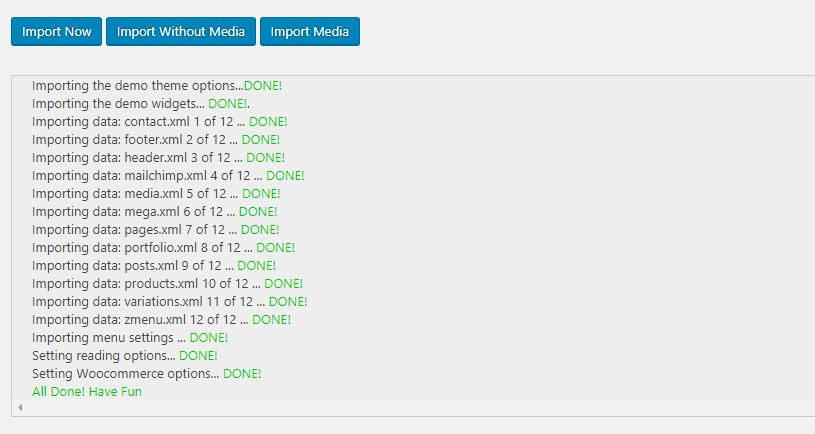
Step 2. Click to Import Now

- 1 Import now: Import full demo content

- 2 Import without media: Import full demo content but no media

- 3 Import media: Import only media

On Popup lightbox select OK to start then waiting a moment while import sample data

Successful import demo data

Note: In case your server has the same configuration as the request but still can not import successfully with Import now. You can use the Import without media feature and then Import media. You can import many times until successful.

6. Video tutorial


Theme Option

Theme options is a custom admin page. It allows users to change theme settings without modifying theme files or touching any code.

In WordPress Dashboard, you go to Theme Option -> Theme Option to customize.

1. Basic Settings

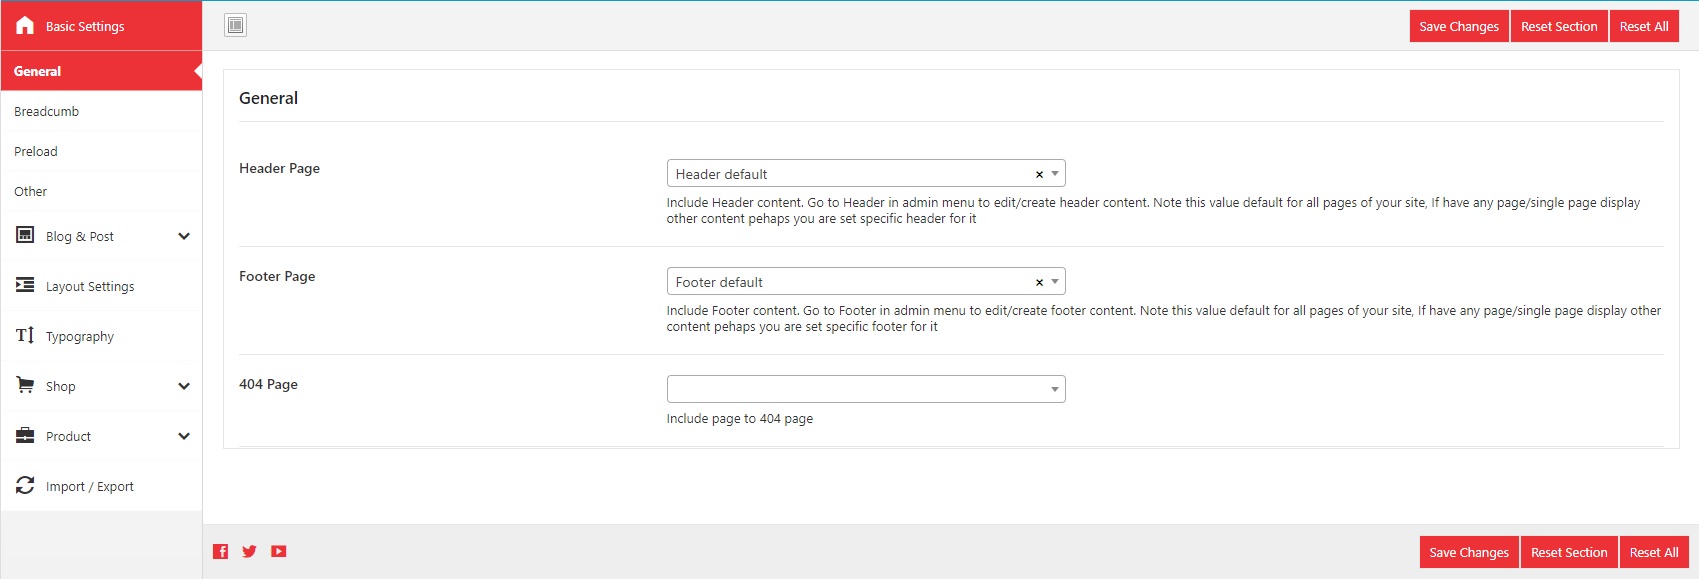
1.1 General

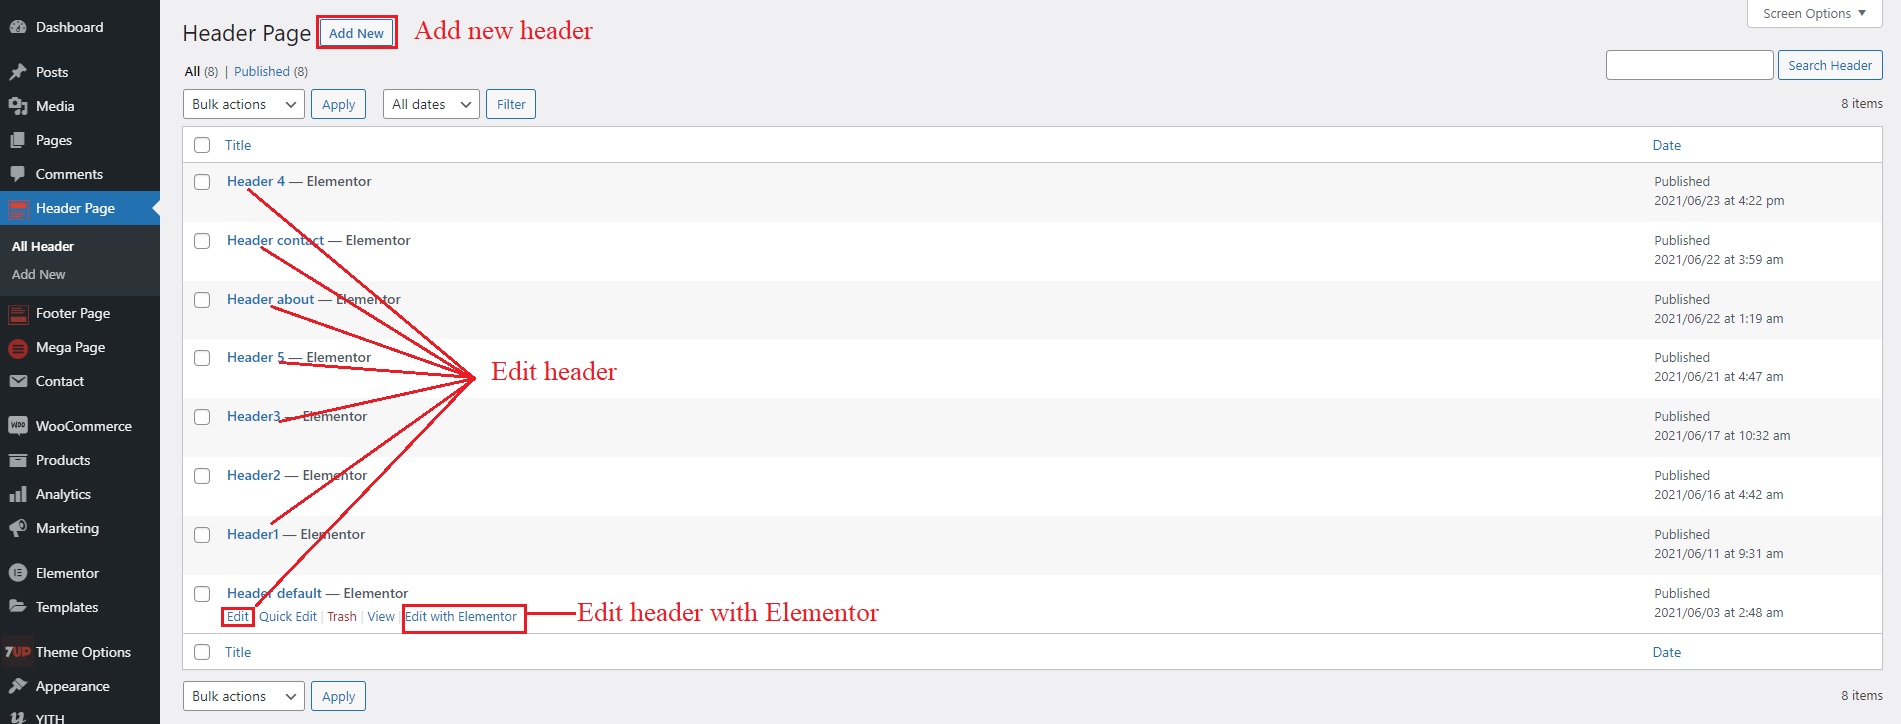
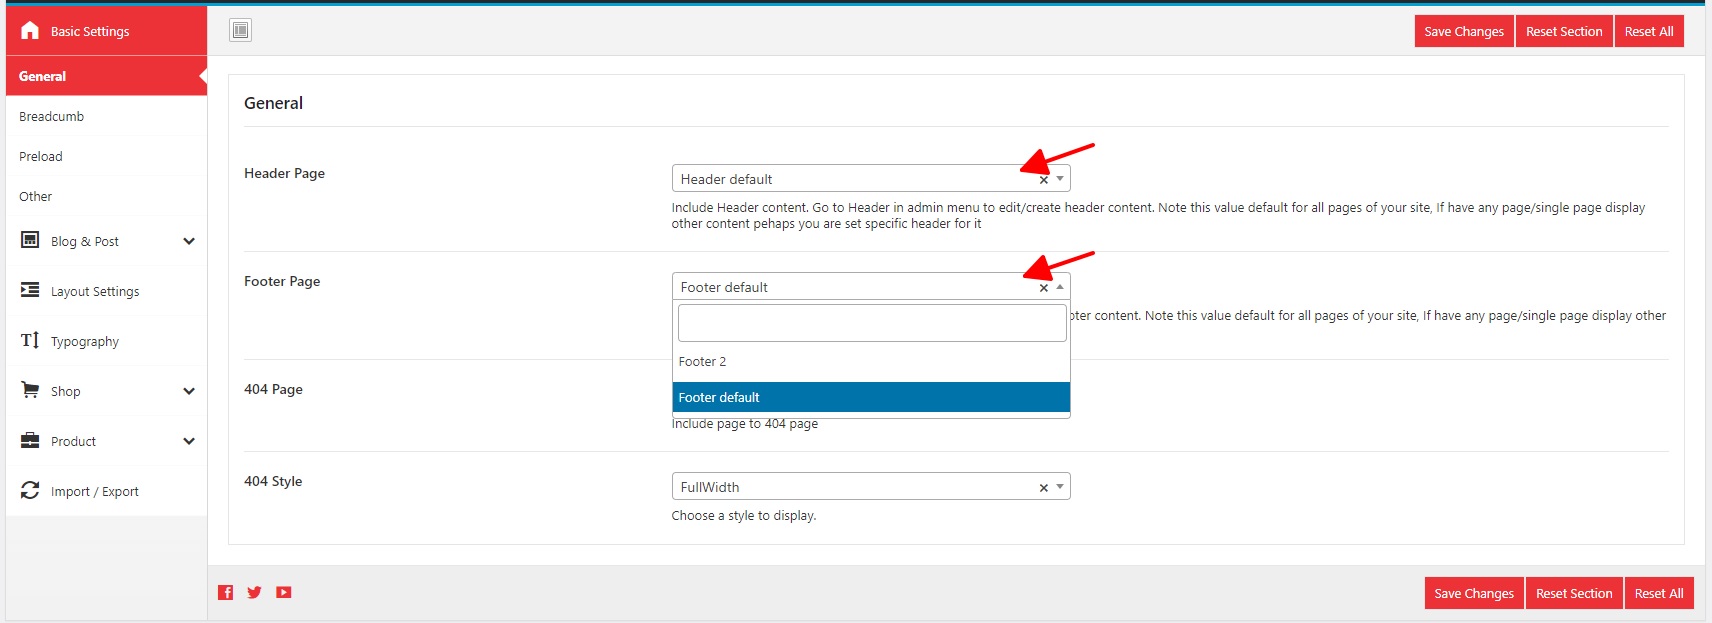
- Header Page: Include Header content. Go to Header in admin menu to edit/create header content. Note this value default for all pages of your site, If have any page/single page display other content pehaps you are set specific header for it

- Footer Page: Include Footer content. Go to Footer in admin menu to edit/create footer content. Note this value default for all pages of your site, If have any page/single page display other content pehaps you are set specific footer for it

- 404 Page: Include page to 404 page. You can create 404 page in Mega Page by page builder.

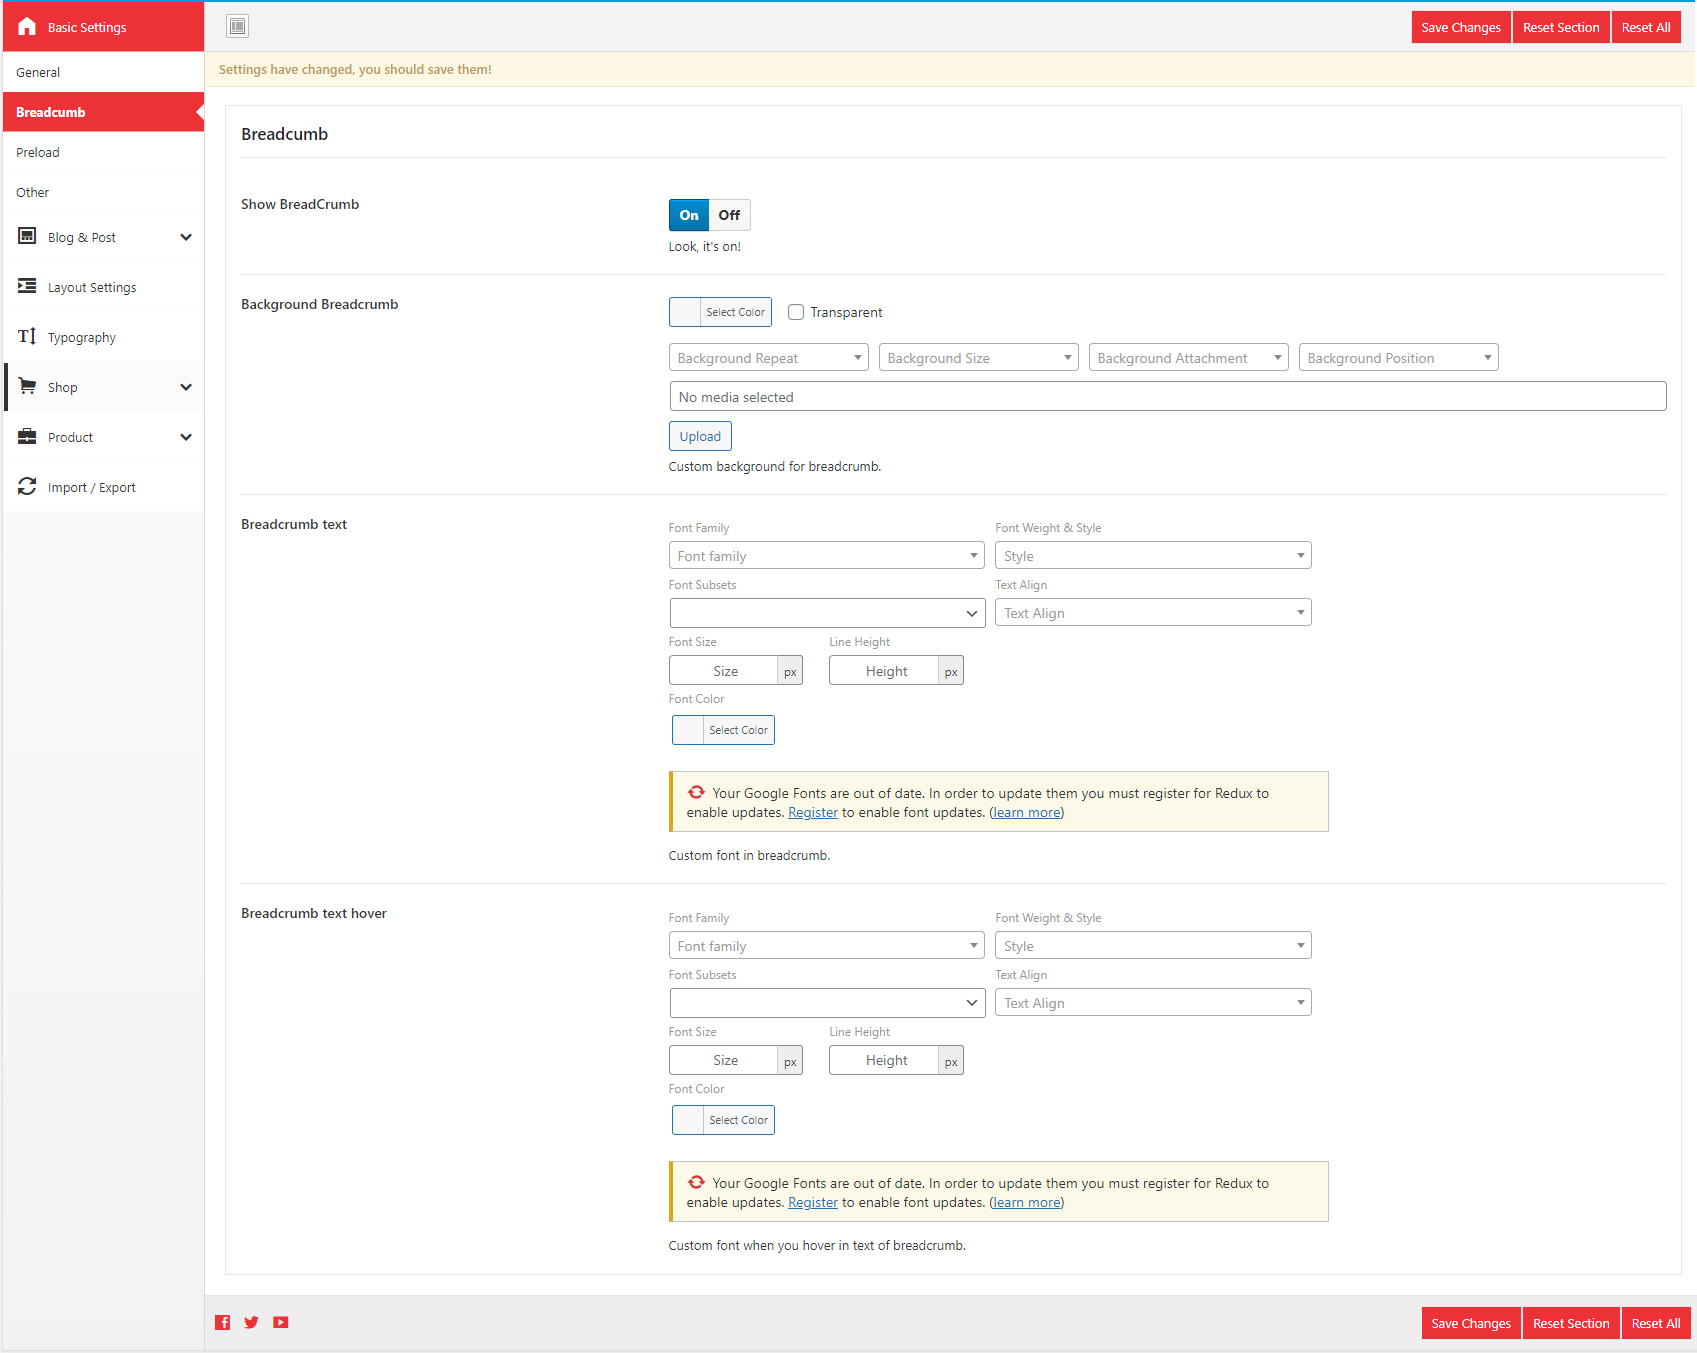
1.2 Breadcrumb

- Show BreadCrumb: This allow you to show or hide BreadCrumb (ON/OFF).

- Background Breadcrumb: Custom background for breadcrumb.

- Breadcrumb text: Custom font in breadcrumb.

- Breadcrumb text hover: Custom font when you hover in text of breadcrumb.

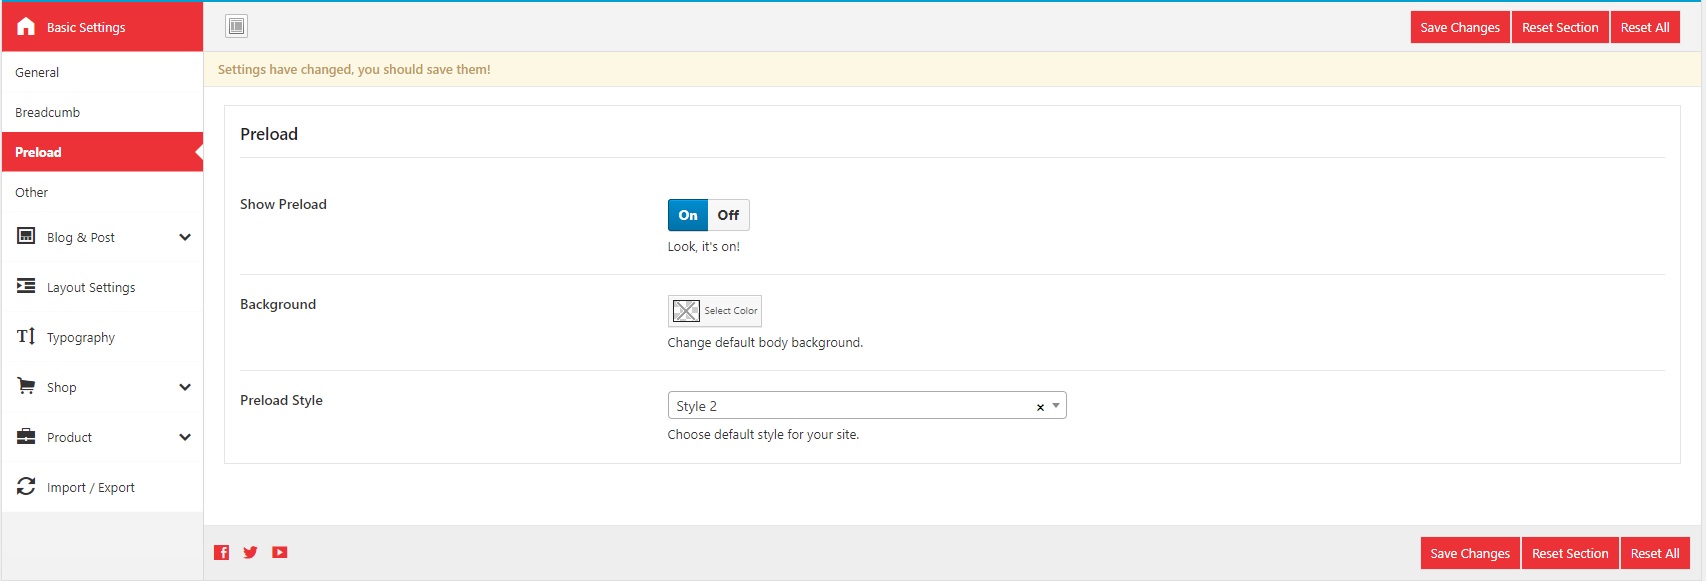
1.3 Preload

- Show Preload: This allow you to show or hide preload (ON/OFF)

- Background: Change default body background on loadding.

- Preload Style: Choose preload default style for your site (8 style).

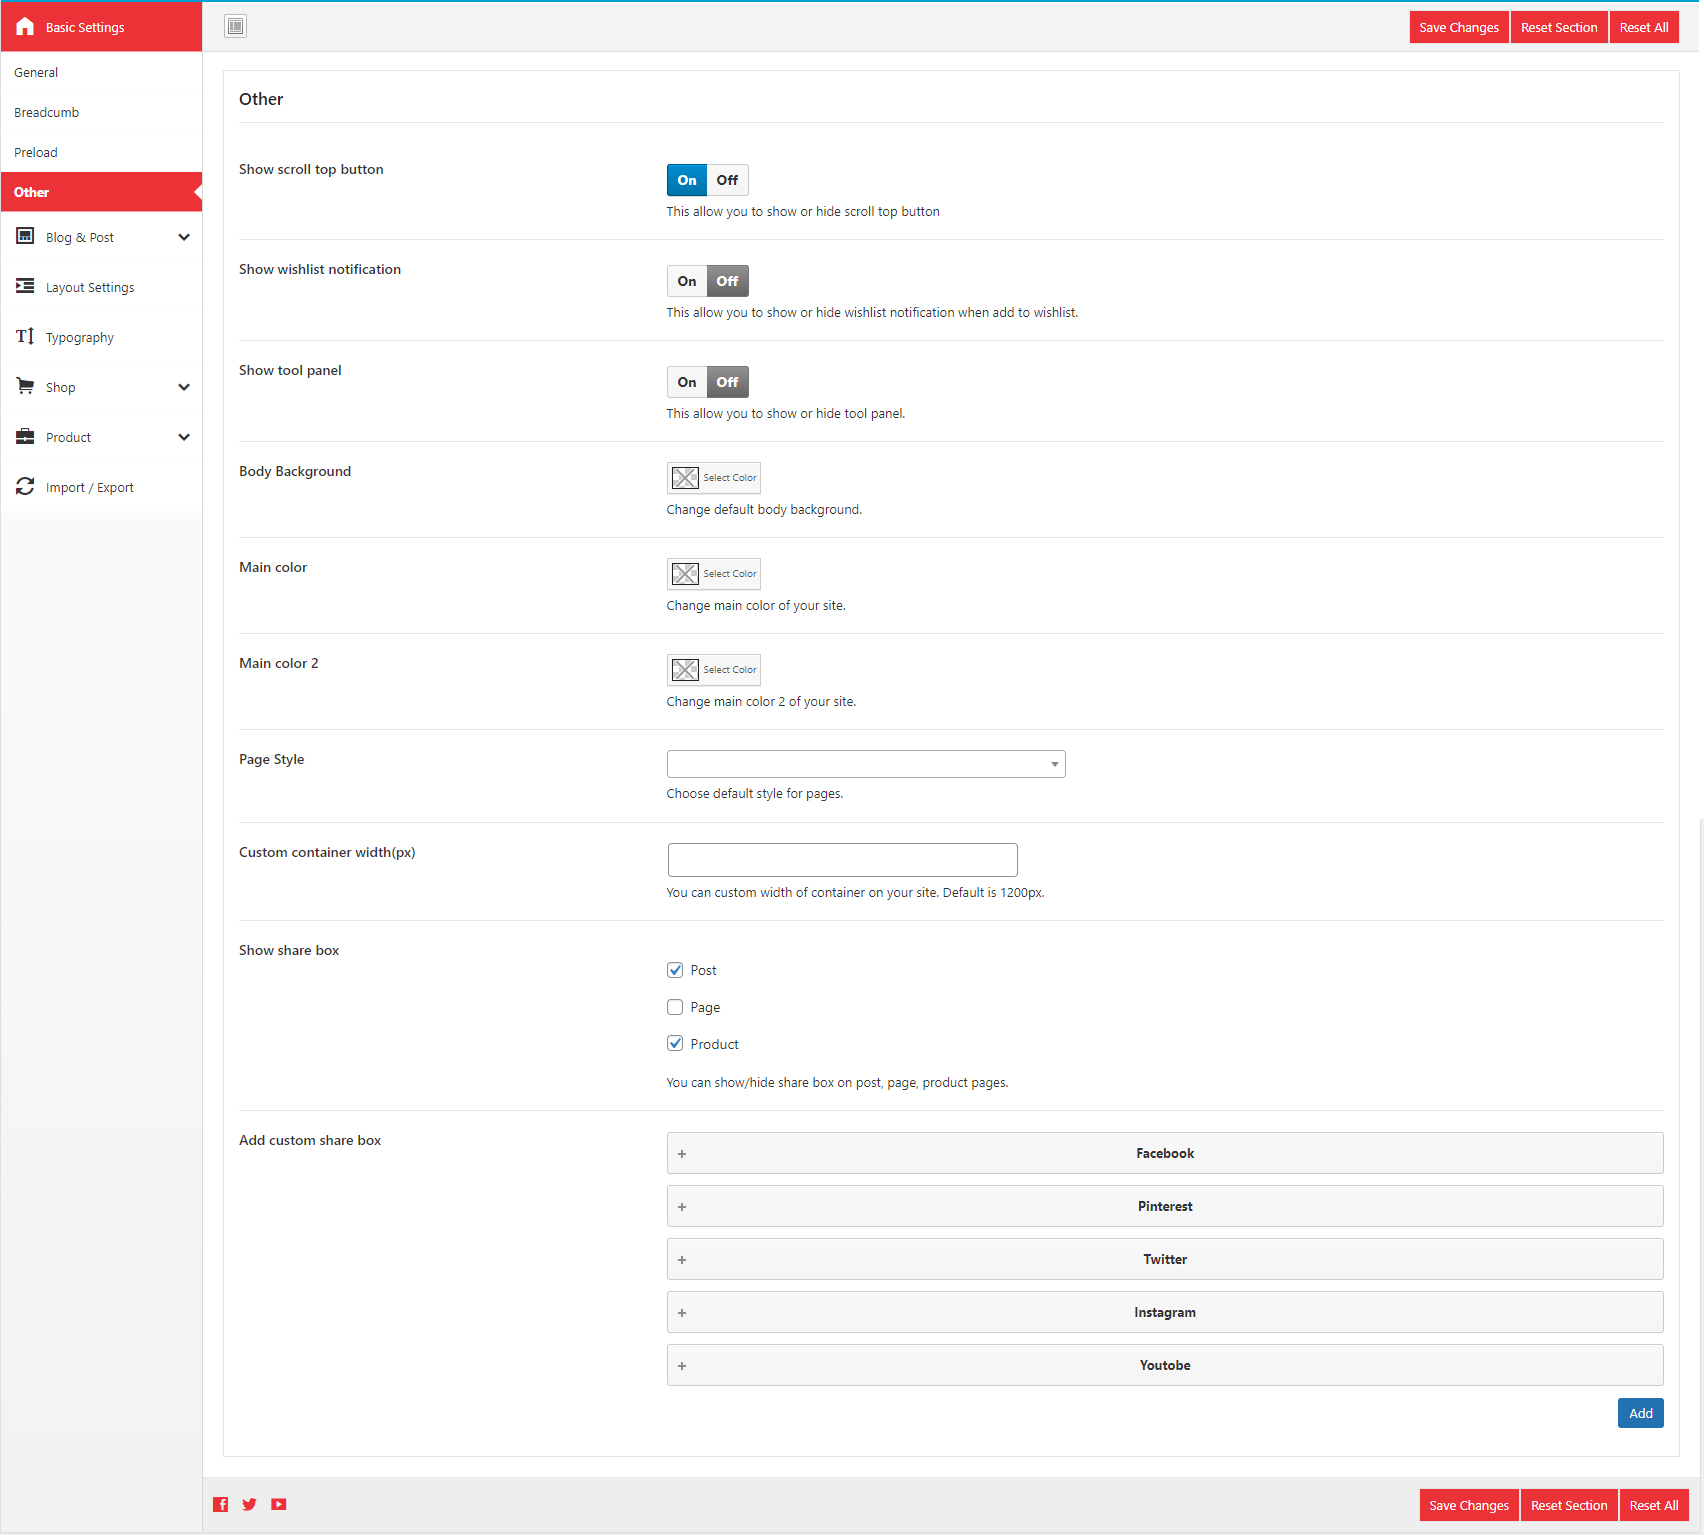
1.4 Other

- Show scroll top button: This allow you to show or hide scroll top button on your site (ON/OFF).

- Show wishlist notification: This allow you to show or hide wishlist notification when add to wishlist.

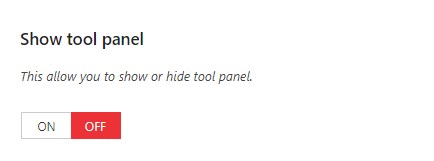
- Show tool panel: This allow you to show or hide tool panel. Use on the demo to display the main layout, links document and support. In fact you can disable this option.

- Body Background: Change default body background.

- Main color: Change main color of your site.

- Main color 2: Change main color 2 of your site.

- Page Style: Choose default style for pages of your site(Default/Boxed).

- Custom container width(px): You can custom width of container on your site. Default is 1200px.

- Show share box: You can show/hide share box on post, page, product pages.

- Add custom share box: You can customize hide / show social icons as you like.

2. Blog & Post

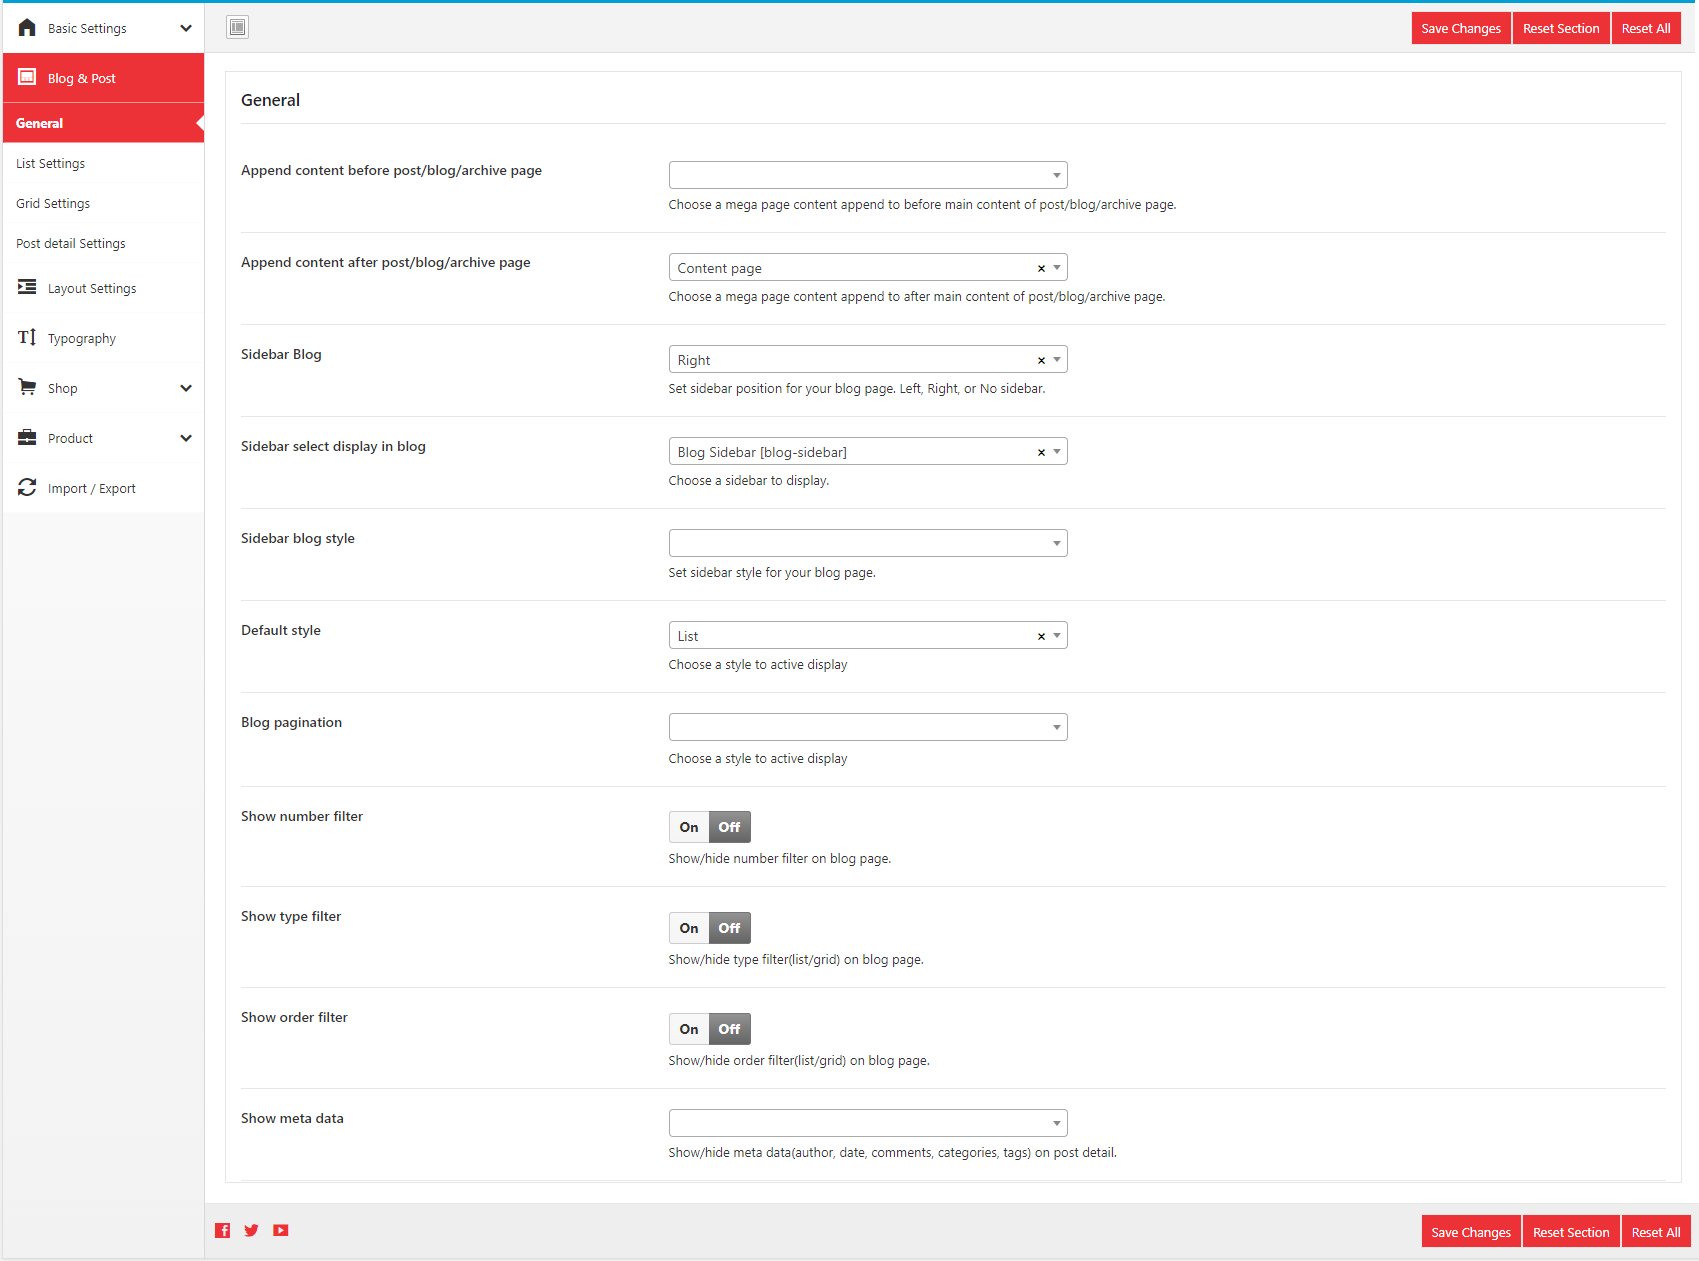
2.1 General

- Append content before post/blog/archive page: Choose a mega page content append to before main content of post/blog/archive page.

- Append content after post/blog/archive page: Choose a mega page content append to after main content of post/blog/archive page.

- Sidebar Blog: Set sidebar position for your blog page. Left, Right, or No sidebar.

- Sidebar select display in blog: Choose a sidebar to display for blog pages.

- Sidebar blog style: Set sidebar style for your blog page.

- Default style: Choose a style to active display (List/Grid)

- Blog pagination: Choose a pagination style to display (Default/Load more).

- Show number filter: Show/hide number filter on blog page.

- Show type filter: Show/hide type filter(list/grid) on blog page.

- Show order filter: Show/hide order filter(list/grid) on blog page.

- Show meta data: Show/hide meta data(author, date, comments, categories, tags) on post detail.

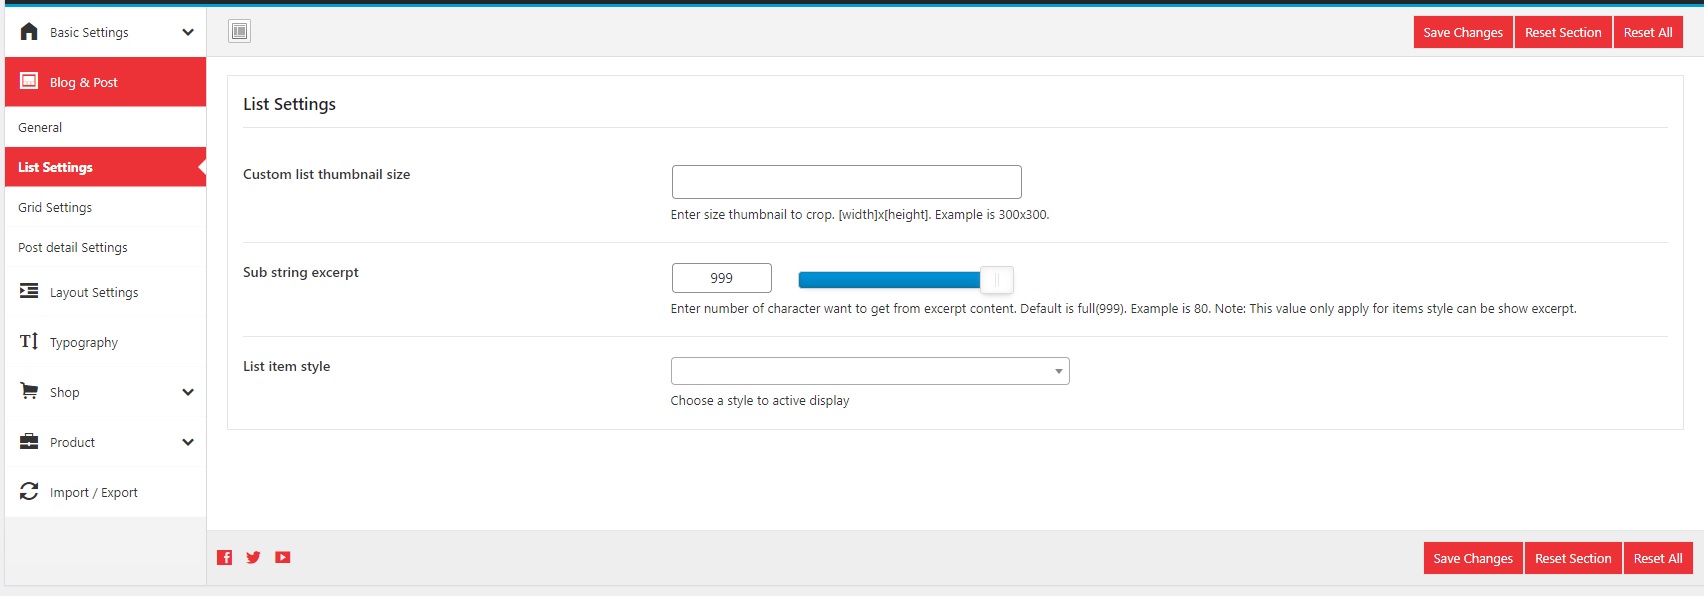
2.2 List Settings

- Custom blog thumbnail size: Enter size thumbnail to crop. [width]x[height]. Example is 300x300.

- Sub string excerpt: Enter number of character want to get from excerpt content. Default is full(999). Example is 80. Note: This value only apply for items style can be show excerpt.

- List item style: Choose a style to active display (3 styles).

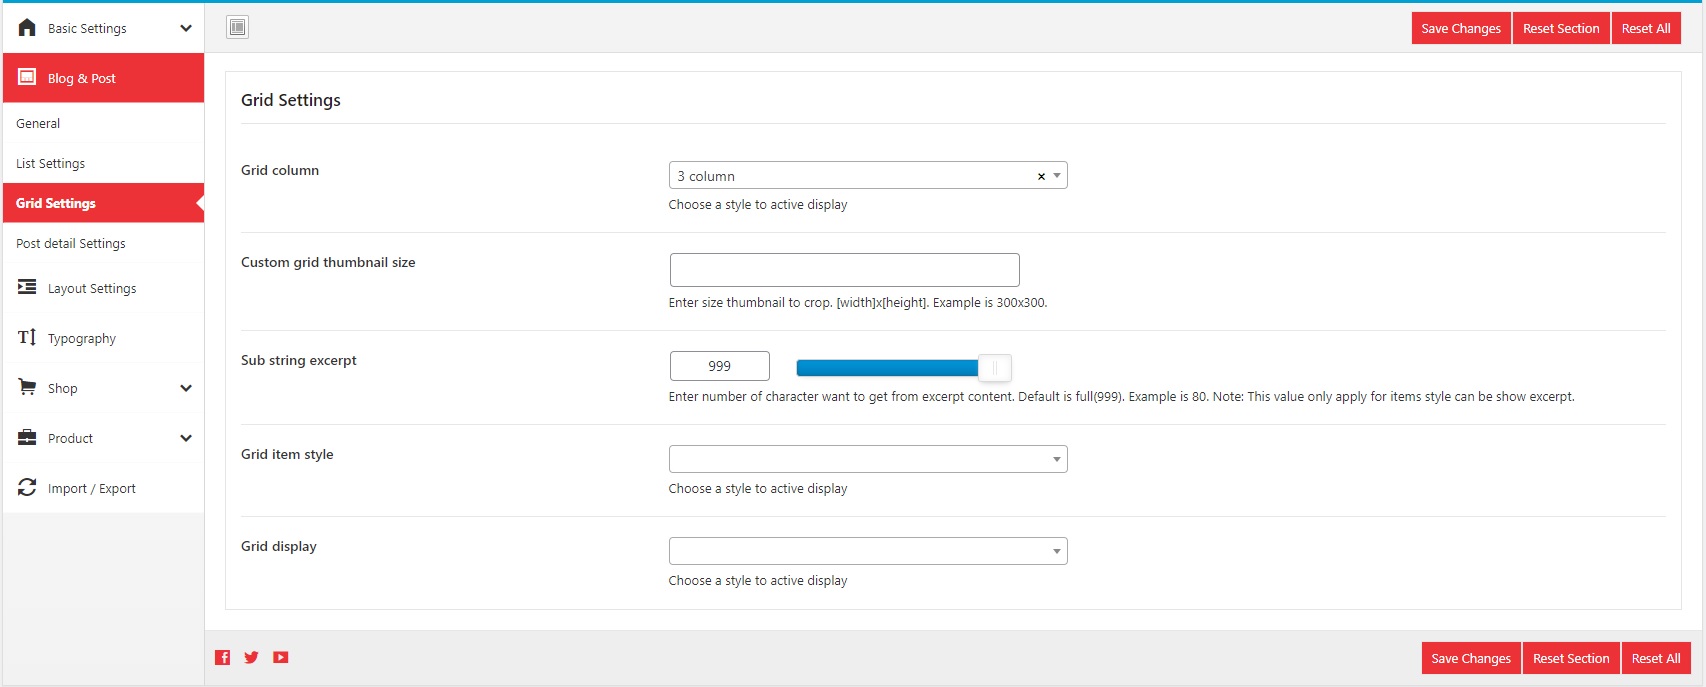
2.3 Grid Settings

- Grid column: Choose a style to active display

- Custom grid thumbnail size: Enter size thumbnail to crop. [width]x[height]. Example is 300x300.

- Grid Sub string excerpt: Enter number of character want to get from excerpt content. Default is 0(hidden). Example is 80. Note: This value only apply for items style can be show excerpt.

- Grid item style: Choose a style to active display

- Grid display: Choose a style to active display

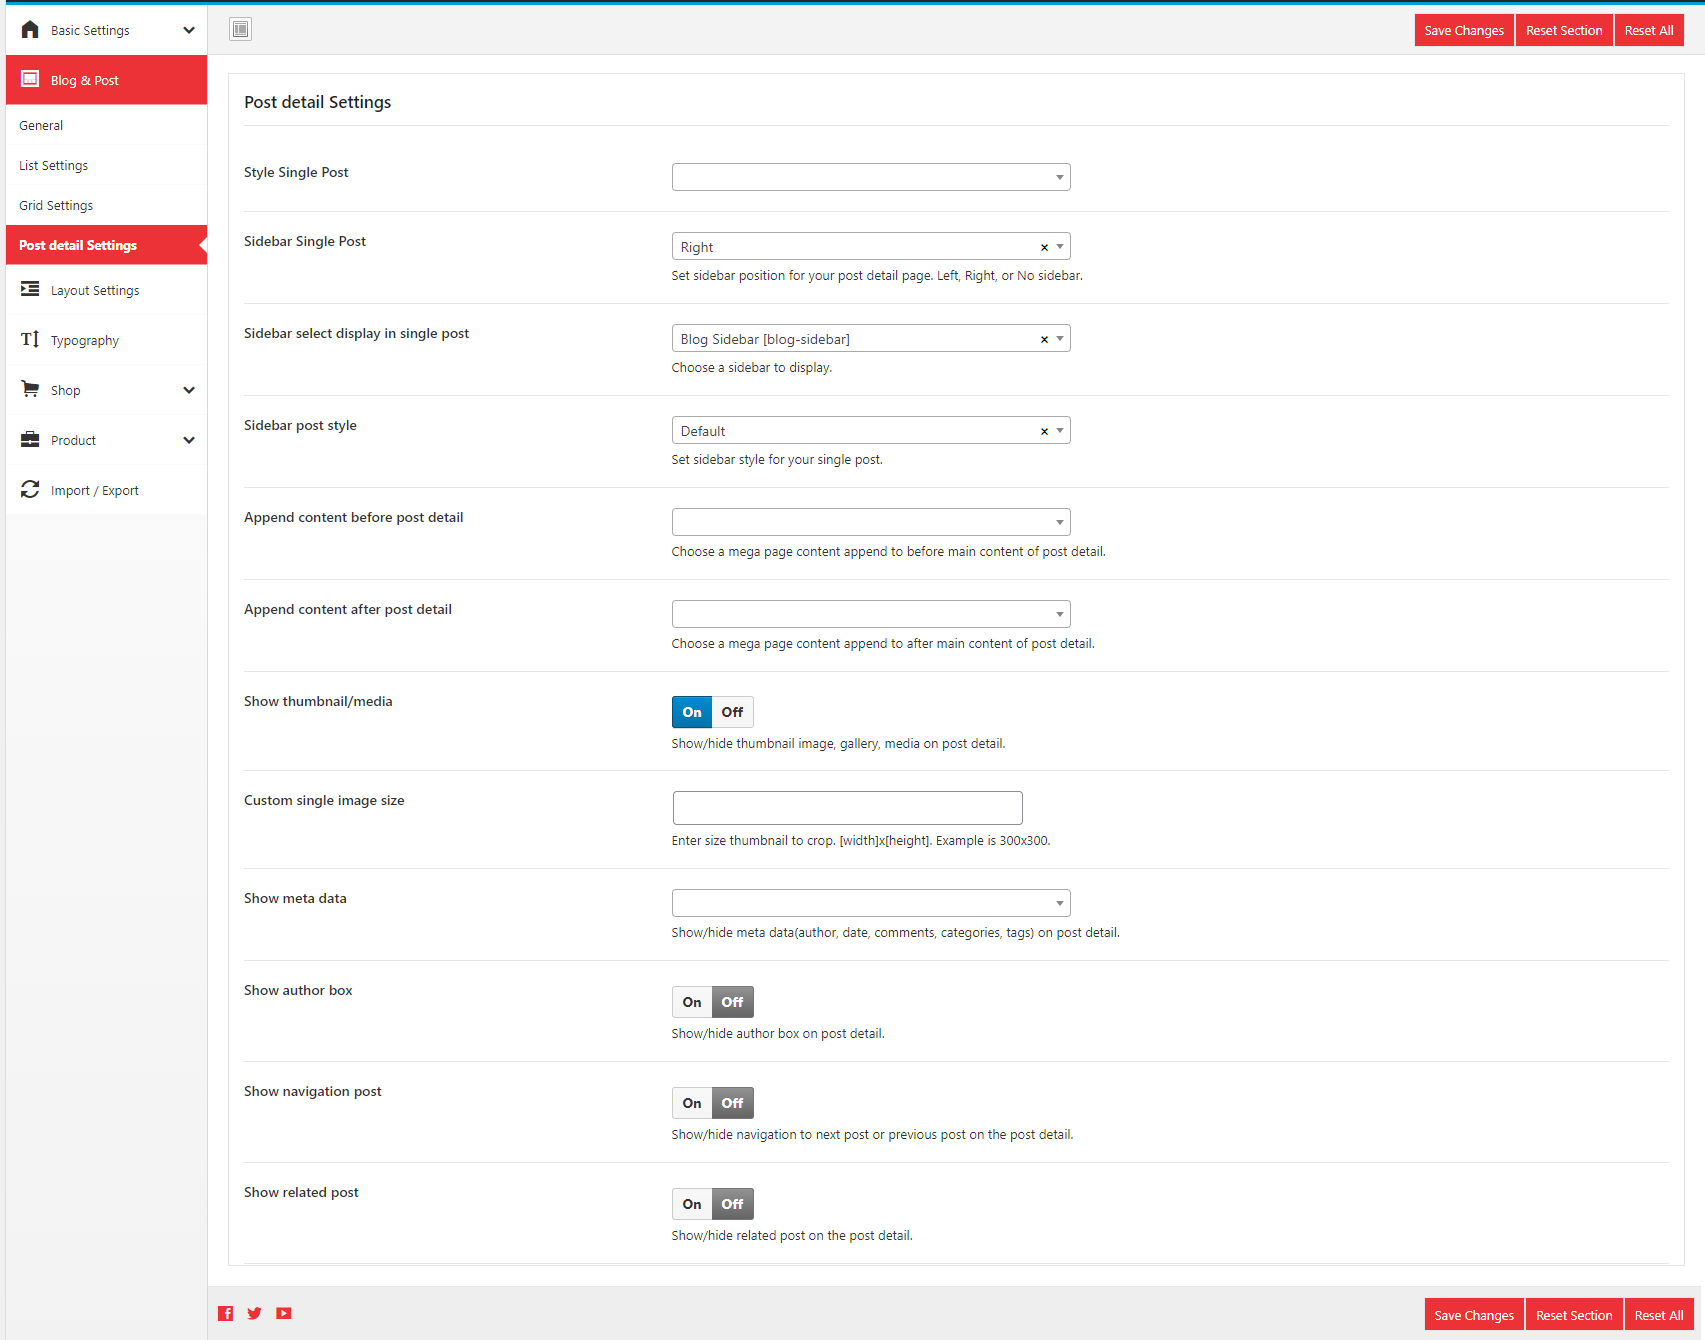
2.4 Post detail settings

- Style Single Post: Choose a style of post single.

- Sidebar Single Post: Set sidebar position for your post detail page. Left, Right, or No sidebar.

- Sidebar select display in post single: Choose a sidebar to display of post single.

- Sidebar post style: Choose a sidebar to display of post single.

- Append content before product page: Choose a mega page content append to before main content of post single.

- Append content after product page: Choose a mega page content append to after main content of post single.

- Show thumbnail/media: Show/hide thumbnail image, gallery, media in post detail.

- Custom single image size: Enter size thumbnail to crop. [width]x[height]. Example is 300x300.

- Show meta data: Show/hide meta data(author, date, comments, categories, tags) on post detail.

- Show author box: Show/hide author box on post detail.

- Show navigation post: Show/hide navigation to next post or previous post on the post detail.

- Show related post: Show/hide related post in the post detail.

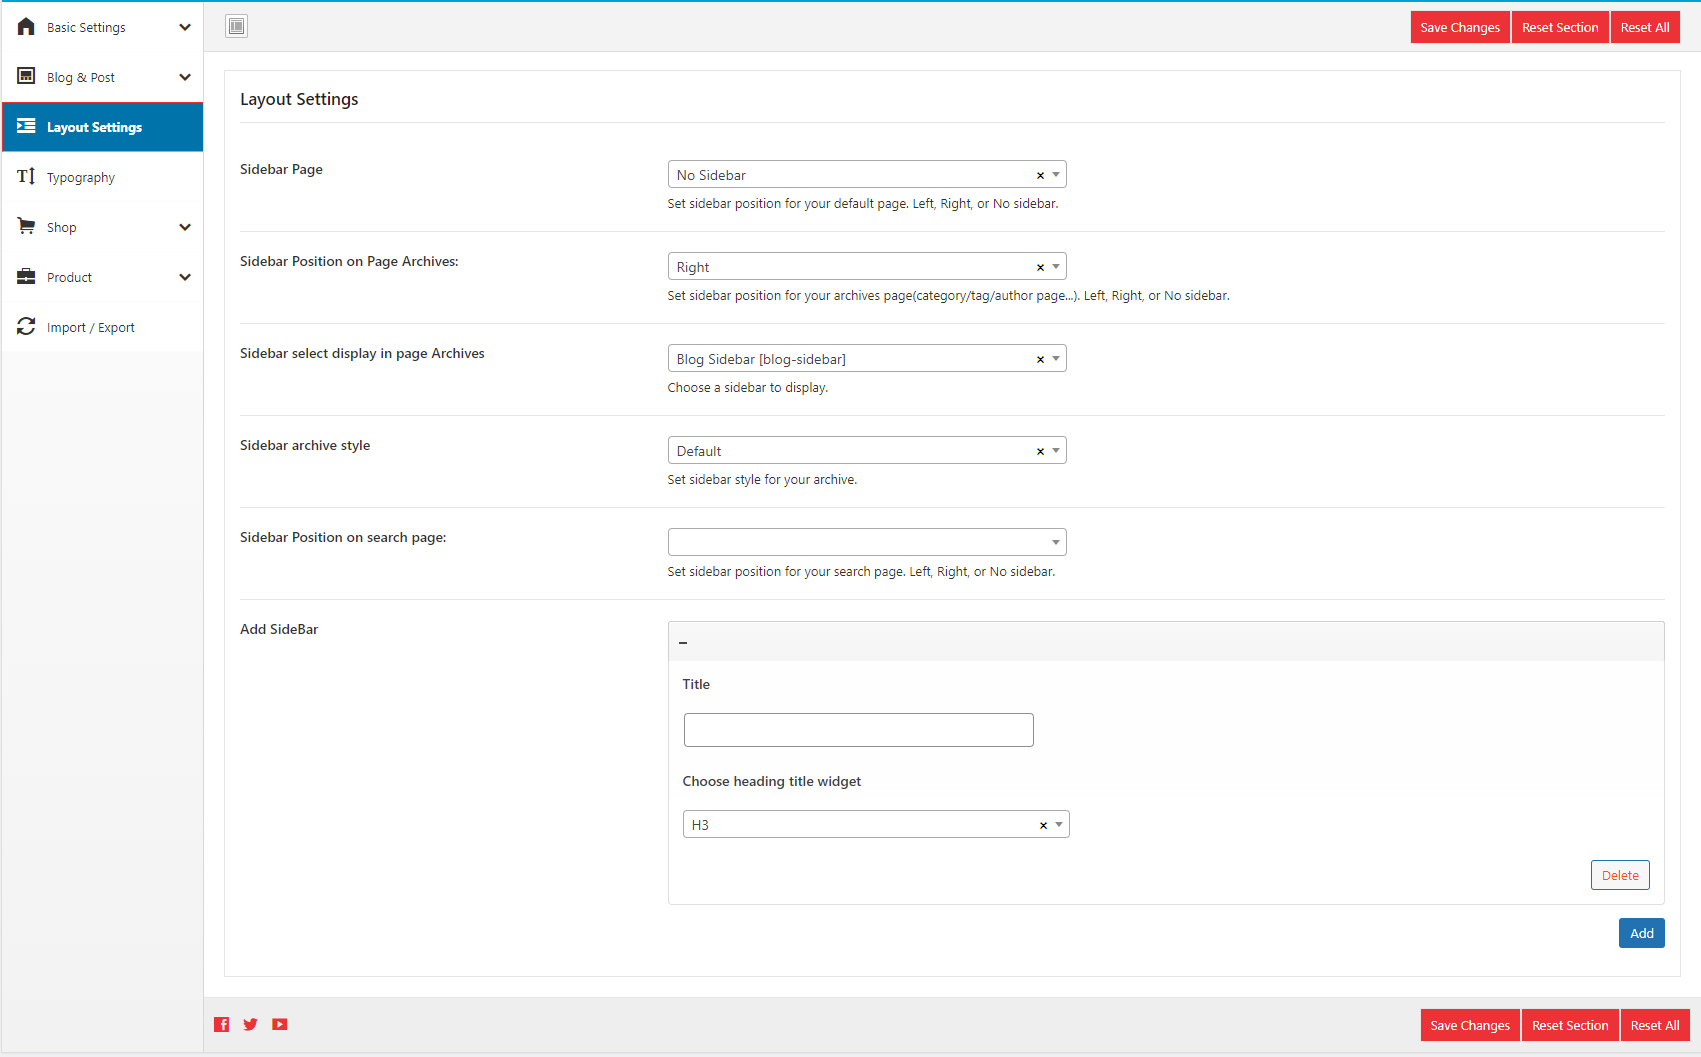
3. Layout Settings

- Sidebar Page: Set sidebar position for your default page. Left, Right, or No sidebar.

- Sidebar Position on Page Archives: Set sidebar position for your archives page(category/tag/author page...). Left, Right, or No sidebar.

- Sidebar select display in page Archives:: Choose a sidebar to display.

- Sidebar archive style:: Set sidebar style for your archive.

- Sidebar Position on search page:: Set sidebar position for your search page. Left, Right, or No sidebar.

- Add SideBar: You can add more sidebar for your site.

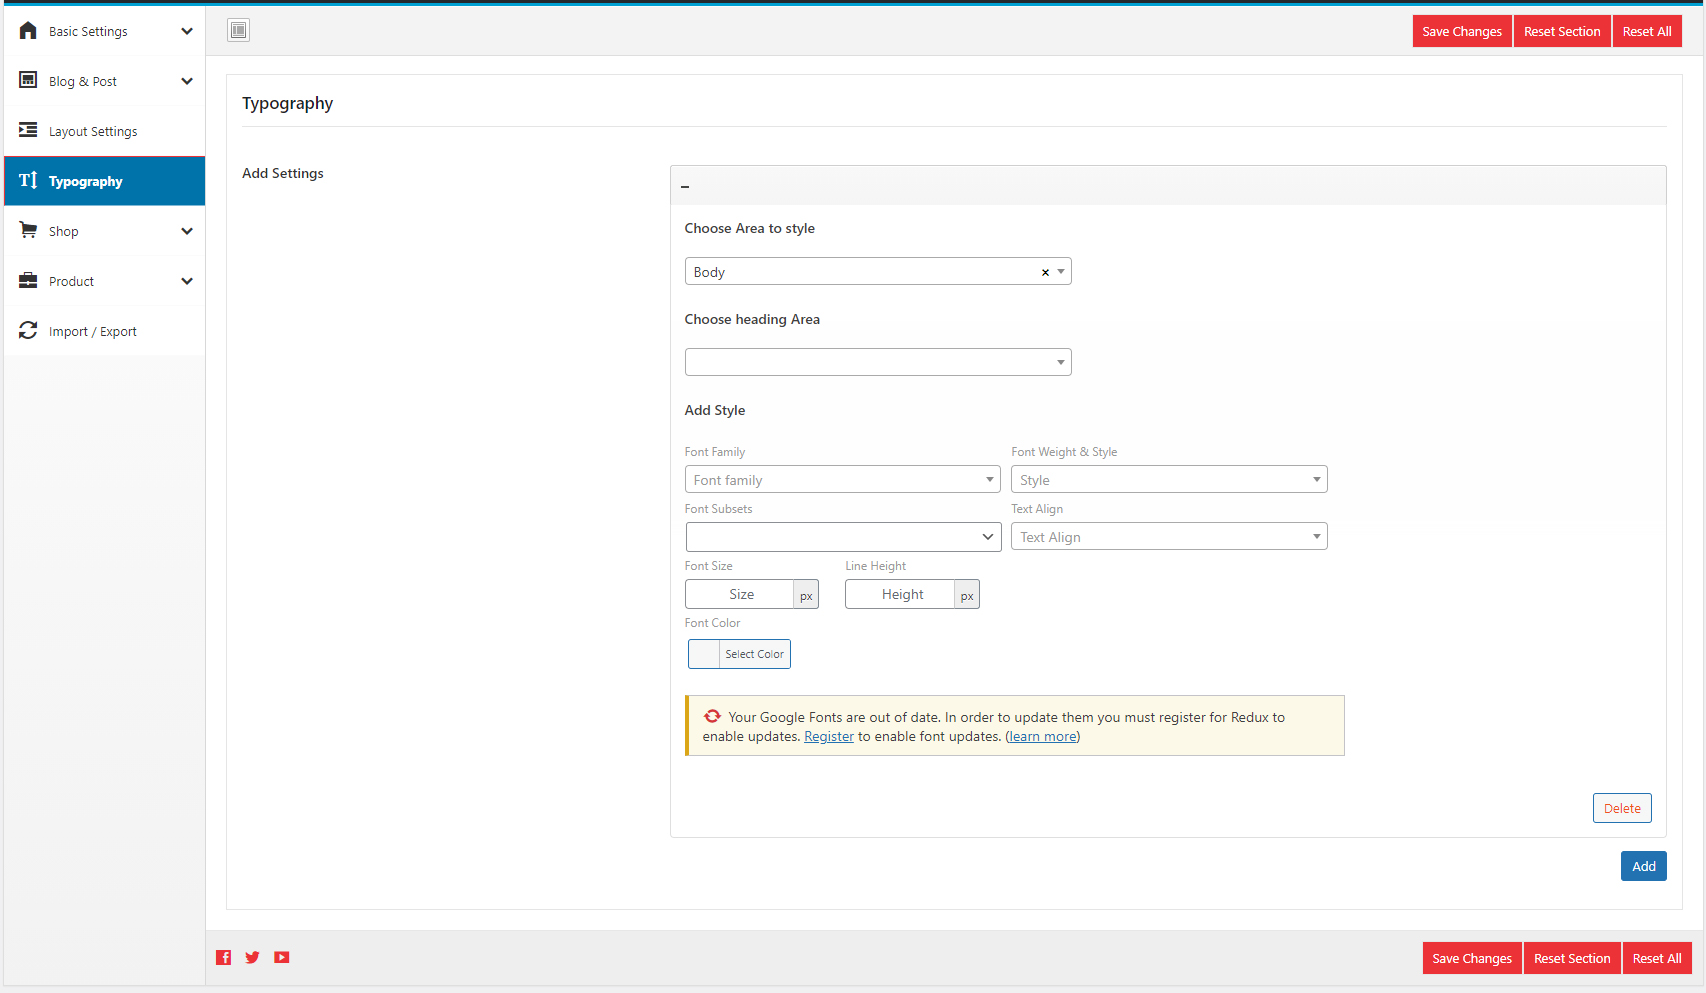
4. Typography

- Add Settings: You can add custom css for html tag in area defined in your site.

5. Shop Settings

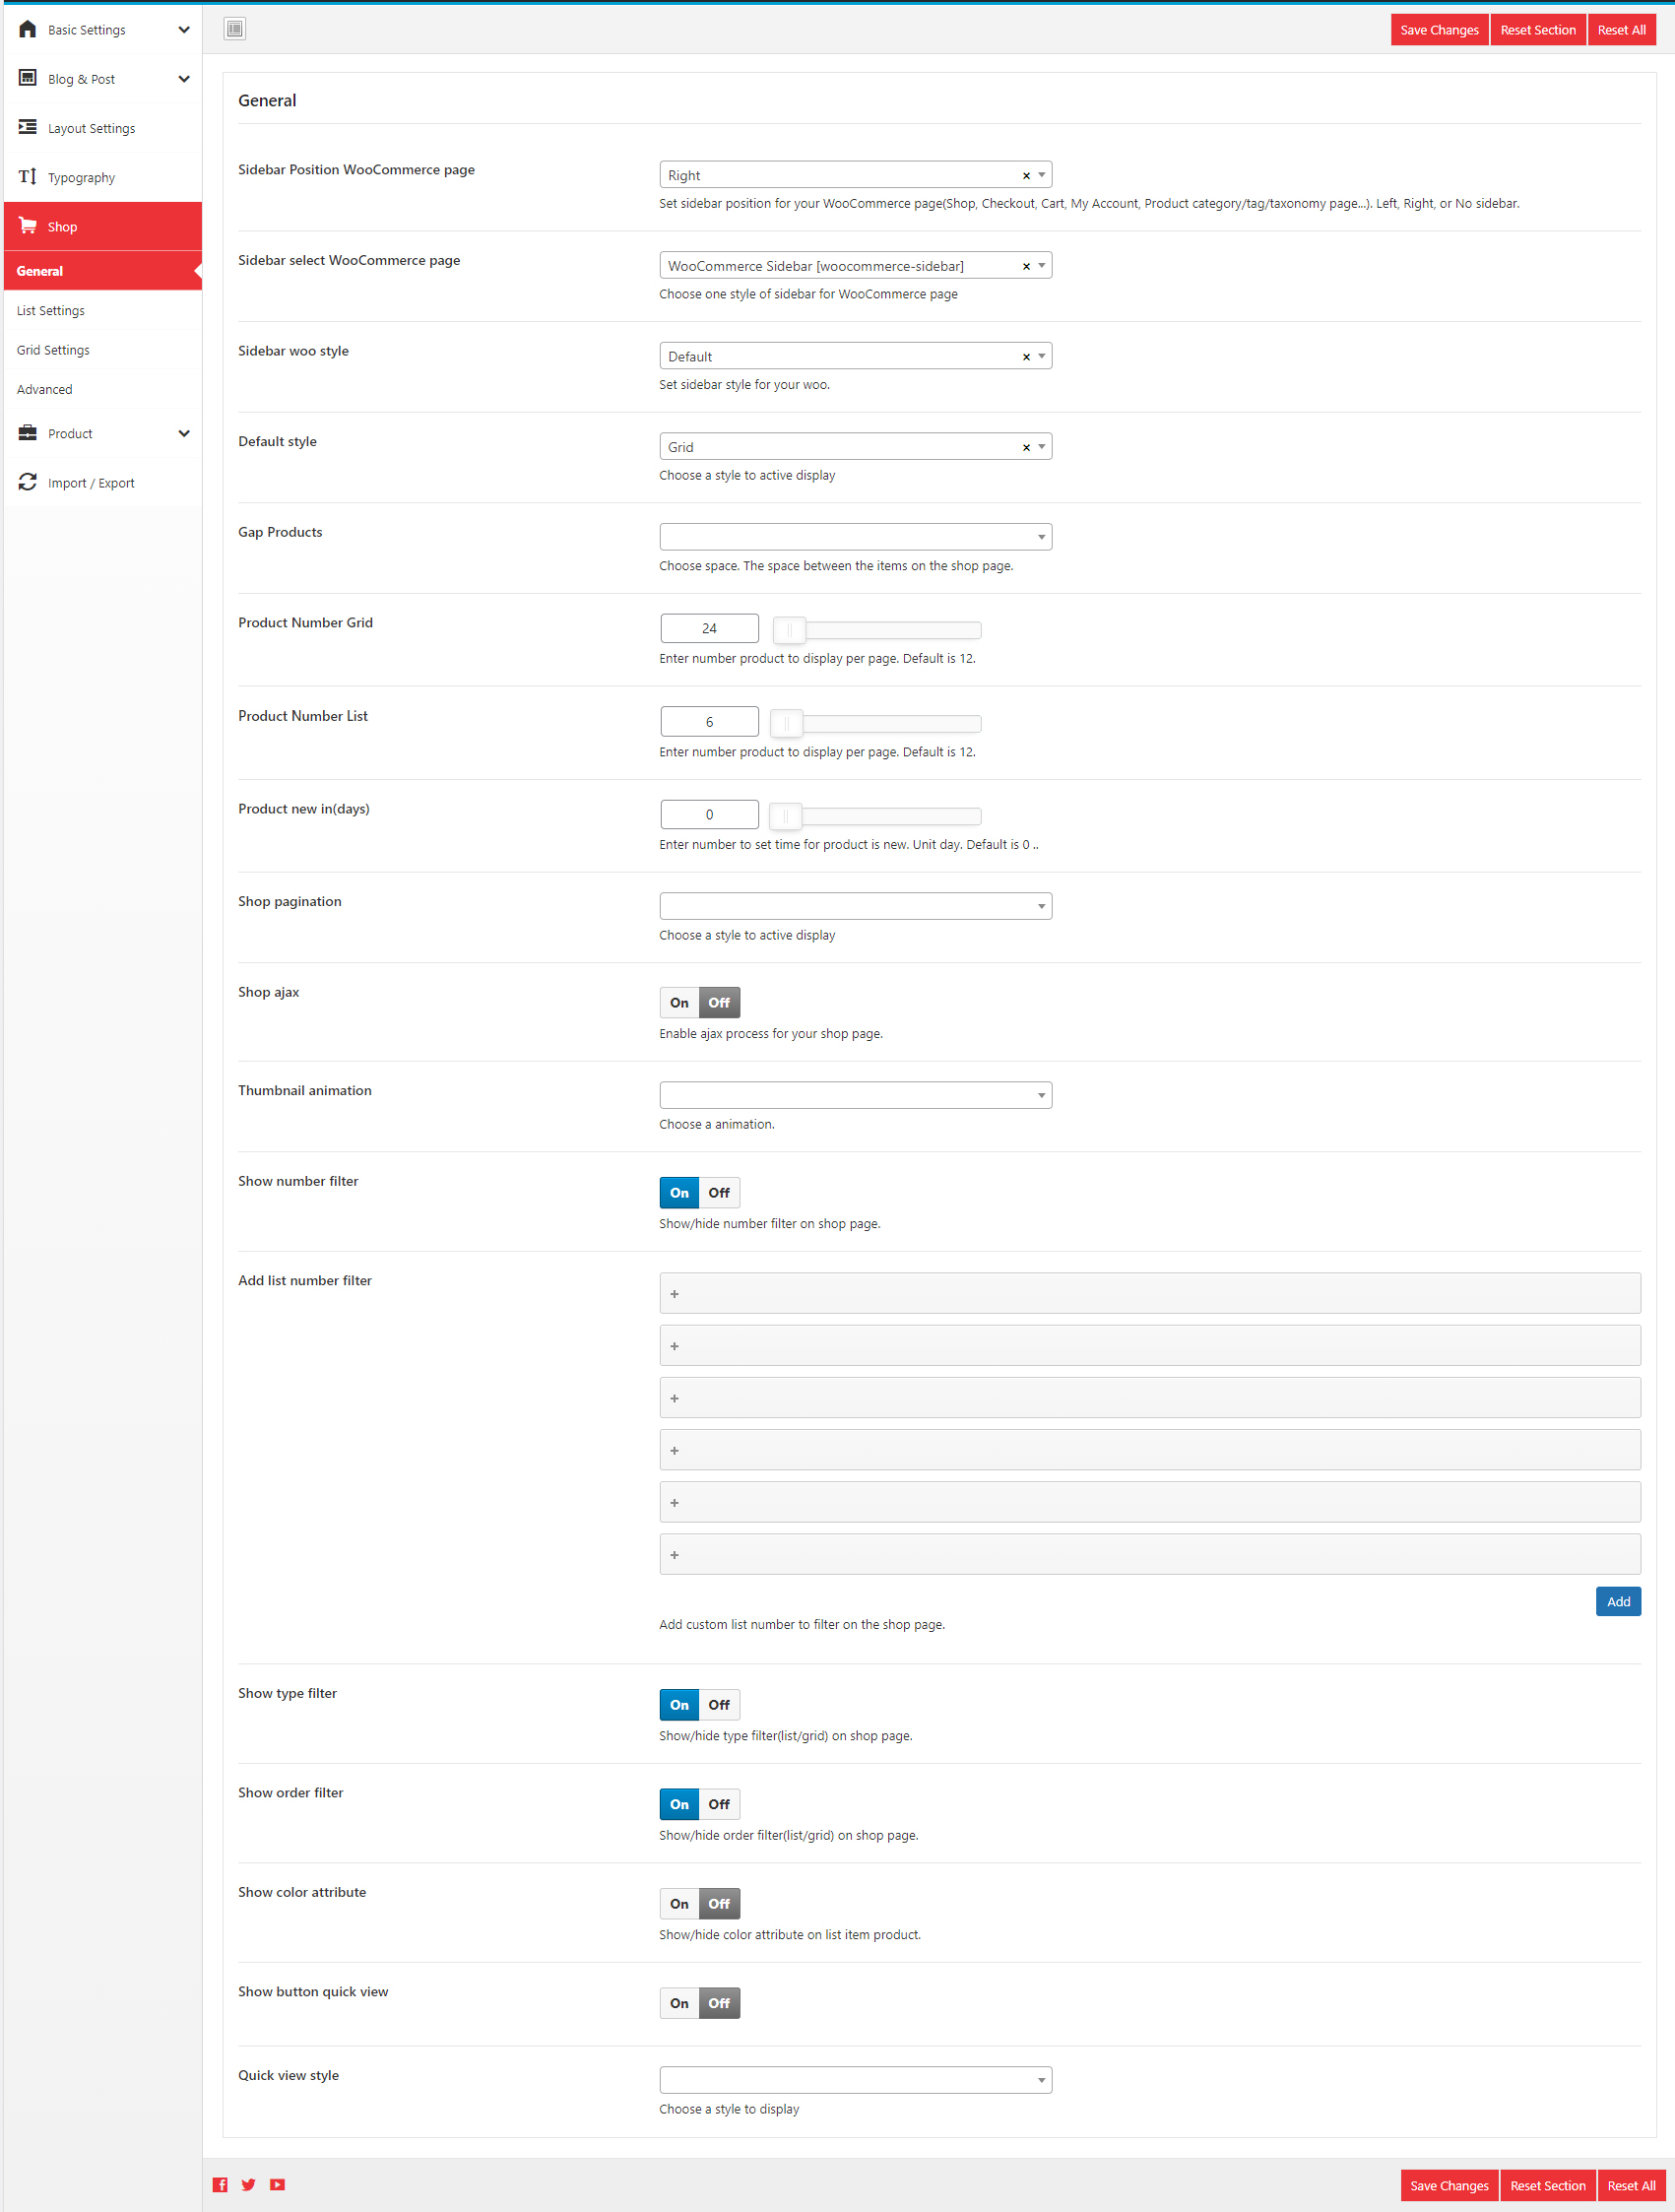
5.1 General

- Sidebar Position WooCommerce page: Set sidebar position for your woocommerce page(Shop, Checkout, Cart, My Account, Product category/tag/taxonomy page...). Left, Right, or No sidebar.

- Sidebar select WooCommerce page: Choose one style of sidebar for WooCommerce page.

- Sidebar woo style: Set sidebar style for your woo.

- Default style: Choose a style to active display.

- Gap Products: Choose space. The space between the items on the shop page.

- Product Number Grid: Enter number product to display per page. Default is 12.

- Product Number List: Enter number product to display per page. Default is 12.

- Product new in(days): Enter number to set time for product is new. Unit day. Default is 30.

- Shop pagination: Choose a style to active display(Default/Load more).

- Shop ajax: Enable ajax process for your shop page (ON/OFF).

- Thumbnail animation: Choose a animation for thumbnail.

- Show number filter: Show/hide number filter on shop page.

- Show type filter: Show/hide type filter(list/grid) on shop page.

- Show order filter: Show/hide order filter(list/grid) on shop page.

- Show color attribute: Show/hide color attribute on list item product.

- Show button quick view: Show/hide quick view on shop page.

- Quick view style: Choose a style to display

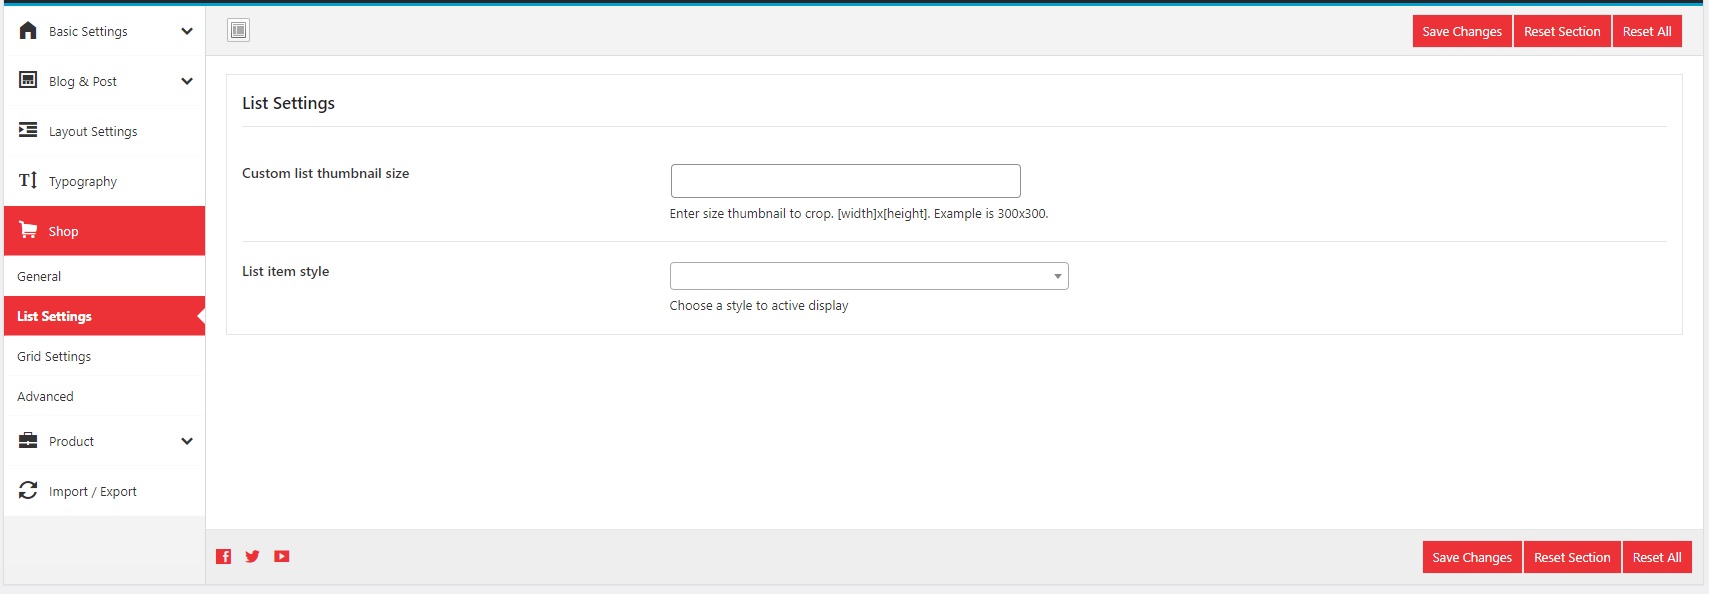
5.2 List Settings

- Custom list thumbnail size: Enter size thumbnail to crop. [width]x[height]. Example is 300x300.

- List item style: Choose a style to active display.

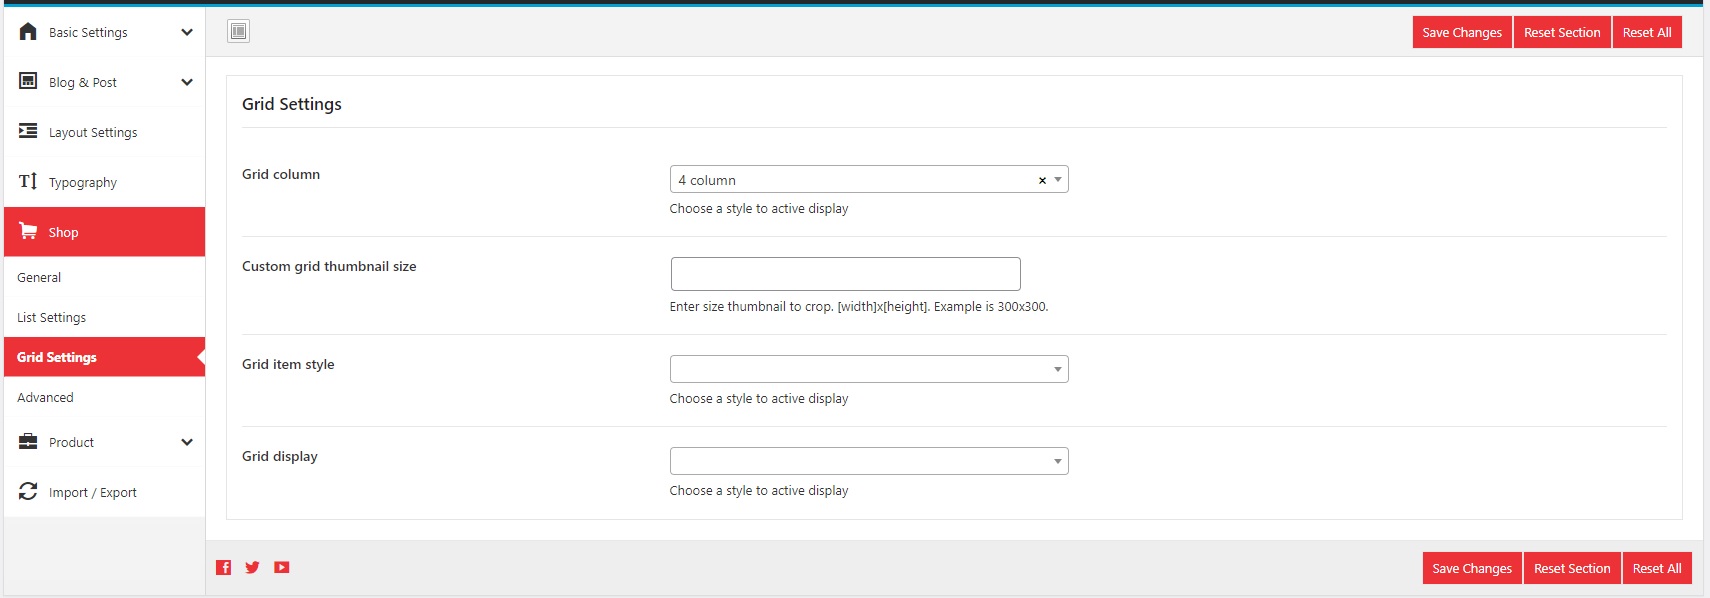
5.3 Grid Settings

- Grid column: Choose a style to active display

- Custom grid thumbnail size: Enter size thumbnail to crop. [width]x[height]. Example is 300x300.

- Grid item style: Choose grid item style to display.

- Grid display: Choose a style to active display

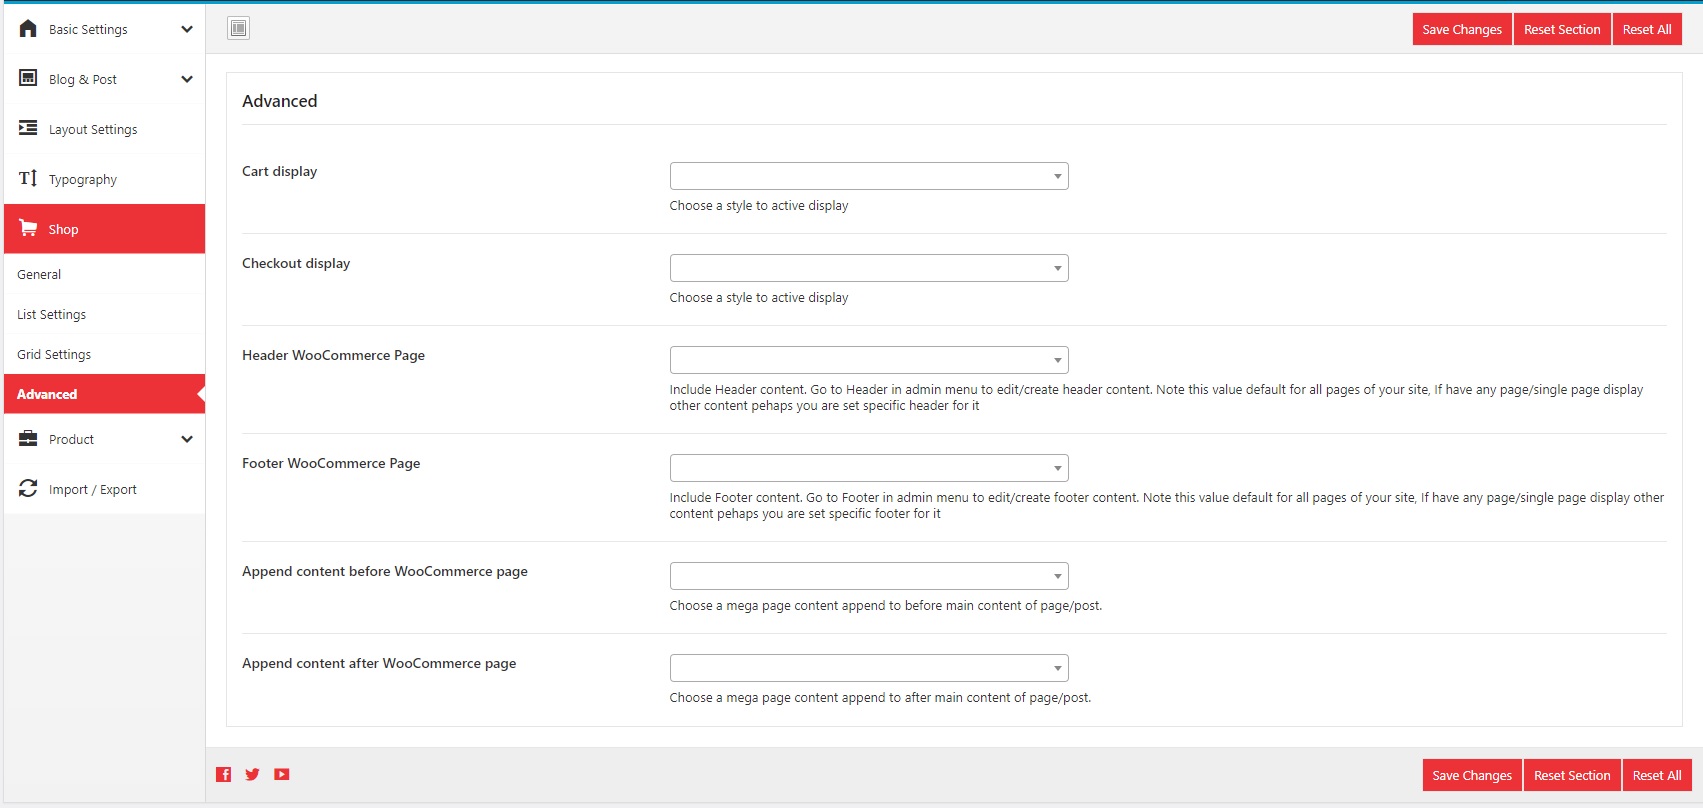
5.4 Advanced

- Cart display: Choose a style to active display.

- Checkout display: Choose a style to active display.

- Header Woocommerce Page: Include Header content. Go to Header in admin menu to edit/create header content. Note this value default for all pages of your site, If have any page/single page display other content pehaps you are set specific header for it

- Footer Woocommerce Page: Include Footer content. Go to Footer in admin menu to edit/create footer content. Note this value default for all pages of your site, If have any page/single page display other content pehaps you are set specific footer for it

- Append content before Woocommerce page: Choose a mega page content append to before main content of page/post.

- Append content after Woocommerce page: Choose a mega page content append to after main content of page/post.

6. Product Settings

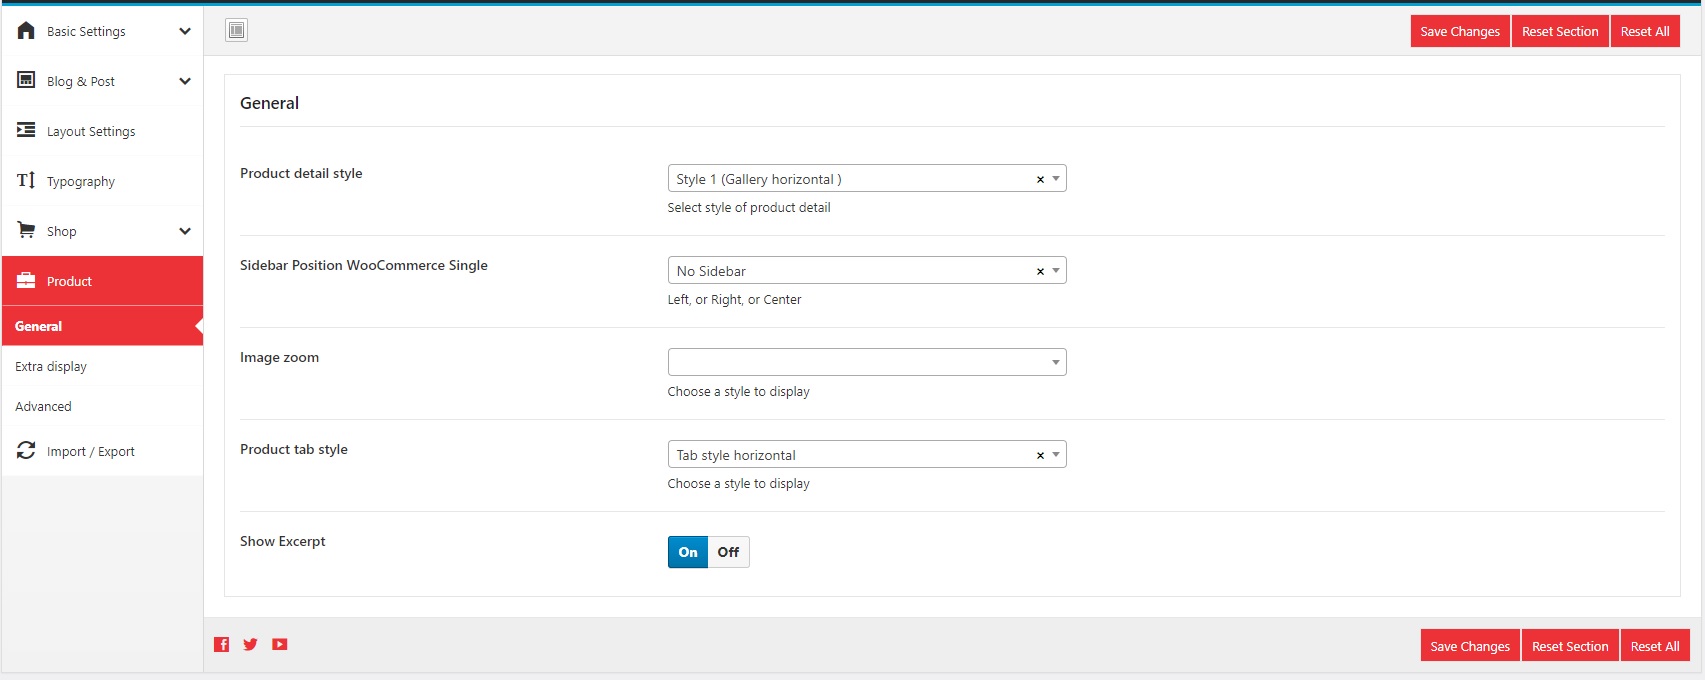
6.1 General

- Product detail style: Select style of product detail.

- Sidebar Position WooCommerce Single: Left, or Right, or Center.

- Sidebar select WooCommerce Single: Choose one style of sidebar for WooCommerce page.

- Image zoom: Choose a style to display.

- Product tab style: Choose a style to display.

- Show Excerpt: Show/hide excerpt in product detail page (ON/OFF).

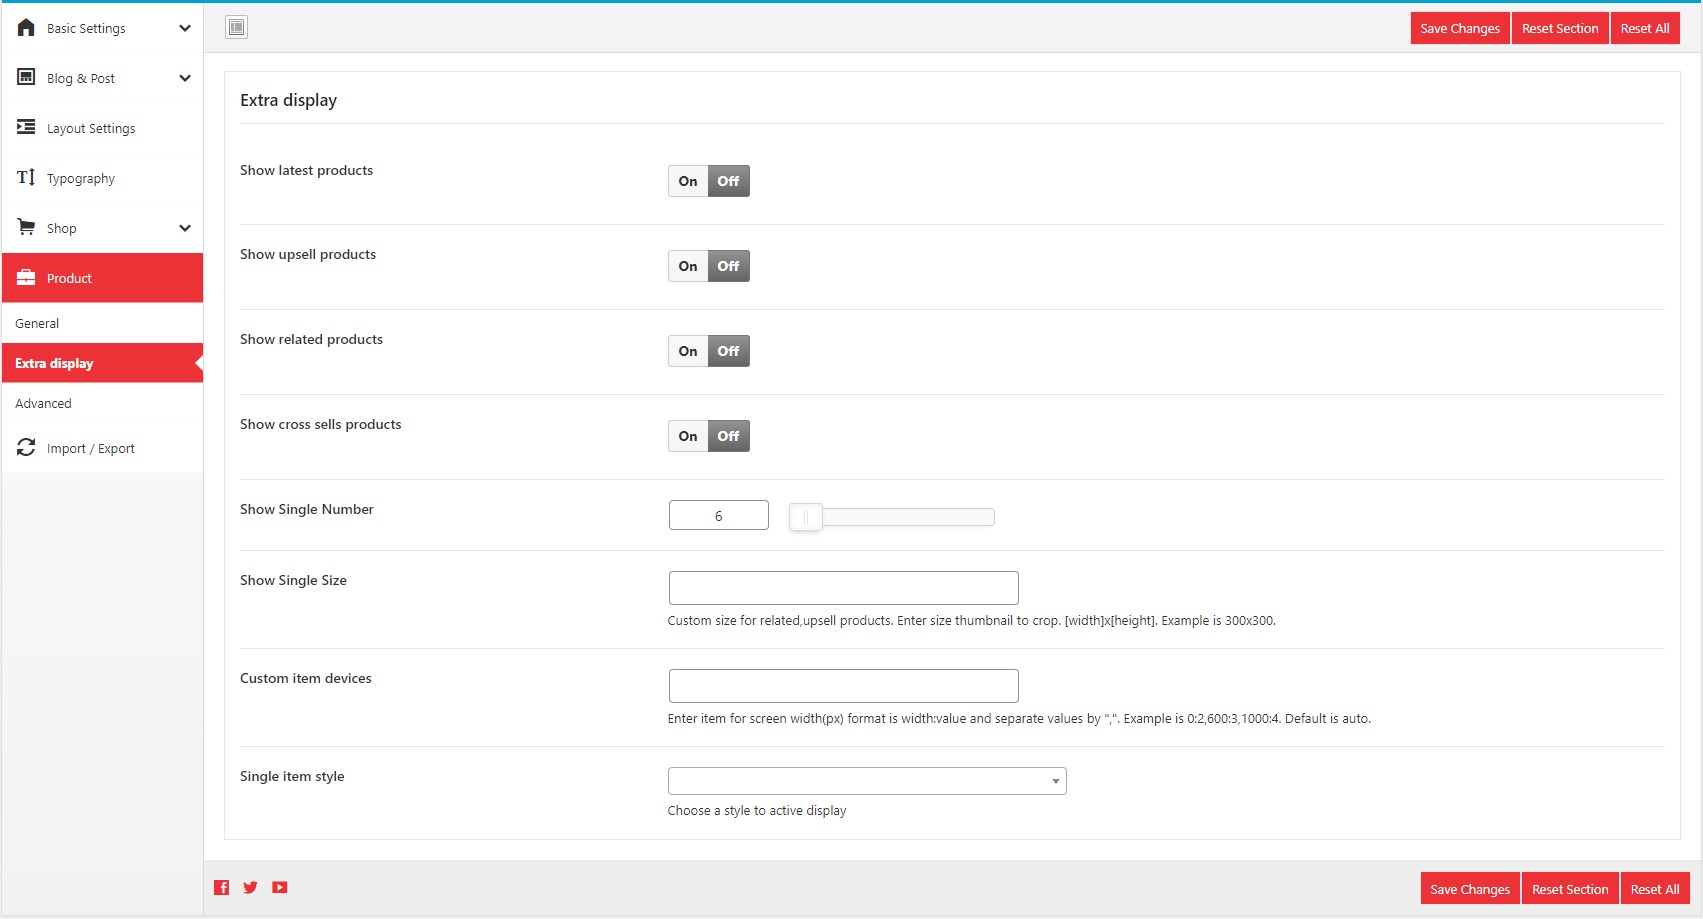
6.2 Extra display

- Show latest products: Show/hide latest products in product detail page (ON/OFF).

- Show upsell products: Show/hide upsell products in product detail page (ON/OFF).

- Show related products: Show/hide related products in product detail page (ON/OFF).

- Show cross sells products: Show/hide cross sells products in product detail page (ON/OFF).

- Show Single Number: Number of latest/upsell/related products

- Show Single Size: Custom size for related,upsell products. Enter size thumbnail to crop. [width]x[height]. Example is 300x300.

- Custom item devices: Enter item for screen width(px) format is width:value and separate values by ",". Example is 0:2,600:3,1000:4. Default is auto.

- Single item style: Choose a style to active display

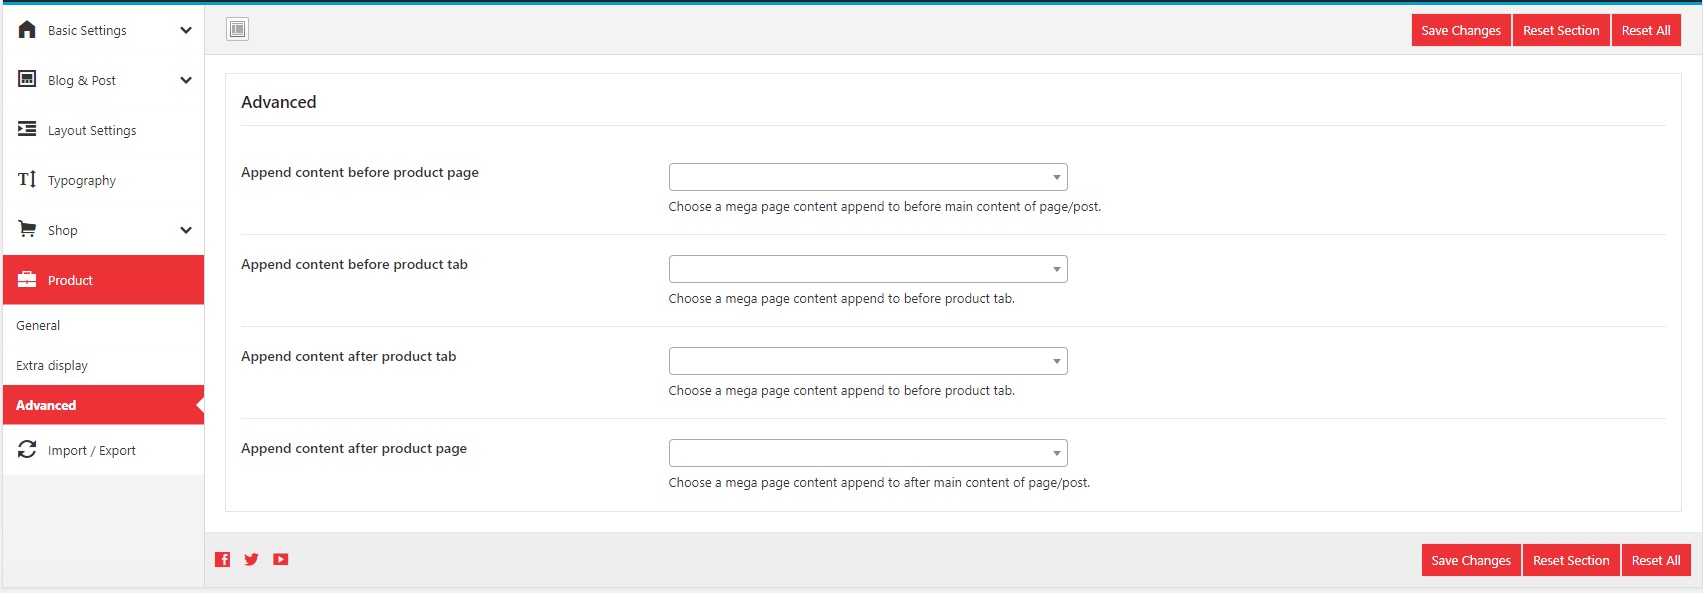
6.3 Advanced

- Append content before product page: Choose a mega page content append to before main content of product detail page.

- Append content before product tab: Choose a mega page content append to before product tab.

- Append content after product tab: Choose a mega page content append to before product tab.

- Append content after product page: Choose a mega page content append to after main content of product detail page.

Video tutorial


Elementor


1. Introduction

Elementor (formerly Visual Composer) is a unique plugin, it will help you manage your content at the WordPress sites and create stunning layouts in few minutes without coding. Nowadays many websites have complex grid layouts with columns, tabs, sliders and etc. In the Sobeau, to create that type of layouts you should be HTML guru or Shortcodes operator ninja.

But not anymore! Elementor will create and manage complex layouts combined with professionally designed plugins made easy!

2. Plugin Documentation

Elementor Documentation
Elementor (Learn more)
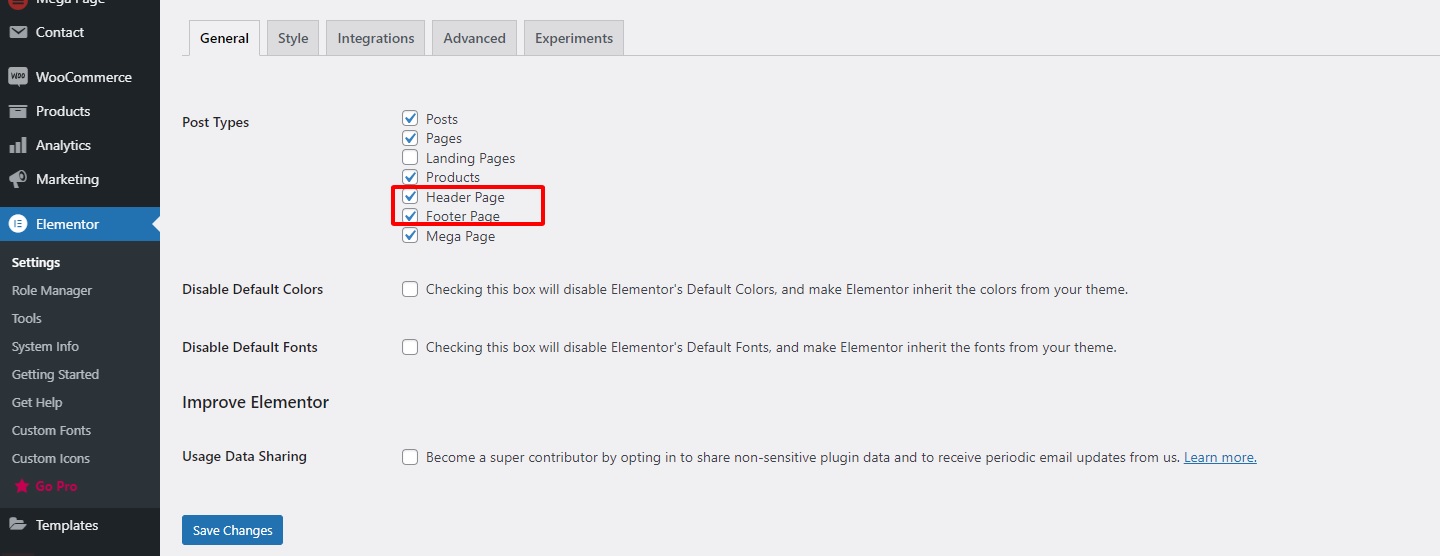
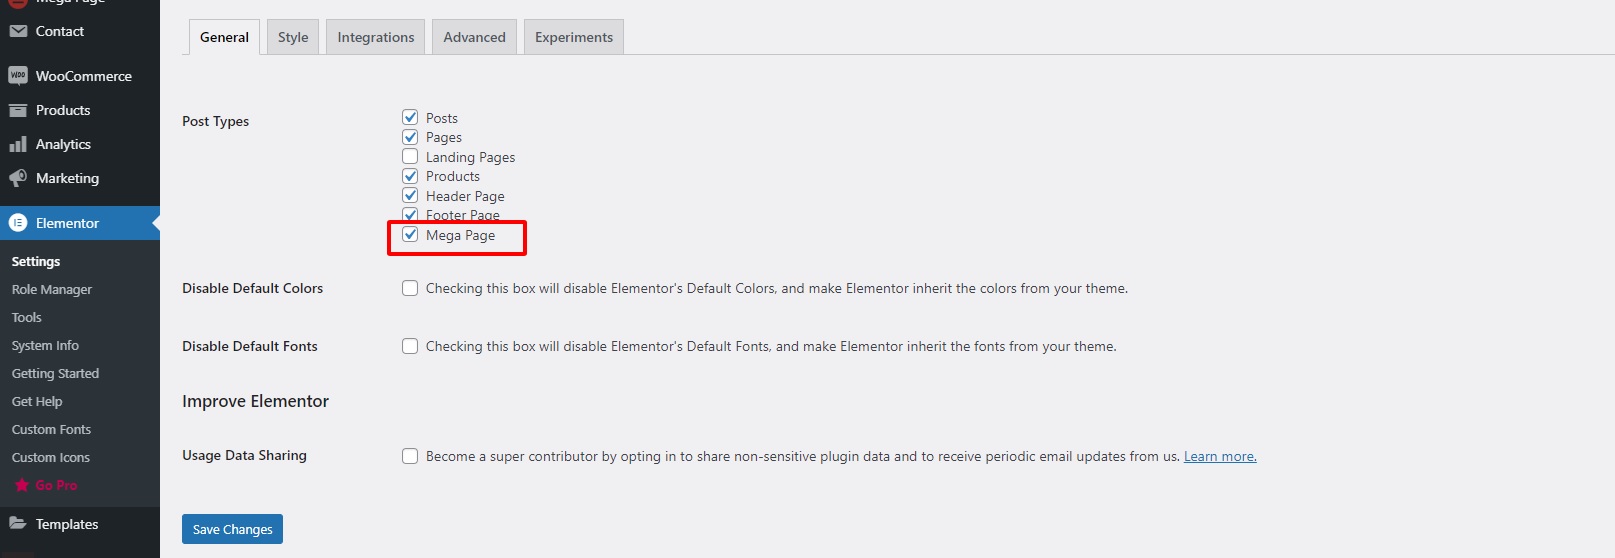
Enable page builder for custom post type

In WordPress Dashboard, You can go to Elementor -> Role Manager. Choose Post types is Custom and check post type that you want to enable page builder and Save Changes to finish

3. Update Elementor plugin

When updating the theme version, if there is a newer update for elementor you will see the update notice line appear. You can see plugin package (js_composer.zip) in folder theme -> plugins folder

You can update elementor following these steps:

Step 1. Click to Begin updating plugin.

Step 2. Click to Update

Update Successful

4. Activate plugin license

elementor was purchased by us for an extended license. As a result, all our buyers can use elementor without having to purchase additional personal licenses. The auto-update Activate plugin only applies to the templatemonster account that directly purchases the elementor license. But you can still update the latest version of Elementor through the installation message when updating our theme.

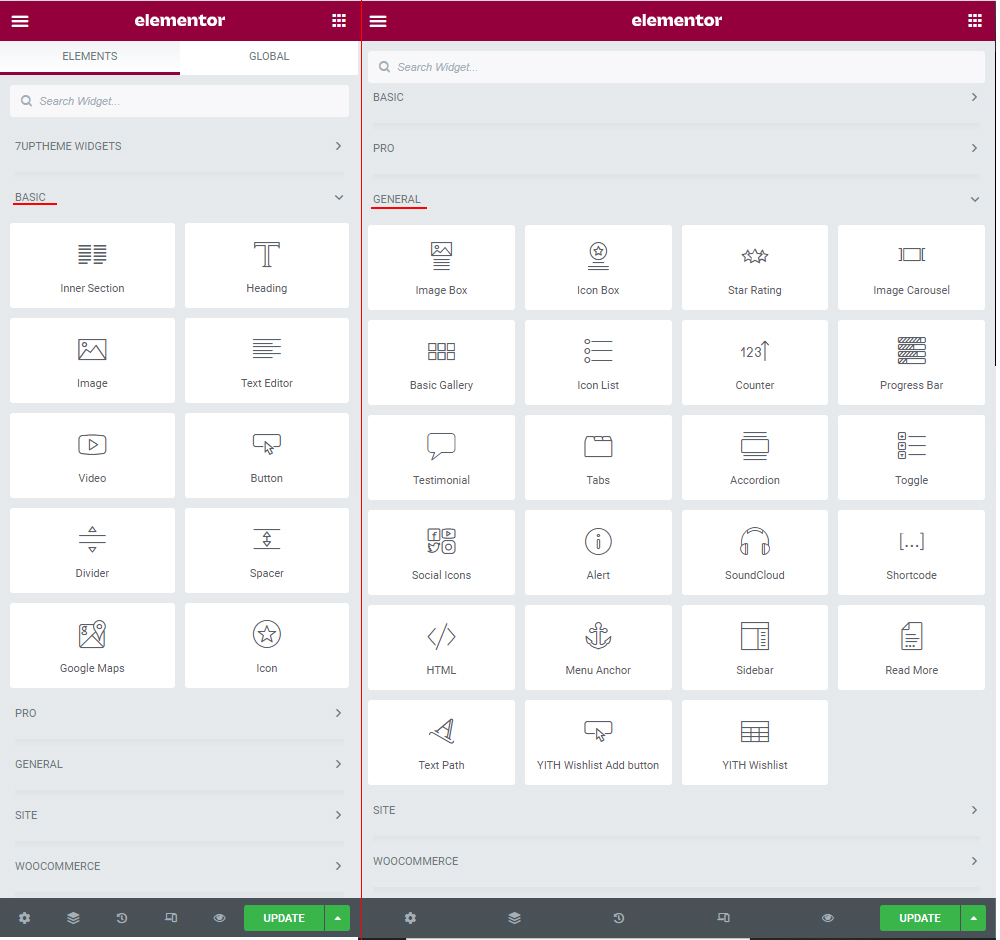
5. Widget elementor

Use the widget utilities provided by the plugin elementor

Overview of Elementor

Setting selector

7up Content


2. Mega Menu

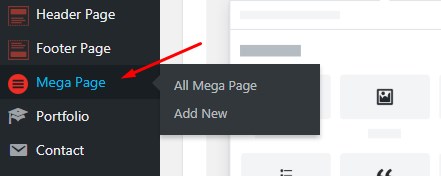
The First, please sure Mega Page editing with page builder is active

In WordPress Dashboard, You can go to Mega Page to edit/create content of mega menu

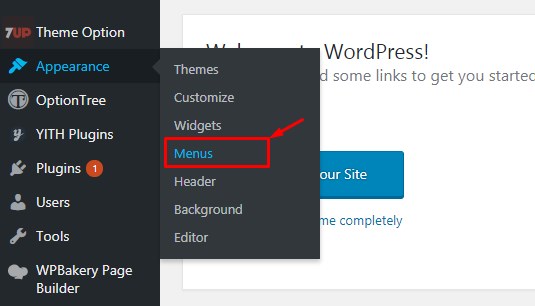
After you have a Mega Page, the next step is to go to the Menus to configure the display for a mega item.

Step 1. To Dashboard, you can go to Appearance -> Menus

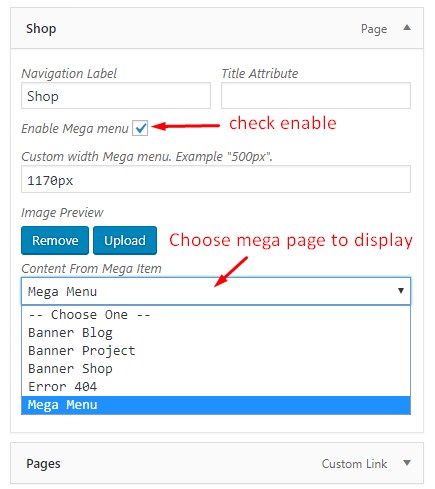
Step 2. Select menu item to display Mega Menu

1. Check Enable Mega Menu

2. Select the Mega Menu to display

3. Save changes to apply

Step 3. This is the front end display interface

Video tutorial


3. Elementor 7uptheme (Shortcodes)

List 7up's elementor.
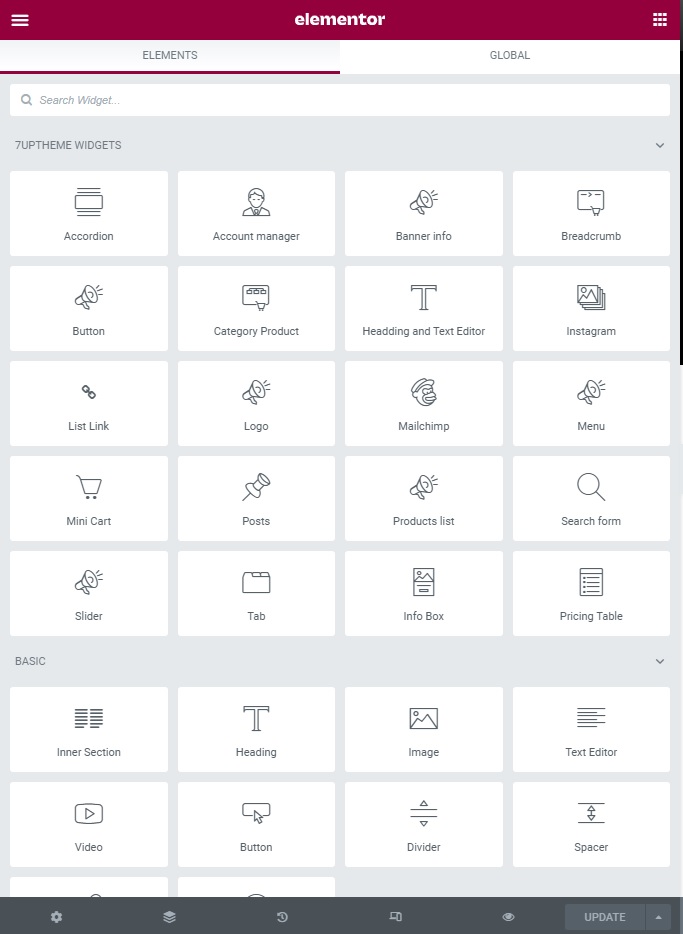
Below is the interface of each element
3.1. Account Manager

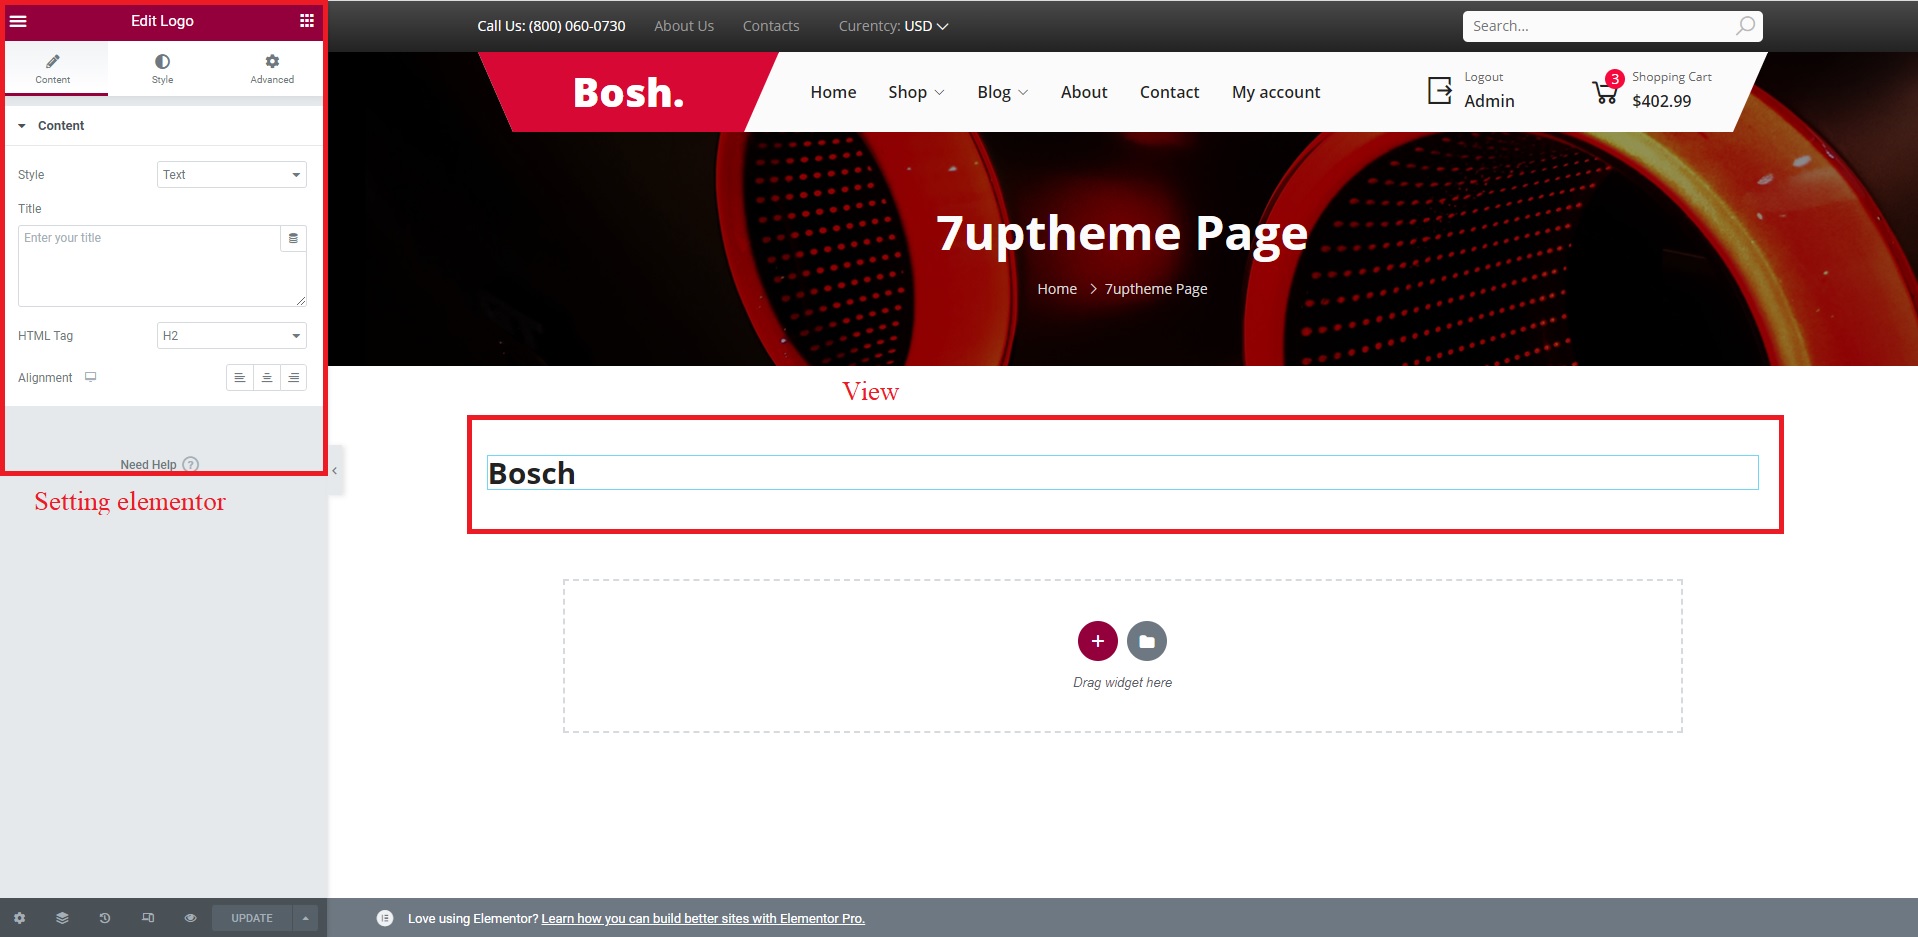
Feature: Used to display the list of paths that users logged in to are allowed to access. Displayed as a dropdown.

Edit interface

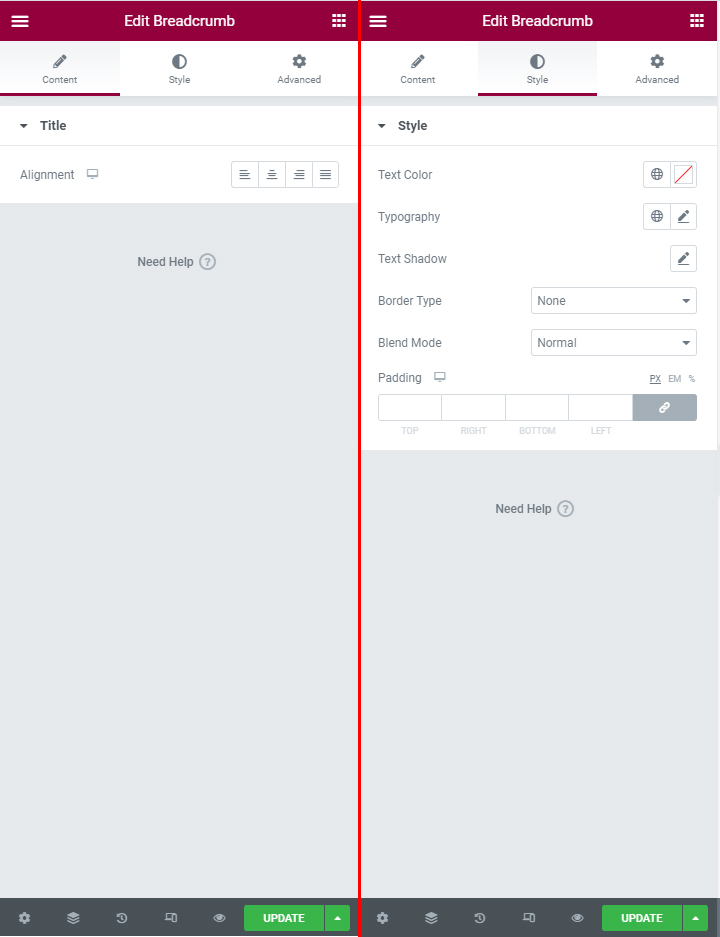
3.2. Breadcrumb

Feature: Used to display breadcrumb any where in page builder.

Edit interface

Front-end views

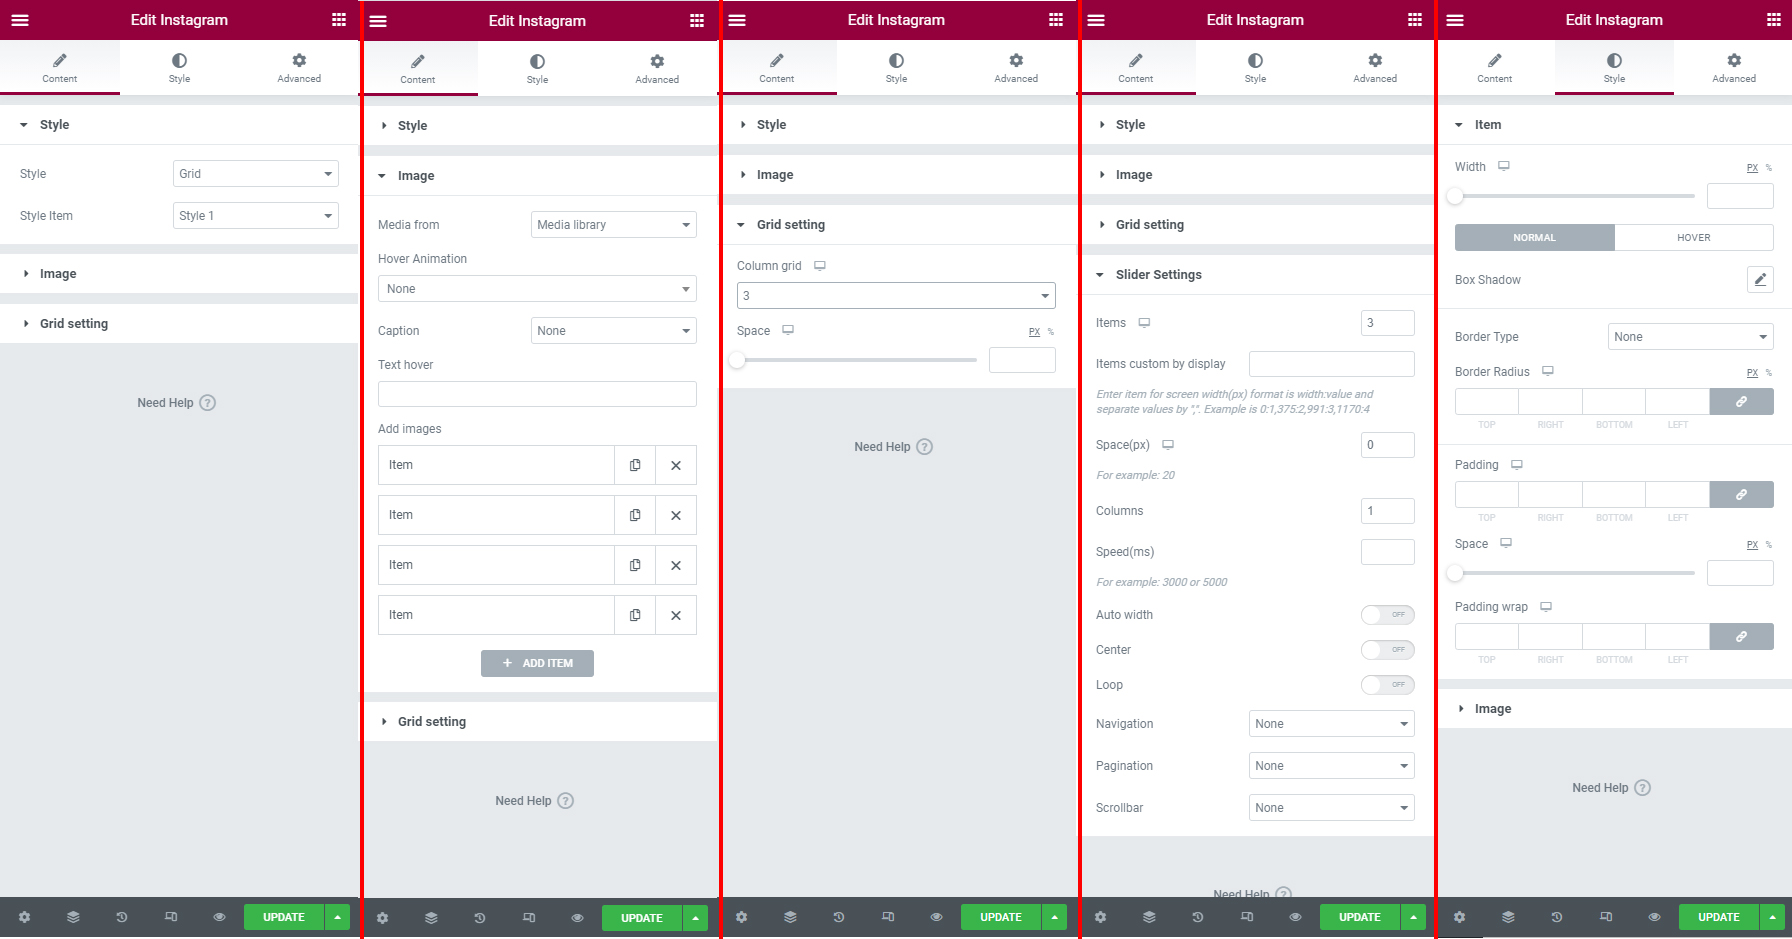
3.4. Instagram

Feature: Used to display images from your instagram.

Edit interface

Front-end views

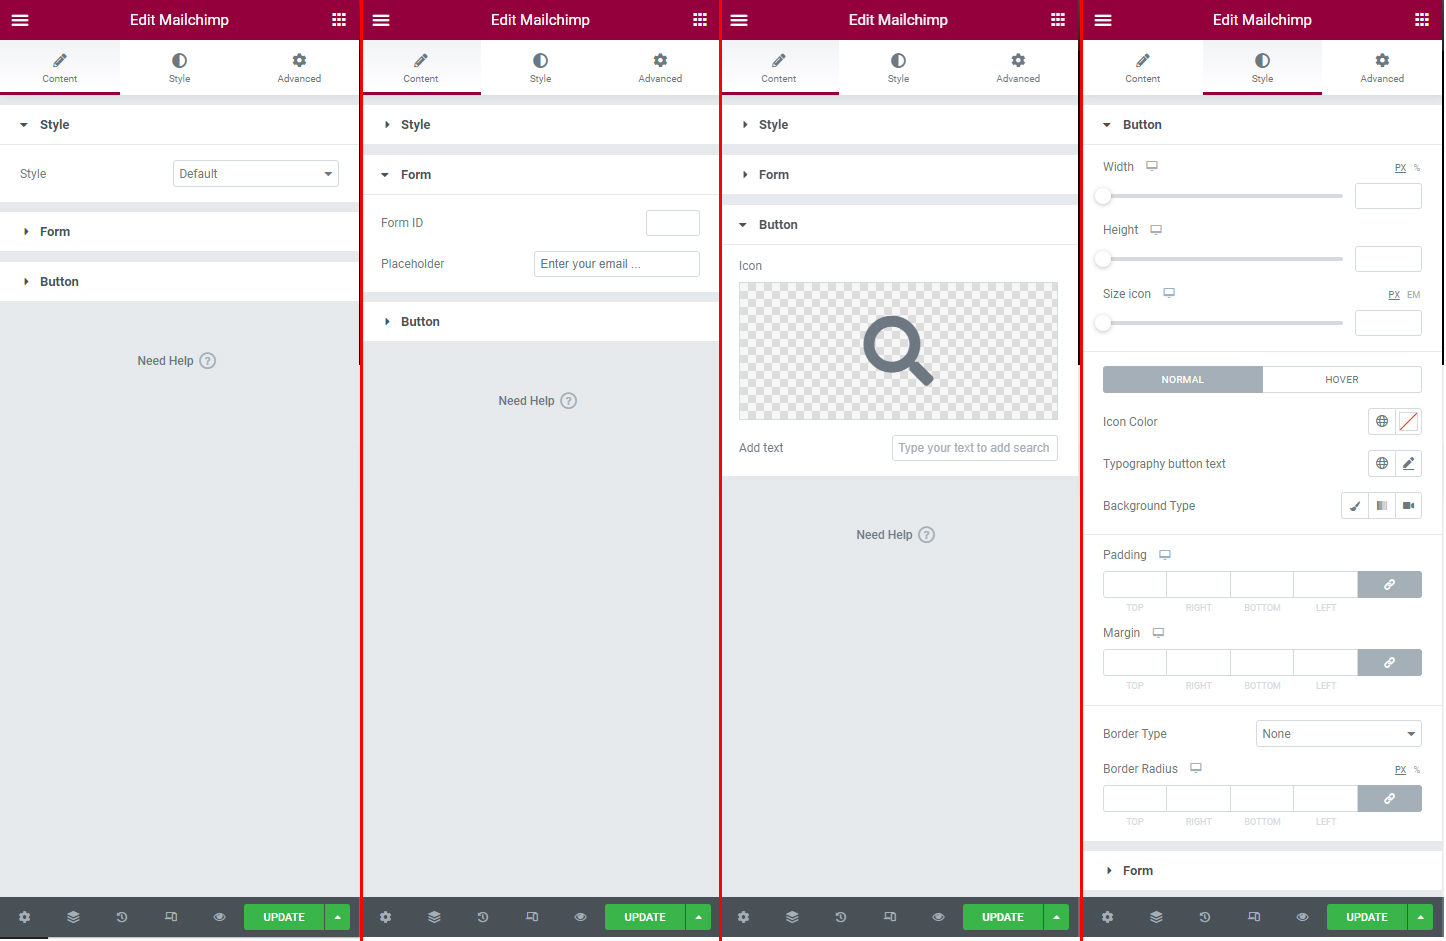
3.6. Mailchimp

Feature: Used to display mailchimp form with MailChimp for WP plugin.

Edit interface

Front-end views

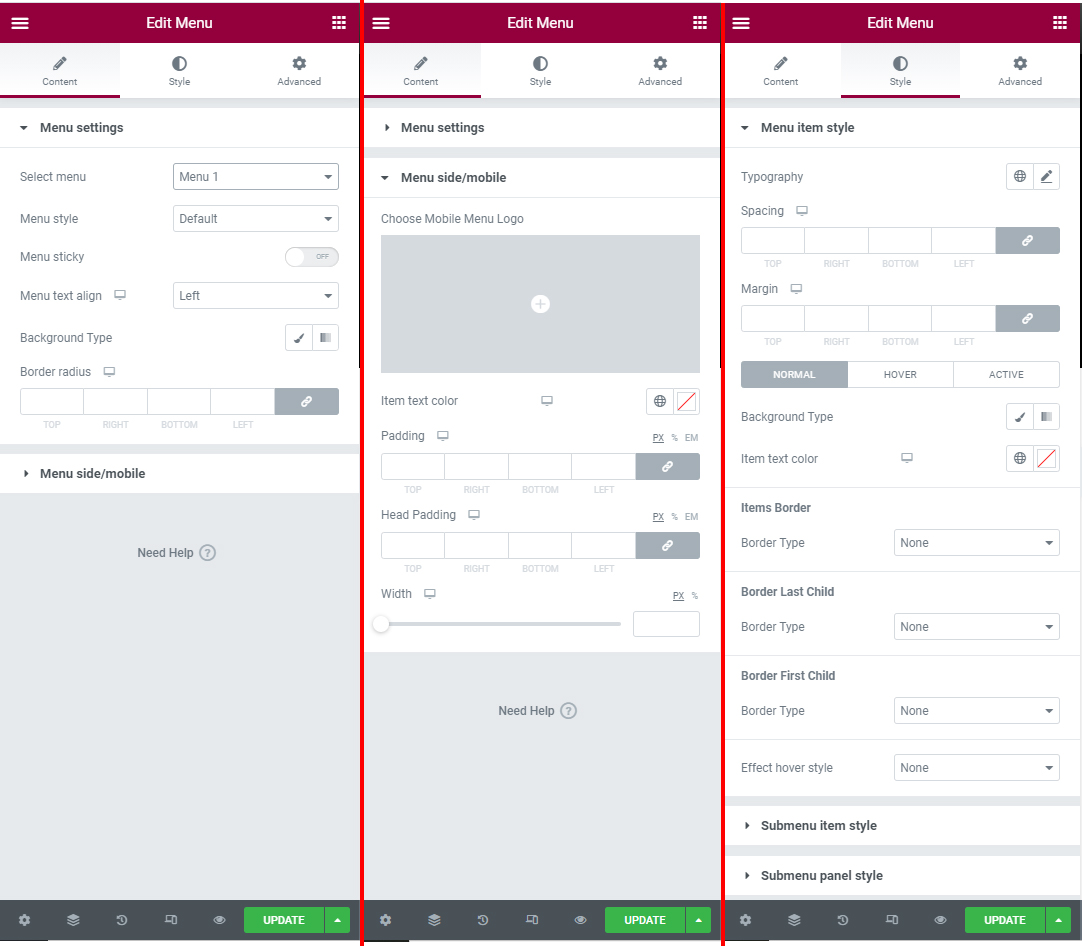
3.7. Menu

Feature: Used to display menu in header or any where in page builder.

Edit interface

Front-end views

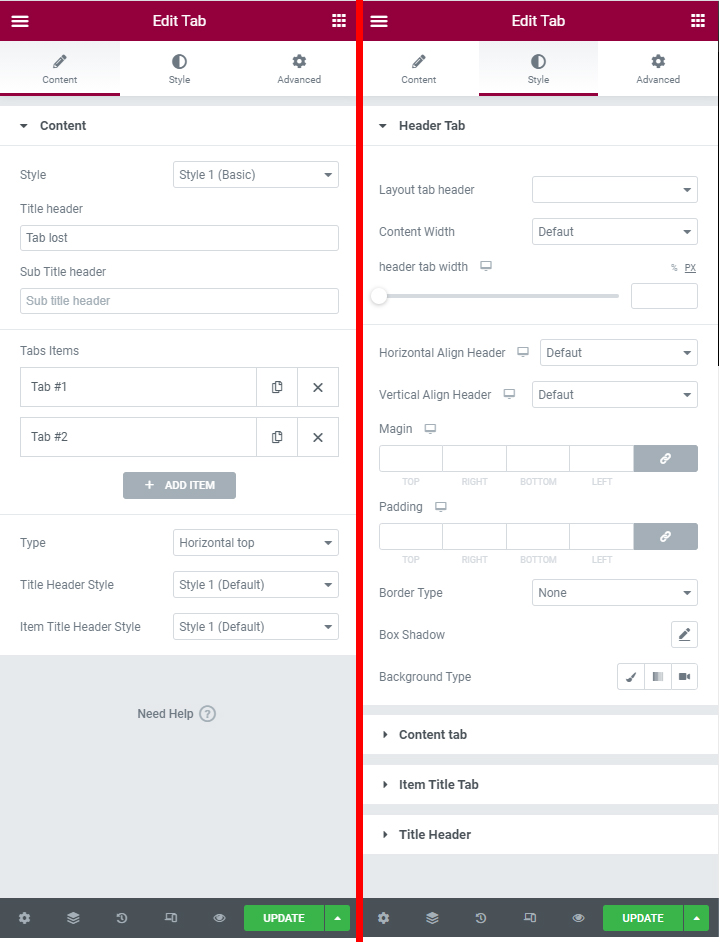
3.8. Tabs

Feature: Used to display tab with 7uptheme style.

Edit interface

Front-end views

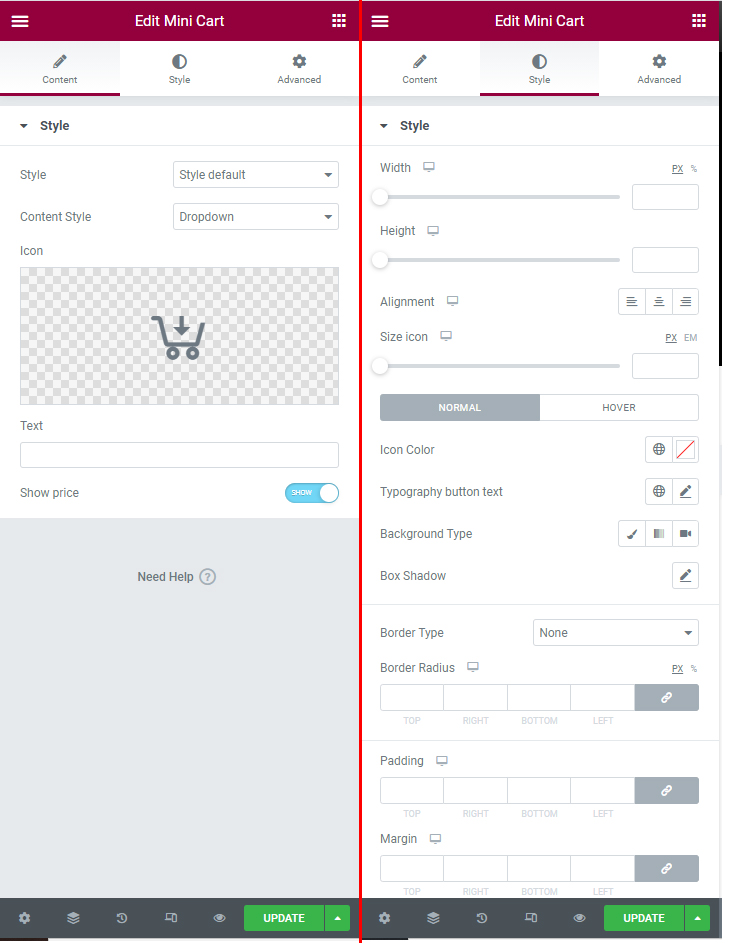
3.9. Mini Cart

Feature: Used to display mini cart any where in your page builder.

Edit interface

Front-end views

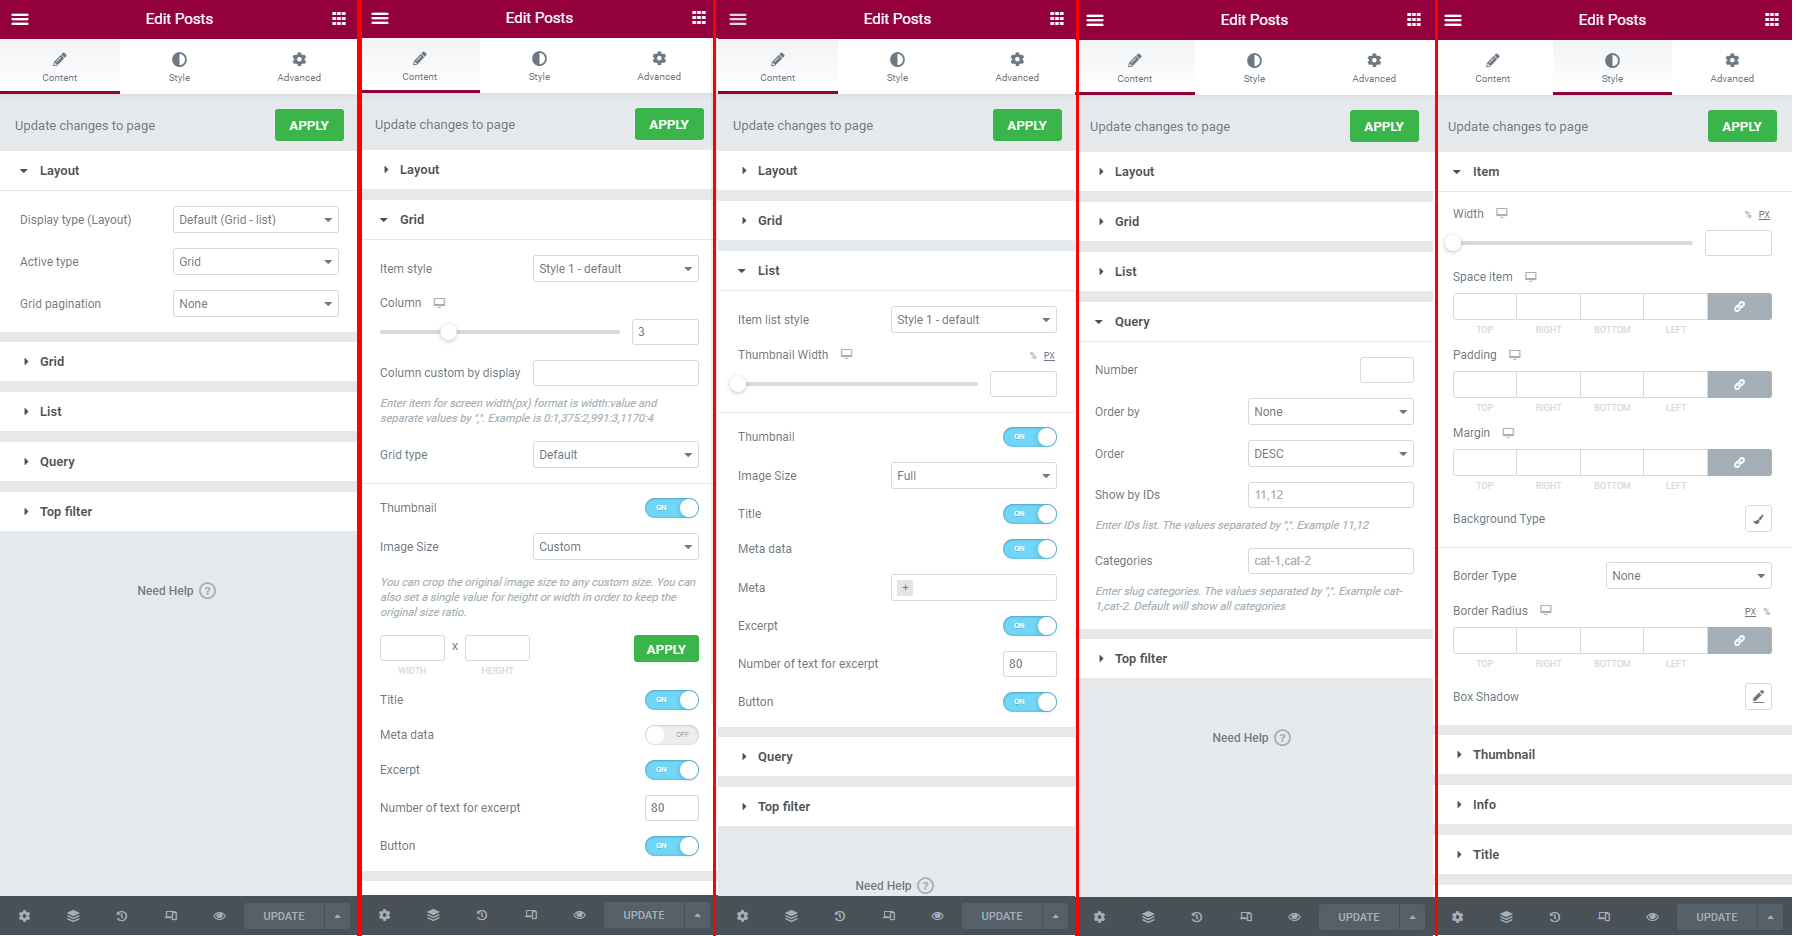
3.10. Posts

Feature: Used to display one more posts with many styles defined (grid, slider). Allows customization of column number, item slider, row number, animation thumbnail, pagination, loadmore, masonry ....

Edit interface

Front-end views

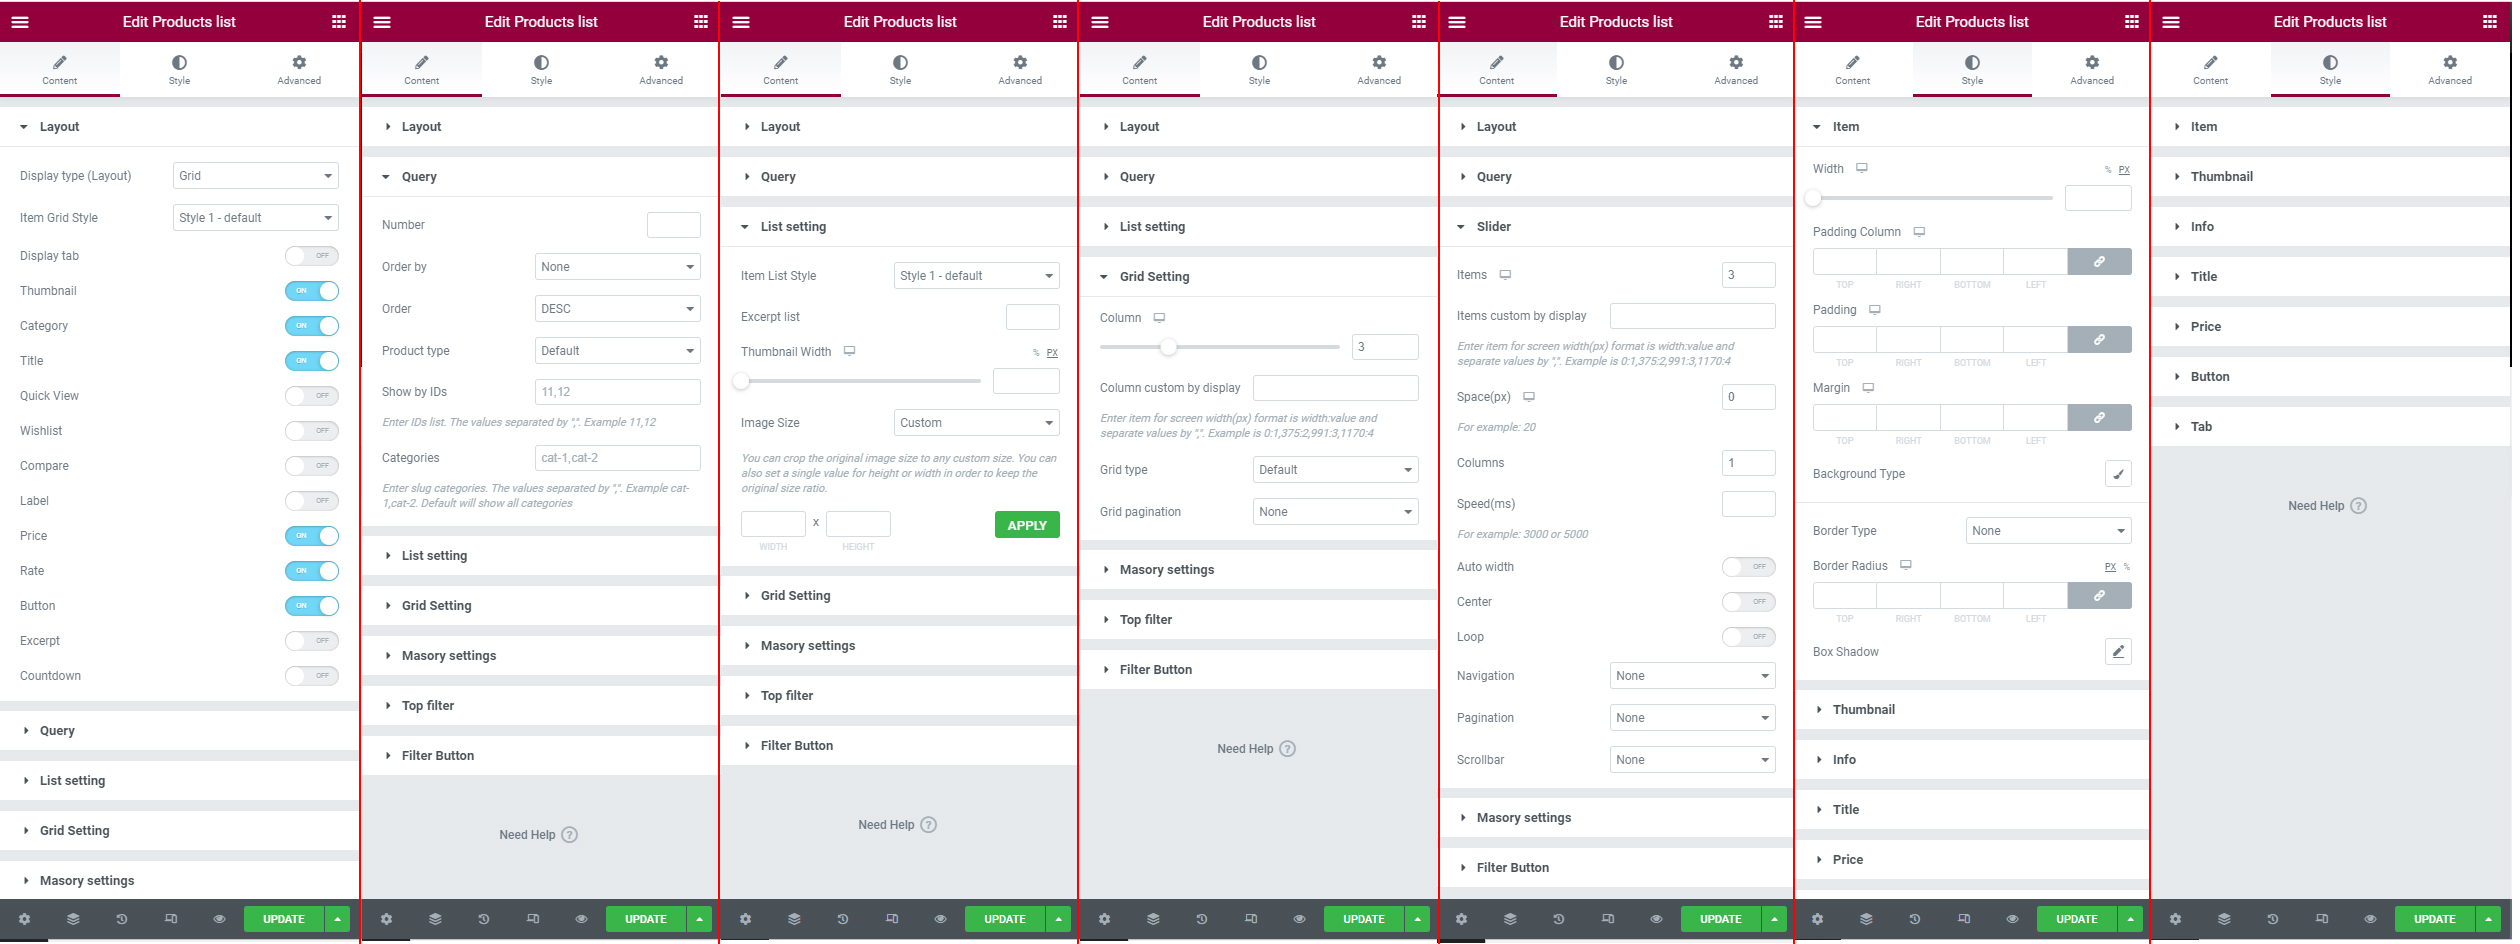
3.11. Products

Feature: Used to display one more product with many styles defined (grid, slider). Allows customization of column number, item slider, row number, animation thumbnail, pagination, loadmore, masonry ....

Edit interface

Front-end views

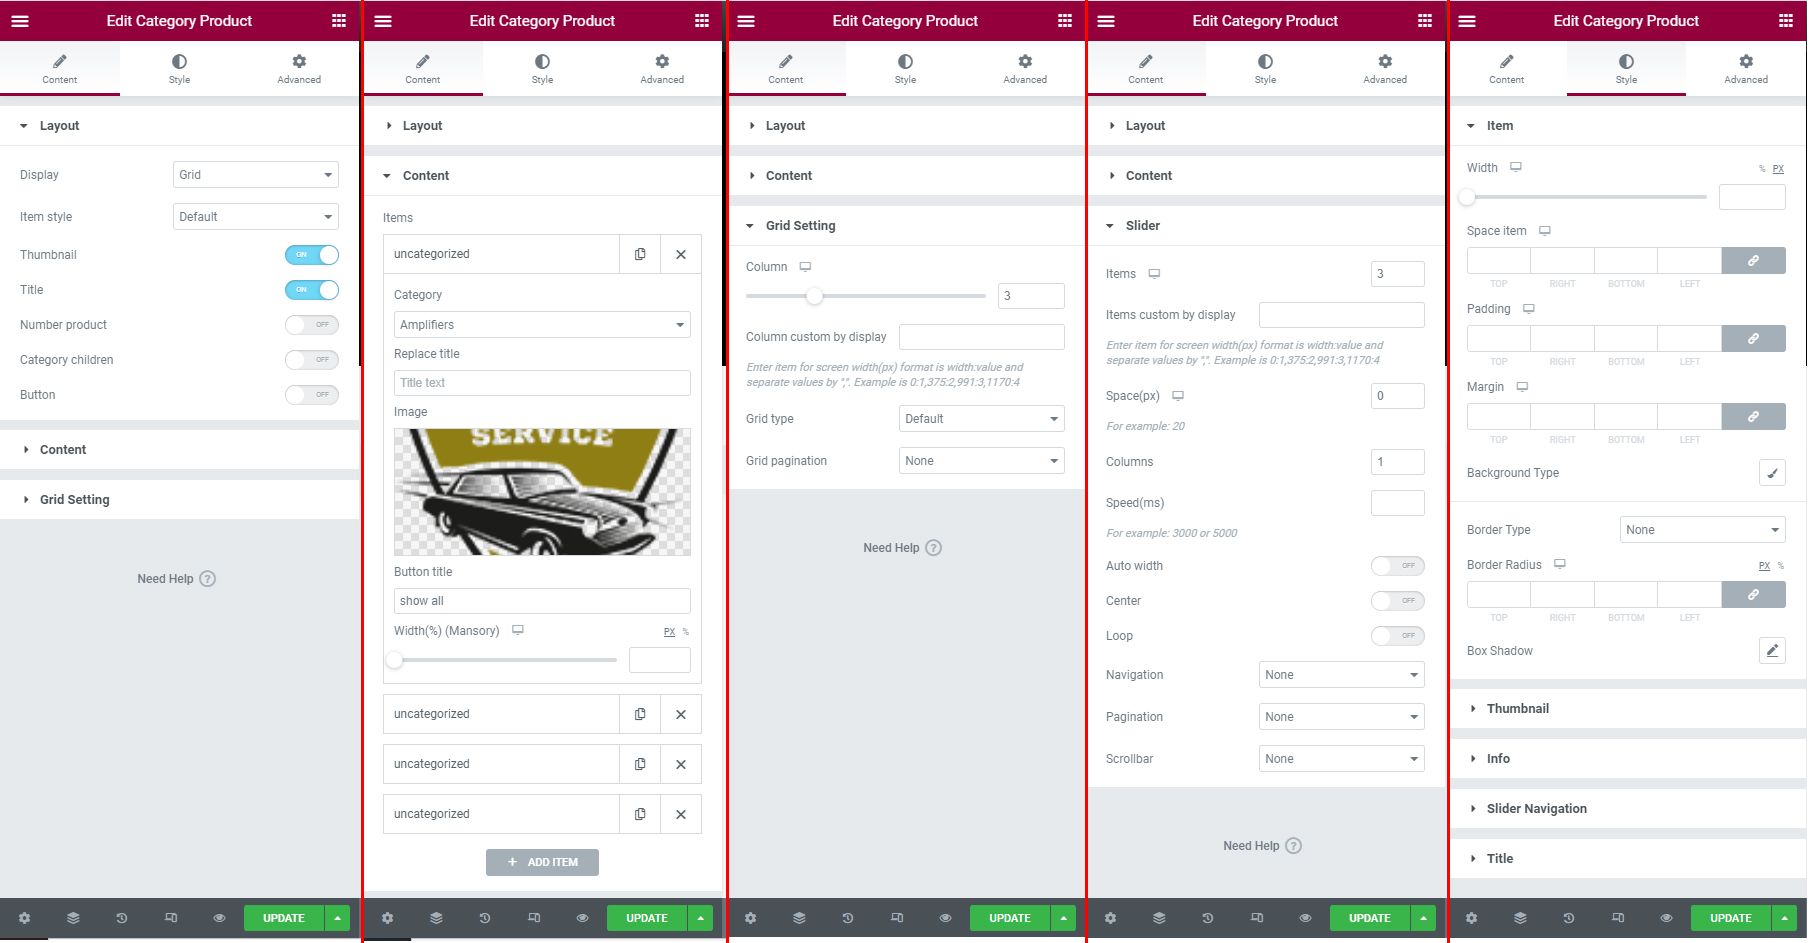
3.12. Category Products

Feature: Used to display one more category product with many styles defined (grid, slider).

Edit interface

Front-end views

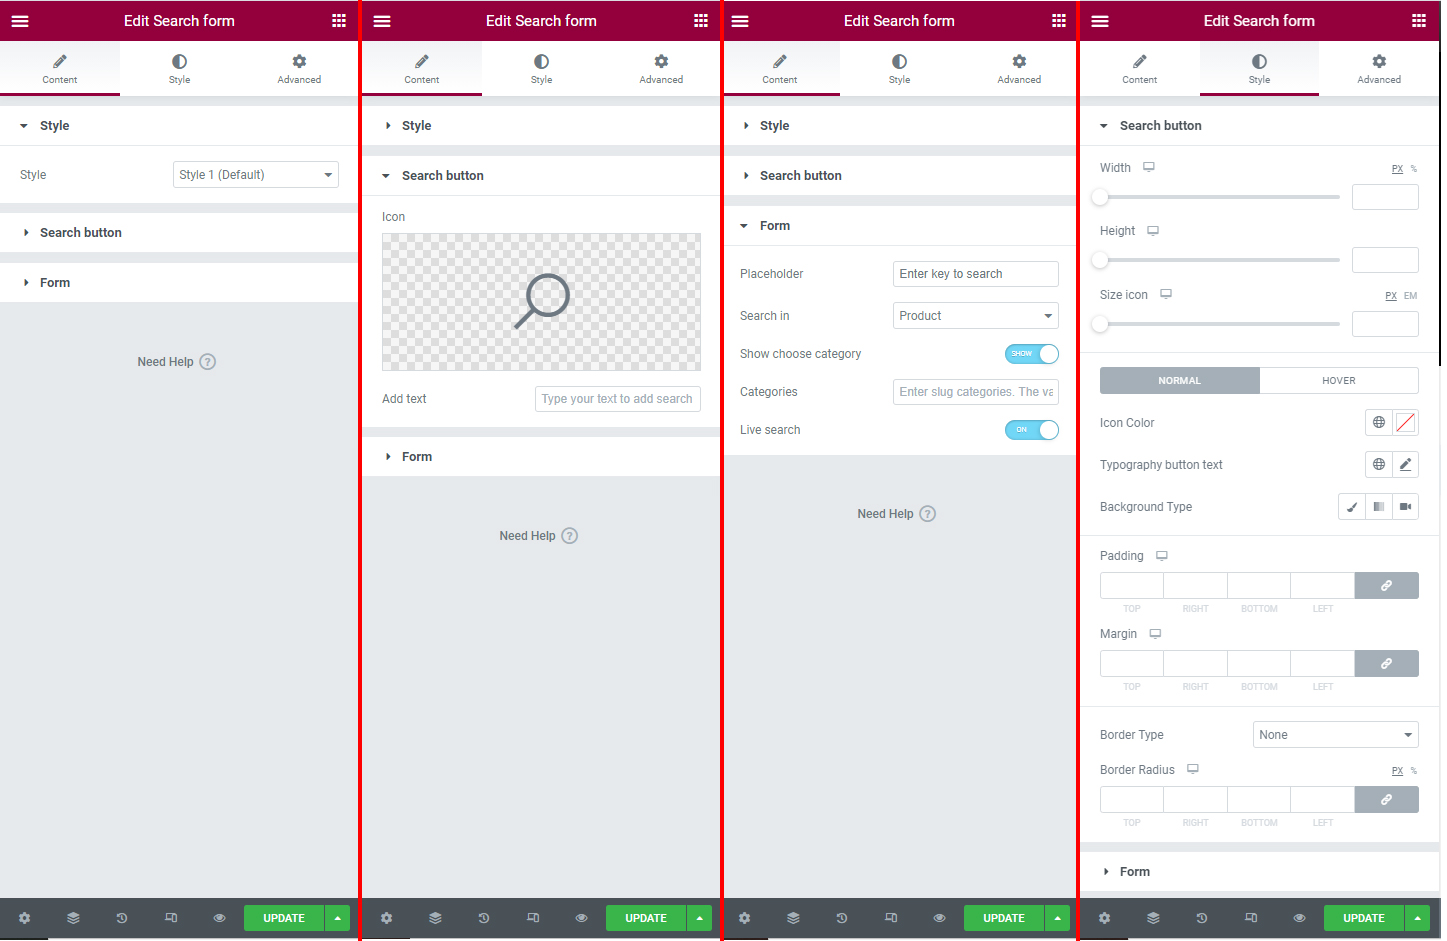
3.13. Search Form

Feature: Used to display search form. You can custom search for post,product or all of your post type with categories list. Live search feature already in this elementor.

Edit interface

Front-end views

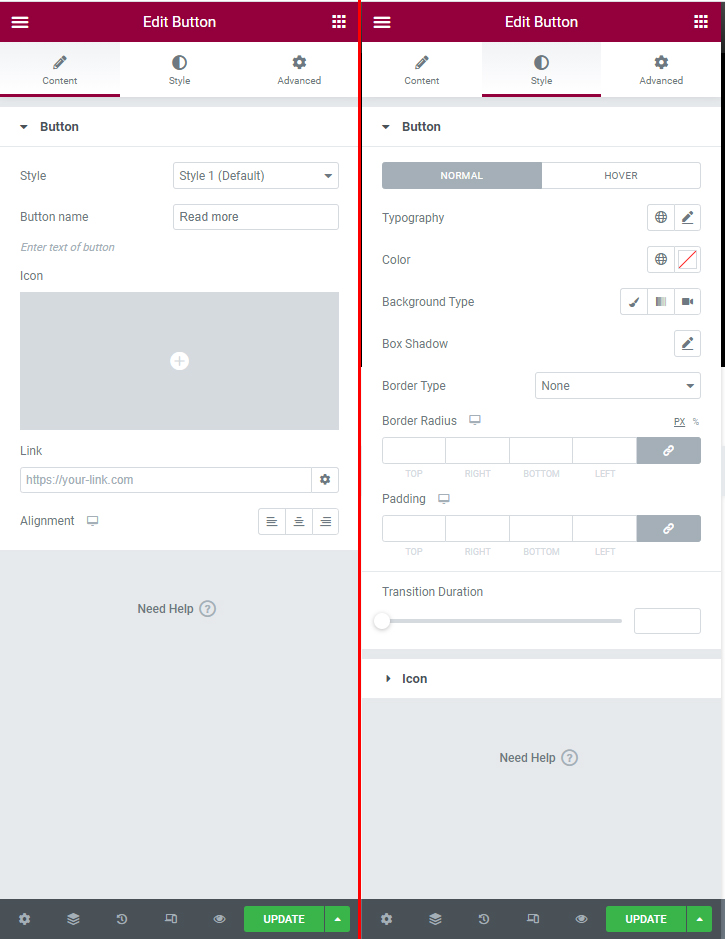
3.14. Button

Feature: Used to display button. You can custom style button in this elementor.

Edit interface

Front-end views

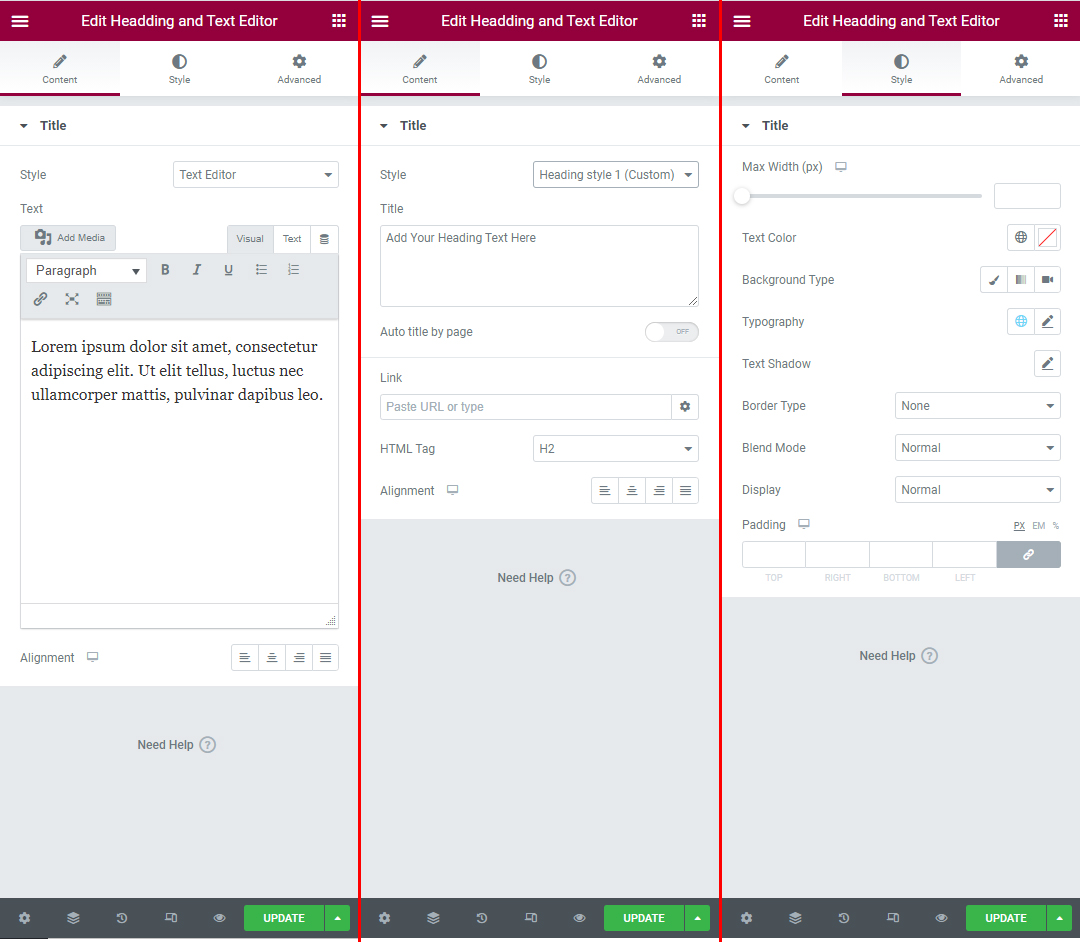
3.15. Headding & Text editor

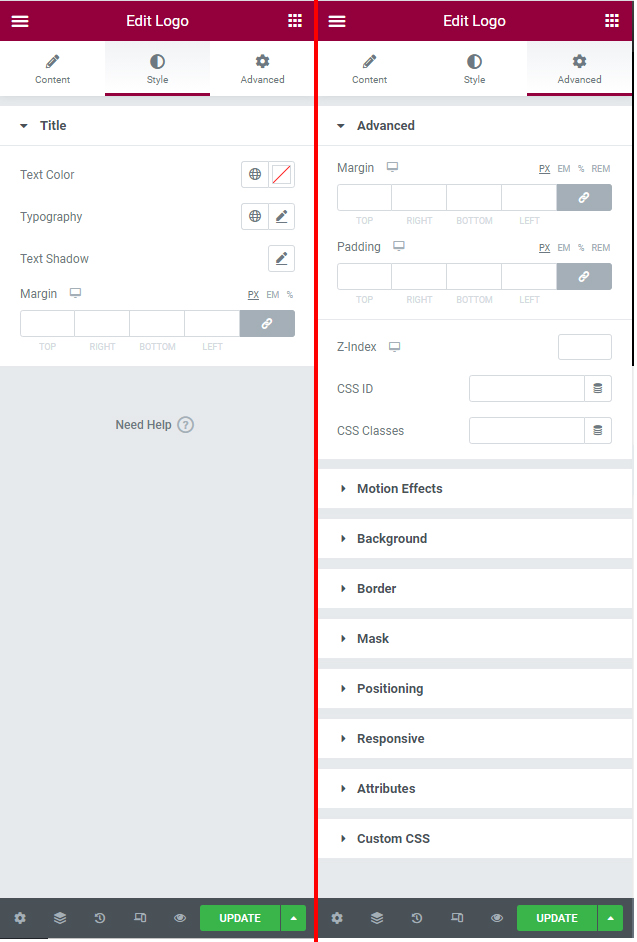
Feature: Used to display Headding & Text editor. You can custom style headding & text editor in this elementor.

Edit interface

Front-end views

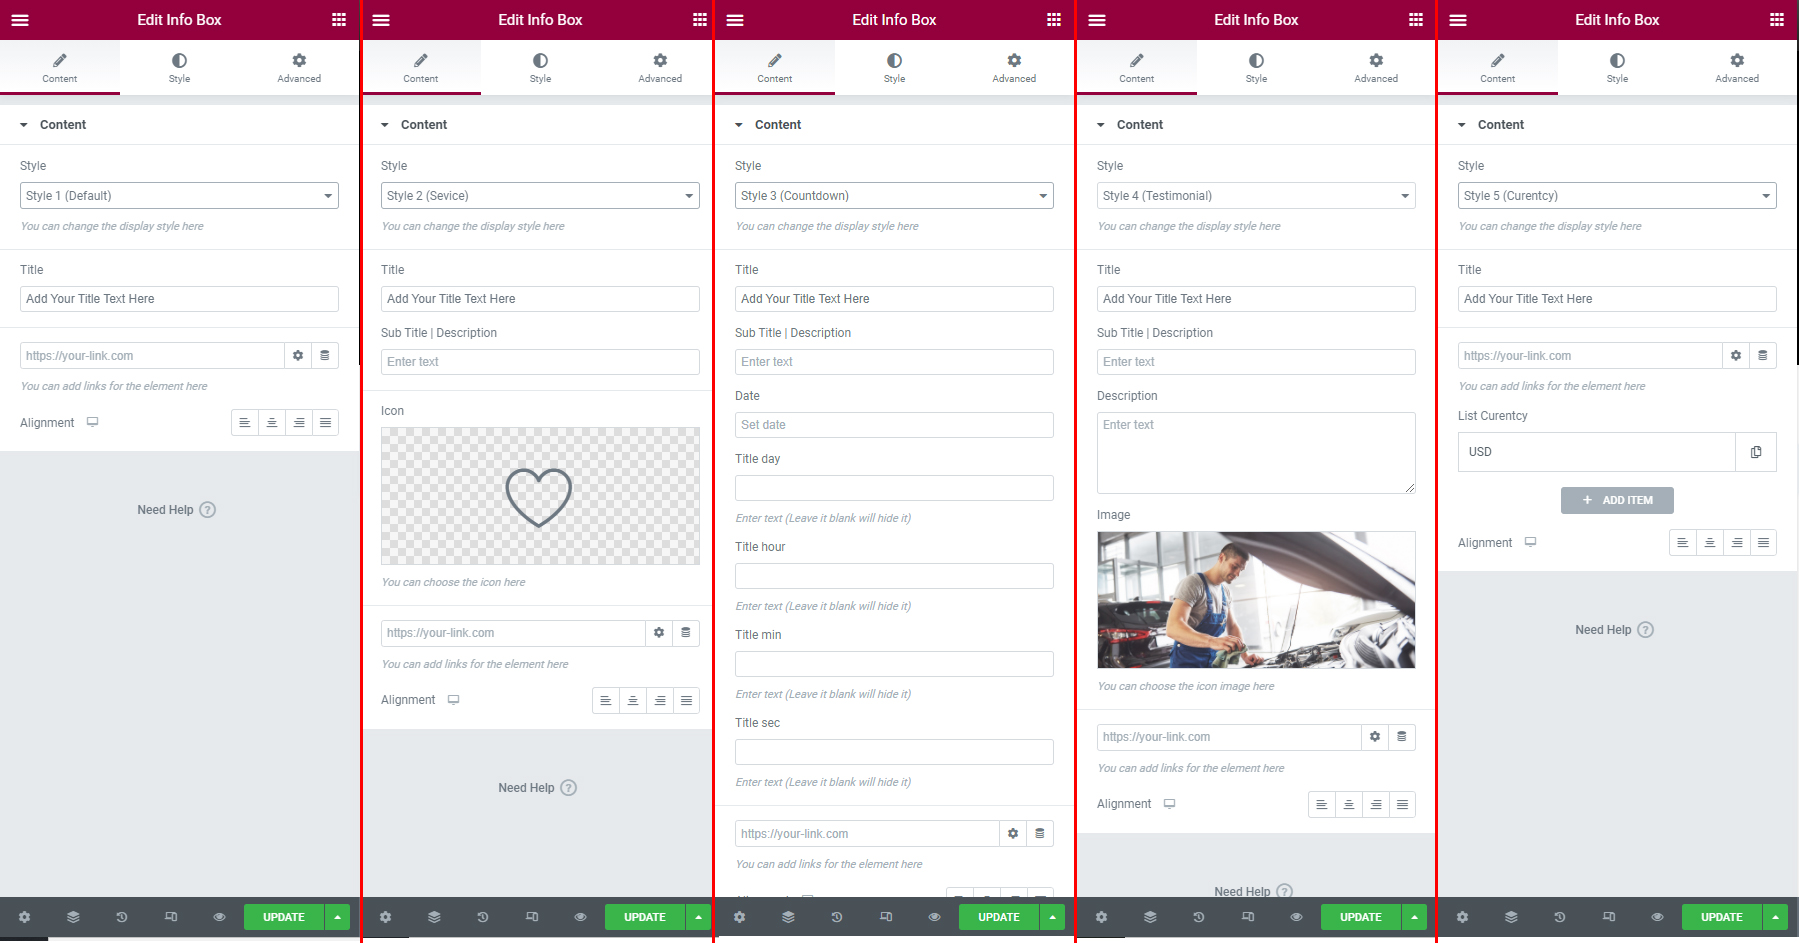
3.15. Info box

Feature: Used to display info box editor. You can custom style info box in this elementor.

Edit interface

Front-end views

4. Create/Edit page

In WordPress Dashboard you can go to Pages -> All Pages and choose page want to edit. Or you can choose Pages -> Add New to create new page.

Pages template:

Default template: create a page with default space top and bottom.

Visual template: create a page with page builder and no default space top and bottom.

Video tutorial

5. Create post/product

Create post

In WordPress Dashboard you can go to Posts --> Add New to create new post. Or Posts --> All Posts and choose a post to edit.

Create product

In WordPress Dashboard you can go to Products --> Add New to create new product. Or Products --> All Products and choose a product to edit.

Note: you can enable page builder for post/product to create/edit with Bakery page builder.

6. Responsive

All products using 7uptheme framework 2 (from 7/2018) will have additional advanced responsive functions. Helps you improve visibility for mobile devices.

Base responsibe for column: when you create page builder content from rows and columns. You can divide the width of the columns you want to display for each screen.

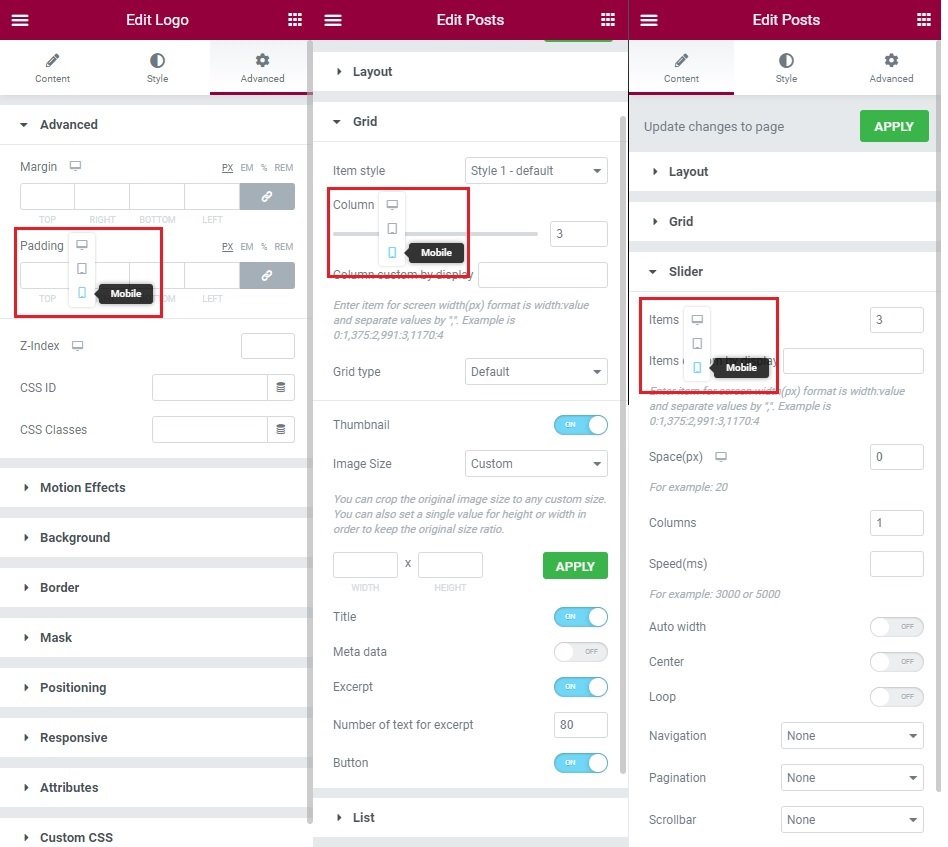
In Column Settings, you can choose Responsive Options
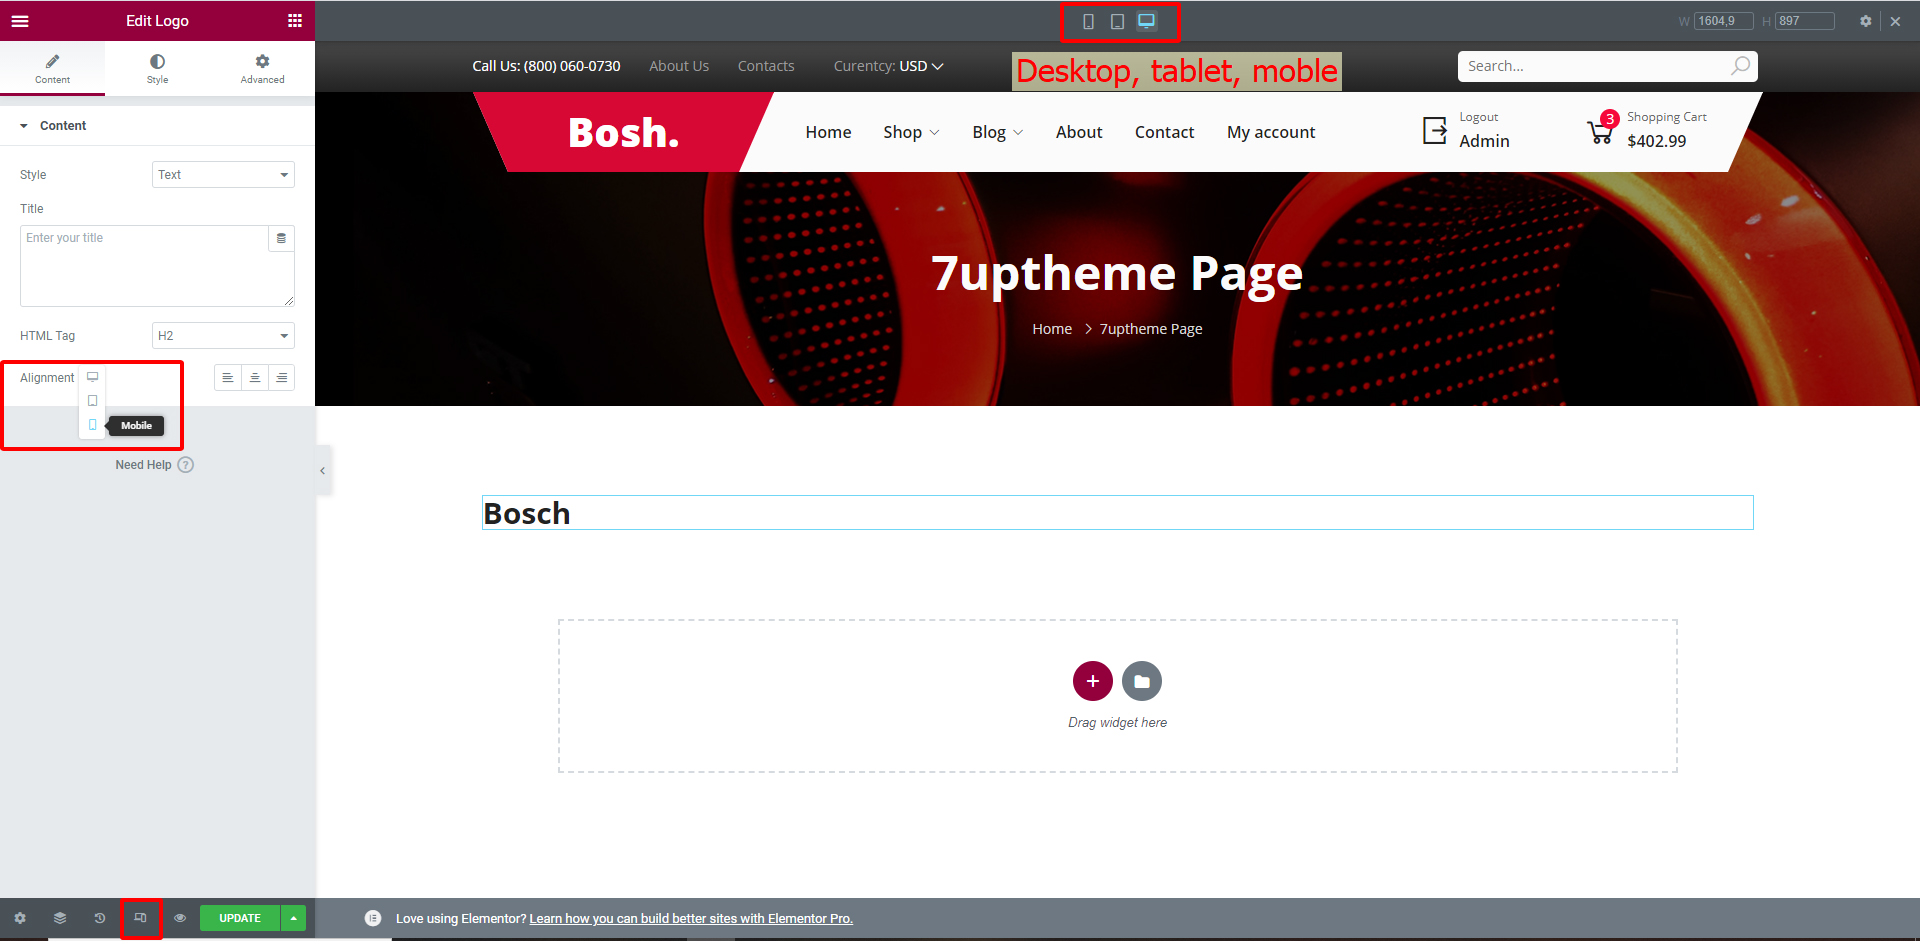
Width: default width. Apply for small device.

Responsiveness: responsibe settings for 3 type of device.

1: Destop device

2: Tablet device

3: Mobile device

Advanced responsive:: Applies to some special items or all items depending on your settings.

In elements setting, You can choose Responsive Design Option: you can change padding, margin, background, width ... and alot of css attribute for each device.
7. Meta Data

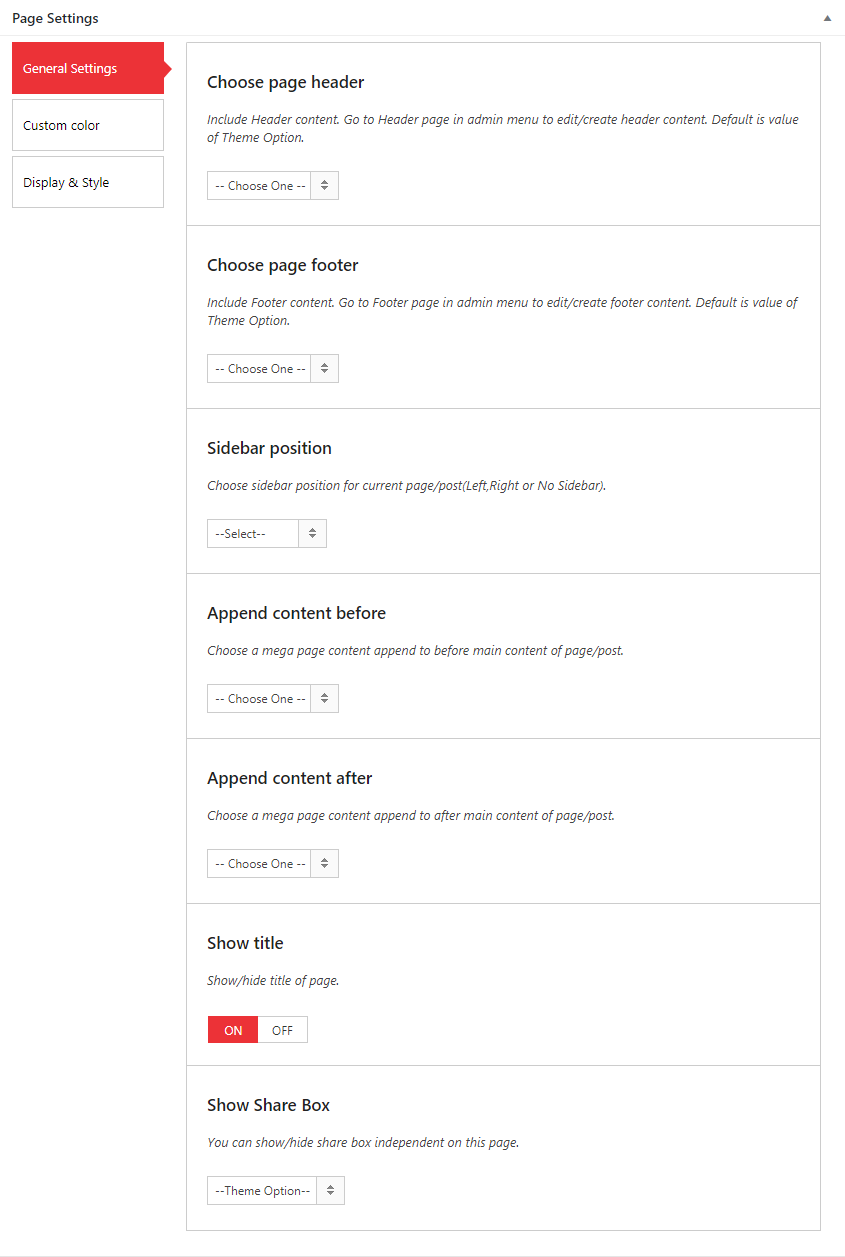
7.1 Meta General

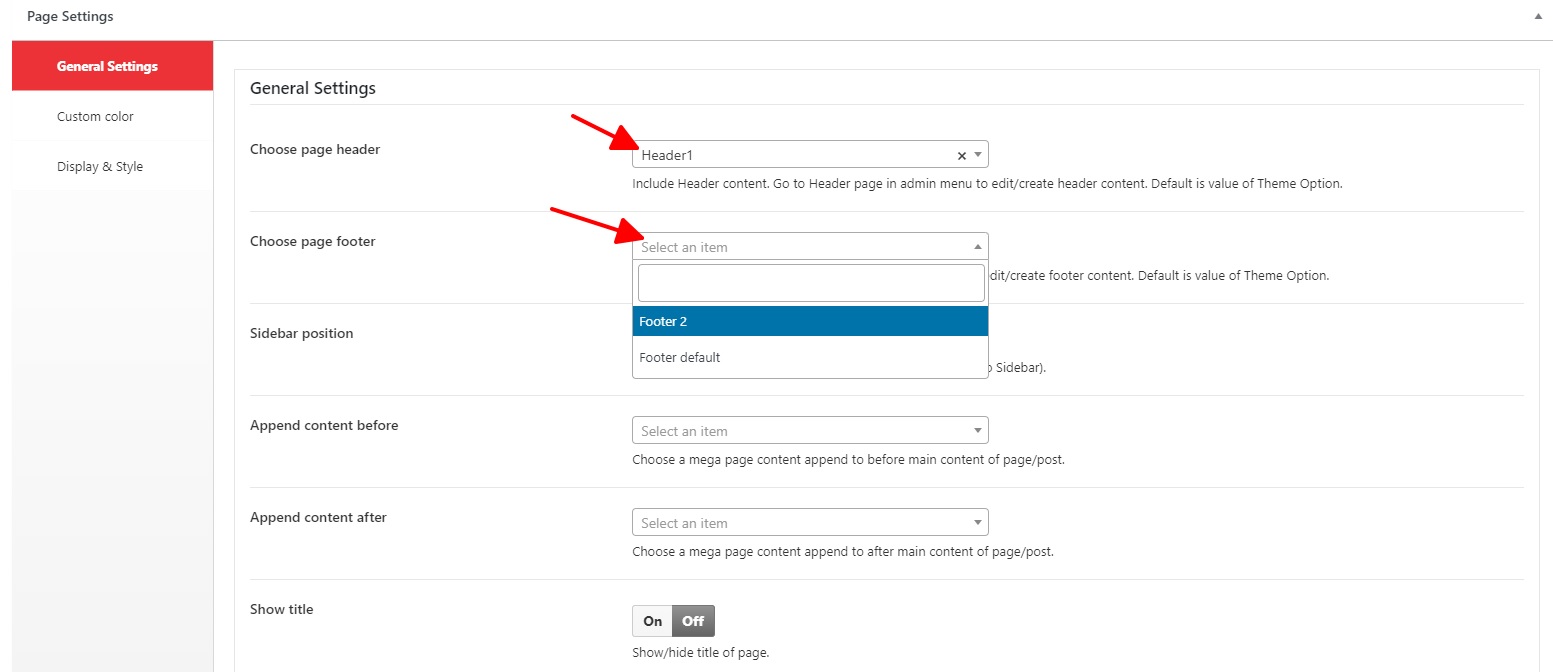
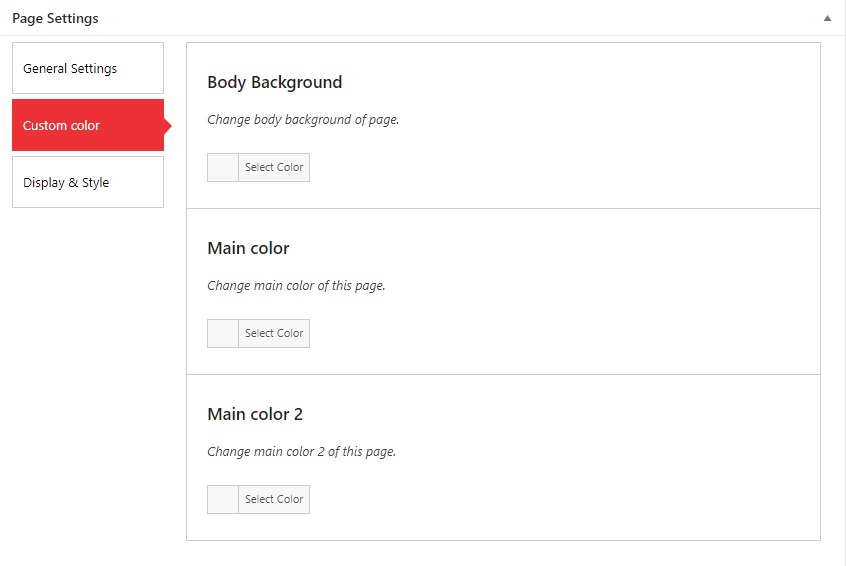
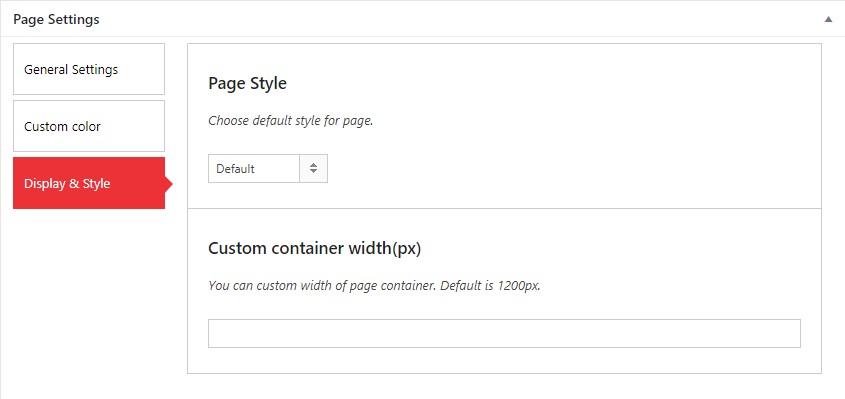
1. Tab General Settings: used to setting header, footer, sidebar, append content before and affter, show/hide title and social network sharing for each page/post/product

2. Tab Custom Color: used to setting background and main color for each page/post/product.

3. Tab Display & Style: used to select style display and edit width of page container for each page/post/product

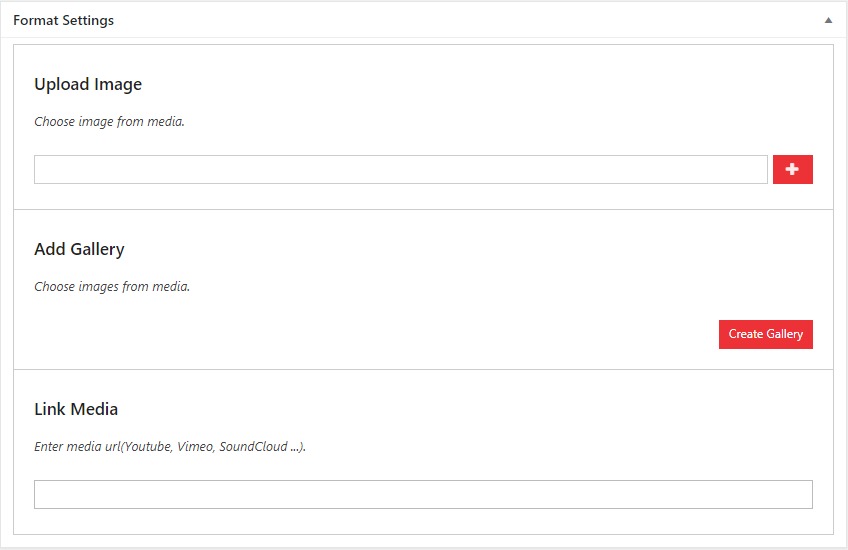
7.2 Meta Post

7.3 Meta Product

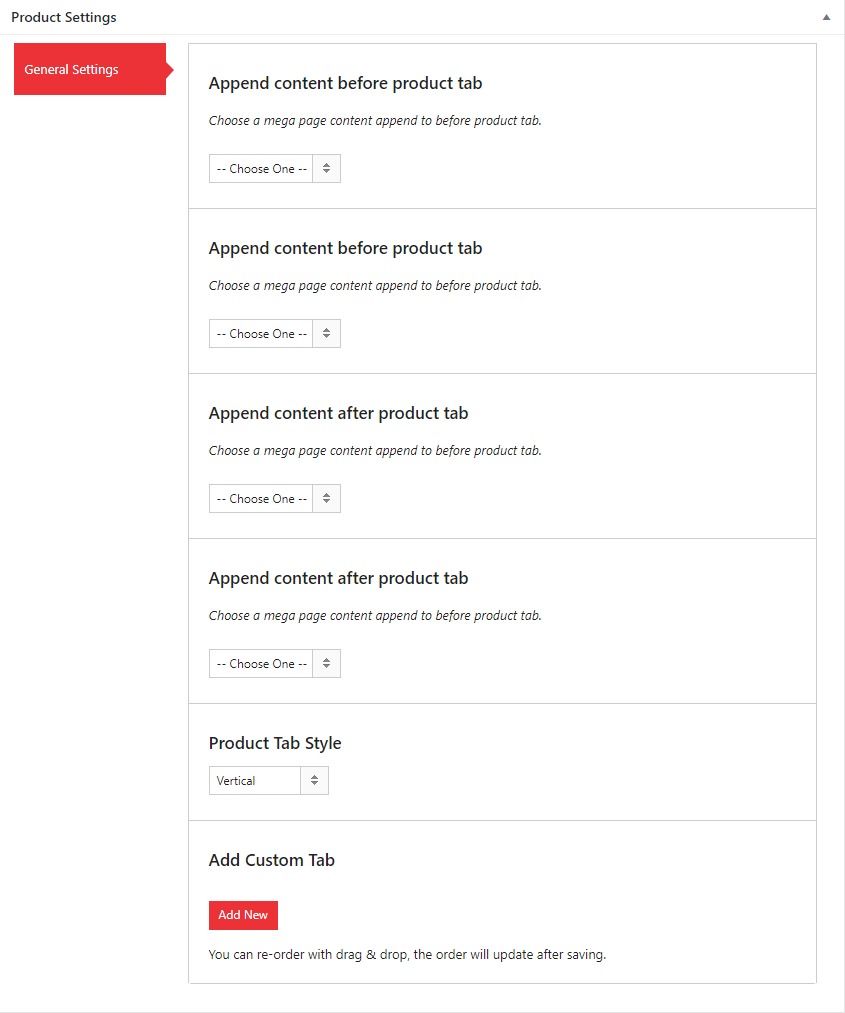
1. Product Settings

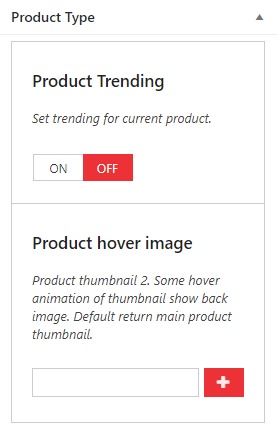
2. Product Type: used to set trending for current product and add more image thumbnail on hover product

8. Widget

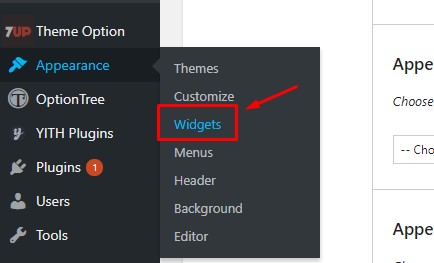
List 7up's widget

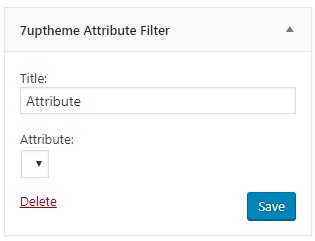
8.1. Attribute Filter

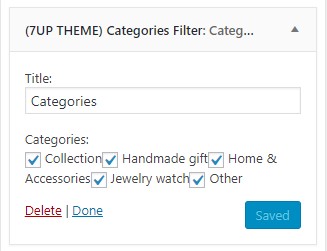
8.2. Categories Filter

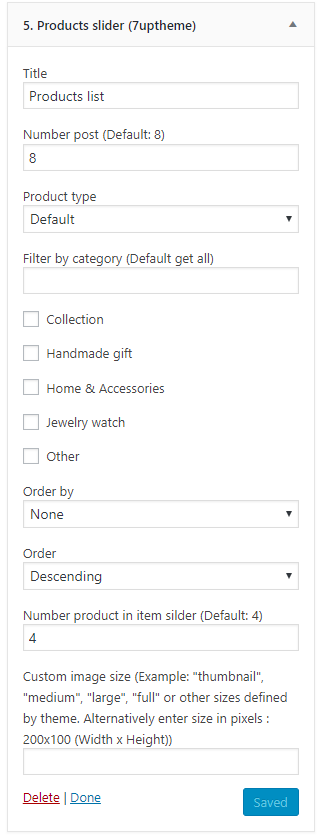
8.3. Product Slider

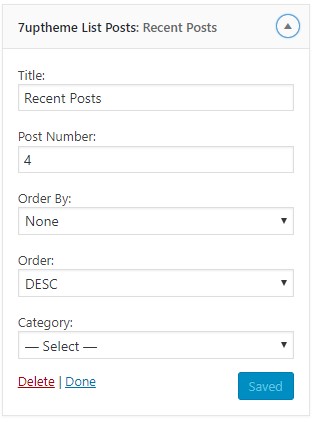
8.4. Post List

7uptheme customize


1. Choose home page

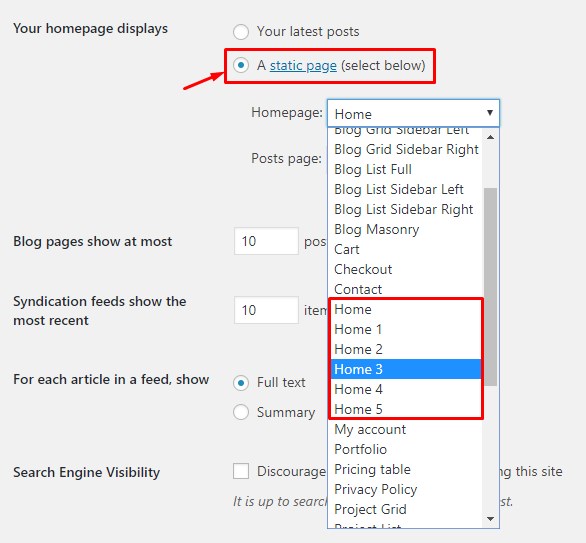
After importing the demo data. You can choose one of our demo home as your home page.

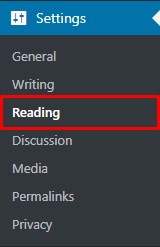
Step 1: In WordPress Dashboard, Go to Settings -> Reading

Step 2: Click to A static page (select below) and select Home page from list.

Step 3: Click Save Changes to apply.

2. Translate theme/plugin with Loco Translate

Loco Translate provides in-browser editing of WordPress translation files. It also provides localization tools for developers, such as extracting strings and generating templates.

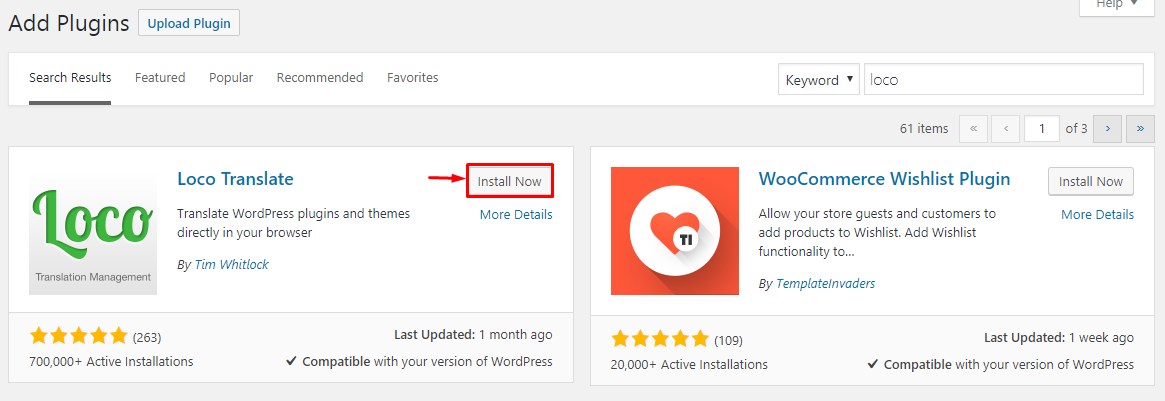
First, you need to install Loco Translate plugin for your site.

Translate Theme

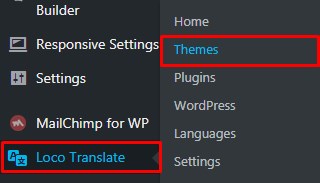
Step 1: In WordPress Dashboard, Go to Loco Translate -> Themes

Step 2: Choose theme want to translate from theme list.

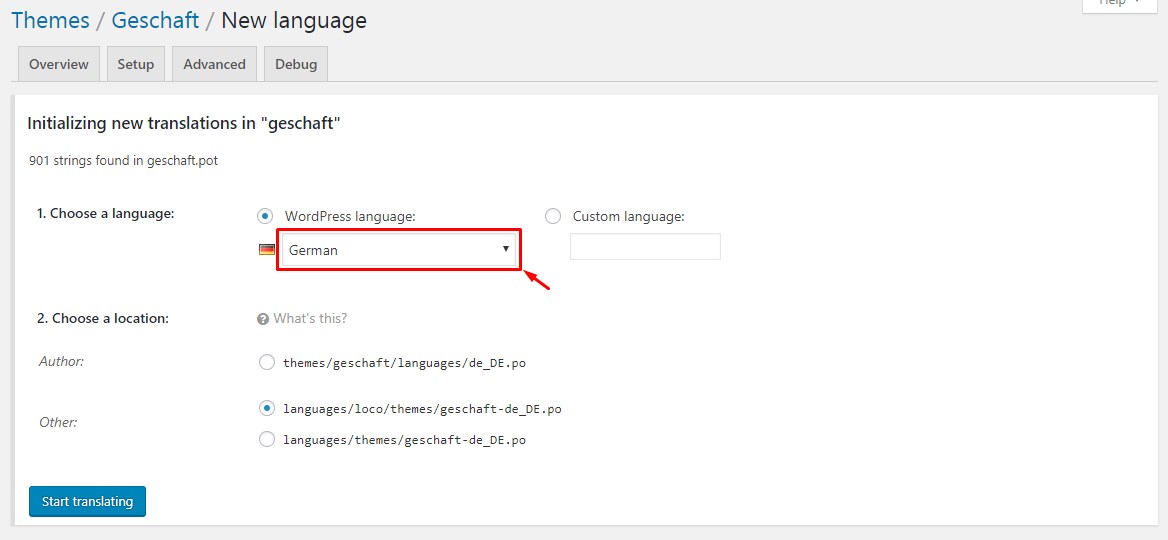
Step 3: Click to New language to add language to translate. Or choose exits language to edit.

Step 4:Choose a language and location and click Start translating to start translate.

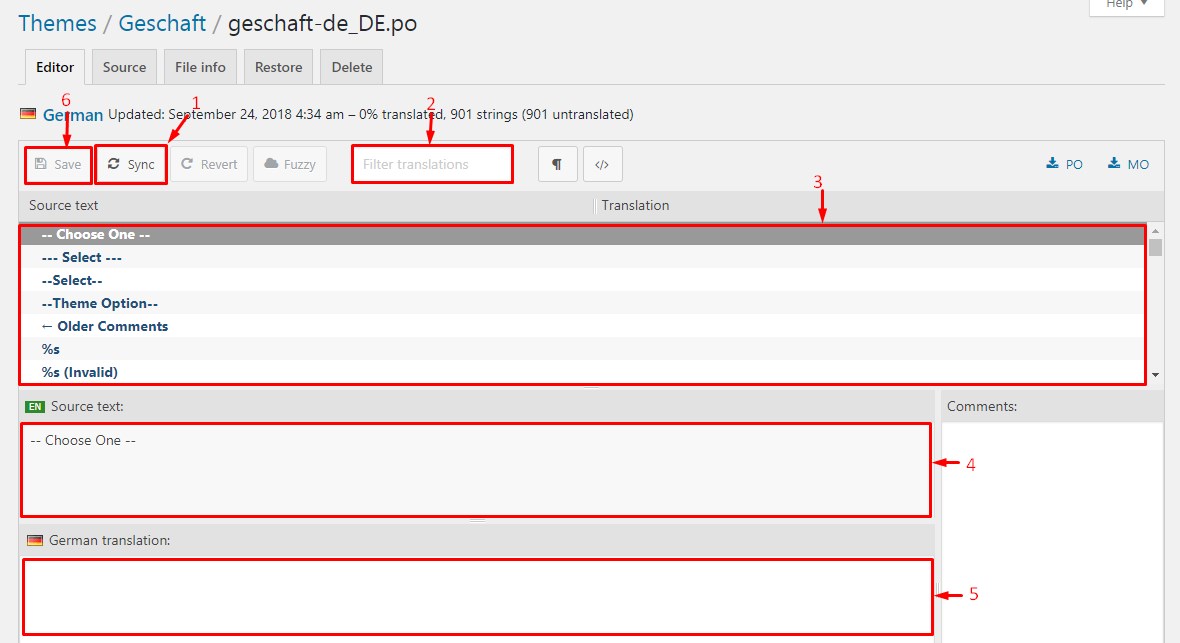
Step 5: translate interface

1: Click Sync button to update new pot file. Use when update theme or update pot file in theme-folder -> languages folder.

2: Enter key to find text/string

3: Source text, click to text want to translate.

4: Source text display.

5: Enter text translated.

6: Click Save to finish.

Translate Plugin: Same as translate theme, In WordPress Dashboard, Go to Loco Translate -> Plugins and and sequentially the remaining steps as you are translating the theme.

3. Multi language plugins

Our products are compatible with multi language plugins like WPML, Polylang, QTranslateX

First, make sure you have installed multi language compatible plugins for our products and that translations for languages are available for the categories, products, pages, product categories .... You can read Multi language plugin guide for usage

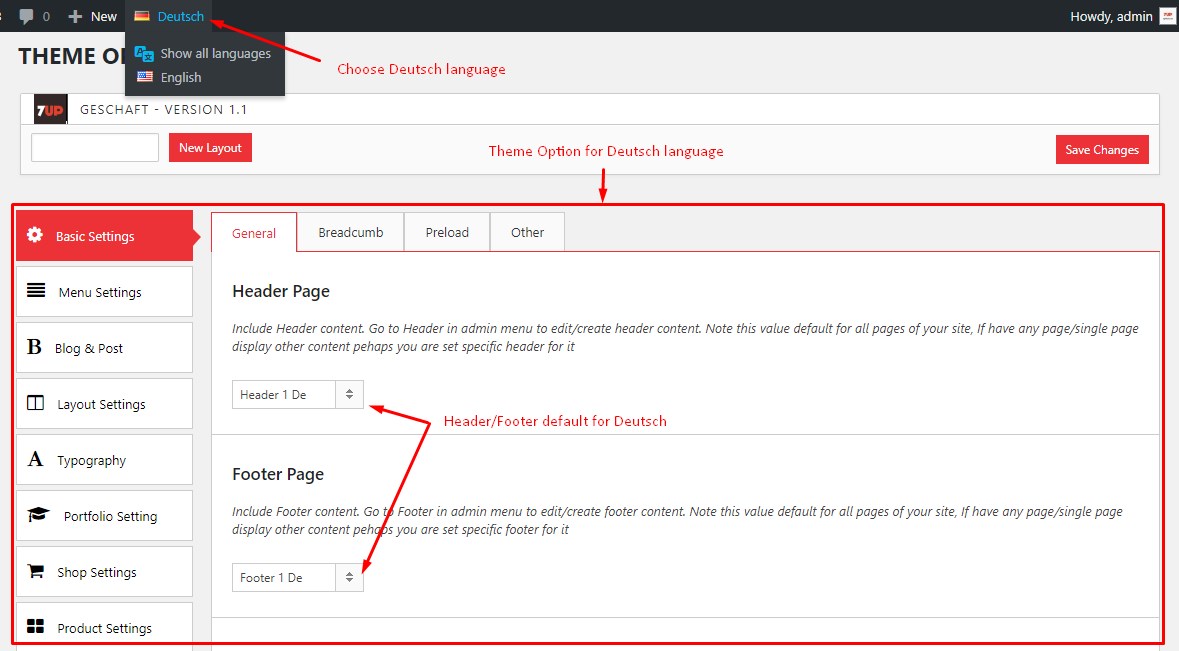
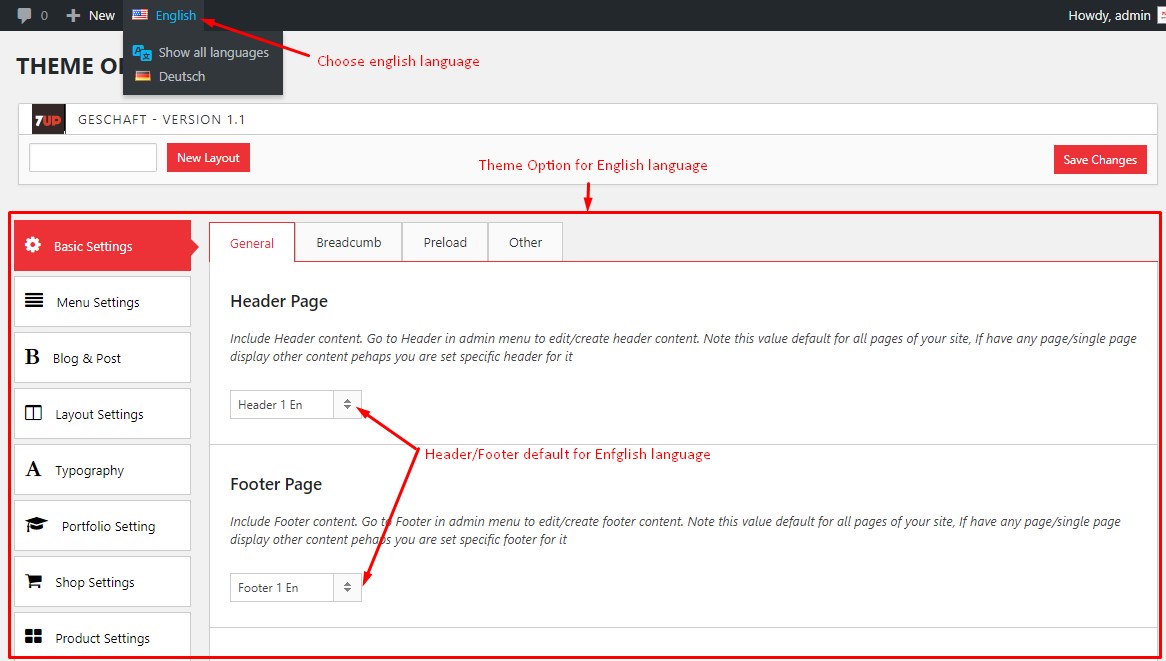
Theme Option in Multi Language: When using multi language plugin. Theme Option values will be stored independently for each language. So you need to save your settings for each language.

Go to Theme Option, Switch language that you want to settings

Header/Footer/Mega page in multi language: You can translate same as page or copy content and translate in a new Header/Footer/Mega Page and rechoose for each language.

4. Optimization

* Optimize Uploaded Images

Images are one of the heavier elements of your site. There are a few ways you can optimize your uploaded images.

You should specify the maximum image dimensions for thumbnail, medium, and large sized images. That means, if you upload an image 1024px wide, and your content area is only 604px wide, normally the image will be scaled down using CSS. When you specify the maximum width of your ‘large’ images as 604px, it’ll then display the pre-resized, 604px wide image, which will be significantly smaller in size.

* Install A Caching Plugin

The second most effective way (the first being choosing a good web host) to improve your site’s load times is to install a caching plugin. As soon as you install a plugin like W3 Total Cache or WP Super Cache, you’ll be able to tell that your site loads faster.
In simple words, when a caching plugin is active on your site, it servers users cached copies of your pages. It greatly reduces MySQL database access, no. of PHP requests, server access for static resources, and even HTTP requests (in case of combining multiple files into one).

W3 Total Cache is one my most favourite WordPress plugins. It offers a variety of caching features:
- Page Cache

- Minify

- Object Cache

- Database Cache

- Browser Cache

- CDN

Initially, you don’t want everything enabled. You can still safely enable everything except Minify and CDN (unless you want to use a CDN).

Minify breaks some other heavily JS-based plugins unless you specifically tweak it. On the other hand, you should tweak the Browser Cache settings to utilise the full potential of browser caching.

* Try a CDN to Speed Up WordPress

Offloading the static resources of your site, like images, scripts, css files, can speed up your site. Not only those resources will load faster for visitors, if you use a CDN, your primary server will have less load to handle and thus will deliver significantly better performance while serving the rest of your site.

* Enable Gzip Compression

You should serve compressed versions of your site to your visitors, as they’ll be less in size and will generally load a lot faster.

5. Use child theme

Child Themes

A child theme is a theme that inherits the functionality and styling of another theme, called the parent theme. Child themes are the recommended way of modifying an existing theme.

Why use a Child Theme?

There are a few reasons why you would want to use a child theme:

- If you modify a theme directly and it is updated, then your modifications may be lost. By using a child theme you will ensure that your modifications are preserved.

- Using a child theme can speed up development time.

- Using a child theme is a great way to learn about WordPress theme development.

Child Themes install

You can find child theme package next to the main theme package in the full download(Sobeau-child.zip). Once you've installed the main theme, you have to install the child theme and start customizing it

The main file

- function.php: You can create new function or php process for your theme or copy a php function in the main theme to child add to edit and customize your way.

- style.css: Allows you to insert the css code into your web page

Template folder

Allows you to change the html structure of the theme components. You can copy any file in folder s7upf_templates into child theme with the same directory structure to edit. Or you also copy all s7upf_templates folder into child theme for comprehensive change.

6. Custom style

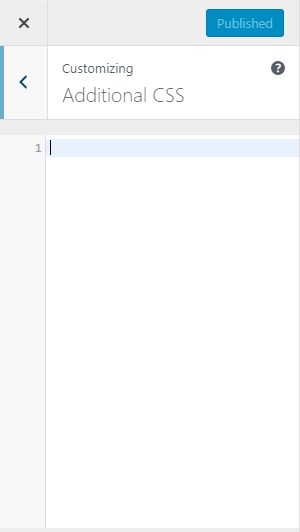
In addition to using styles available in theme settings, you can add css codes to customize your look in the following ways:

Use Custom CSS of Elementor: In WordPress Dashboard, Go to Elementor -> Custom CSS

Use Additional CSS in Customize WordPress: In WordPress Dashboard, Go to Appearance -> Customize -> Additional CSS

Use file style.css in child theme.

Source and Credits


I would like to thank the following providers. This theme would not have been possible without the hard work and dedication of all of them.

  1. jQuery
  2. jQuery UI
  3. Fancybox - Fancy jQuery lightbox alternative
  4. TimeCircles
  5. Bootstrap
  6. BX Slider
  7. Slick Slider
  8. jCarouselLite
  9. Elevate Zoom
  10. jQuery OwlCarousel 

Frequently Asked Questions


2. Import demo data error

- Check your server and WordPress configuration. Make sure it is correct. You can see System requirement.

- In the case of properly configured but not resolved issues with the Import now feature, you can use the Import without media feature.

- After Import without media all done. You can continue Import media. You can import media many time until success.

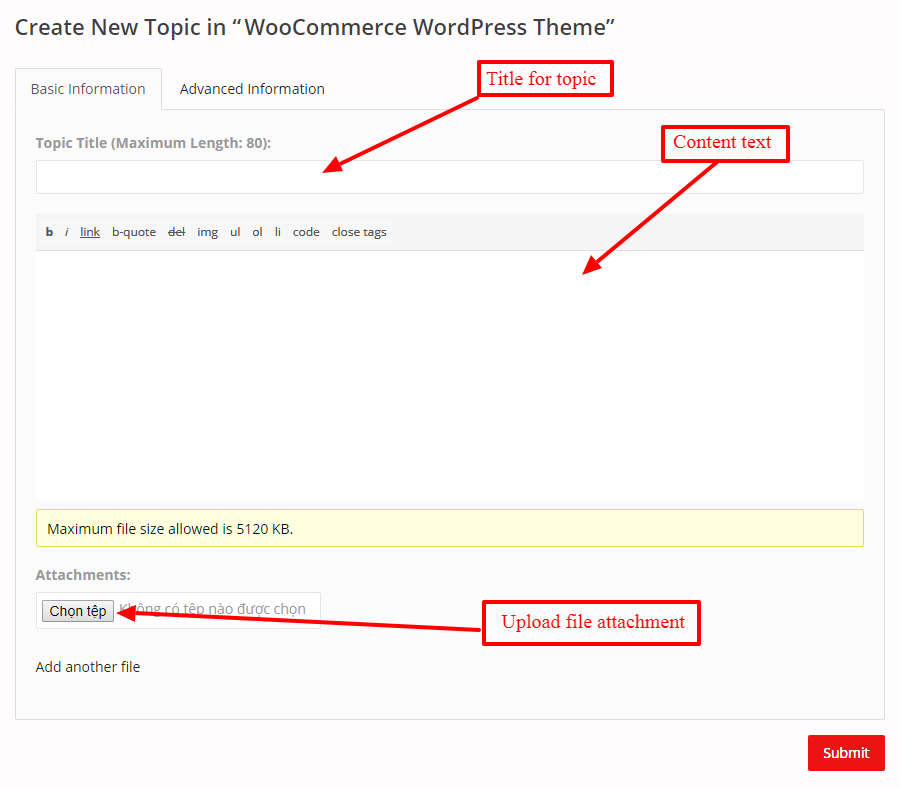
- Worst case is after you have done all that still can not solve the problem you please create topic on our forum with your demo account information. We will help you check the problem.

3. RTL style missing in child theme

- If you use child theme and have problem with RTL style. You can copy rtl.css in main theme into child theme to fix this issue.

5. Remove Intro Demo

Go to Theme Option -> General -> Other -> Session page -> Show tool panel

Support


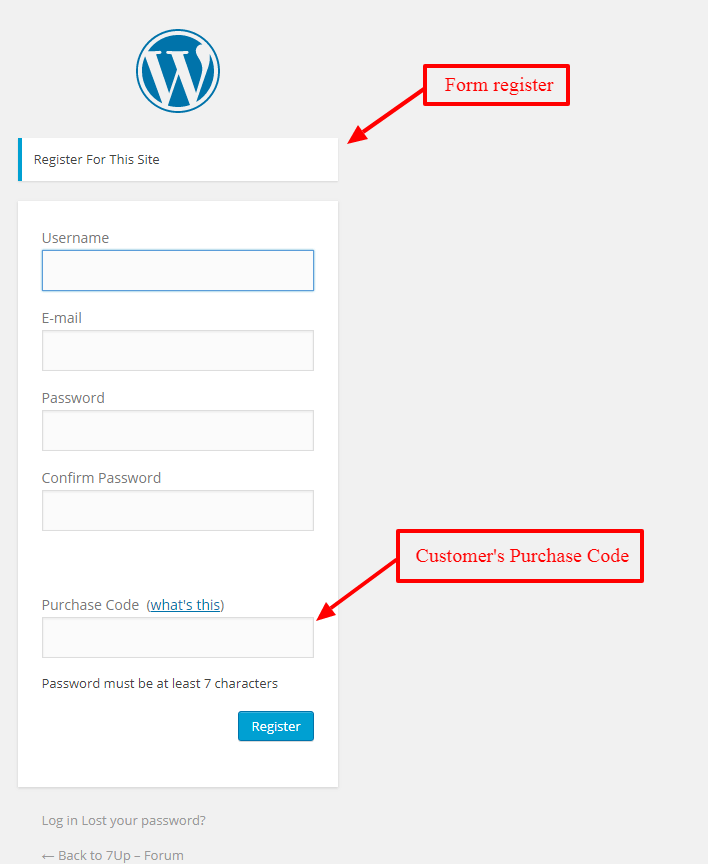
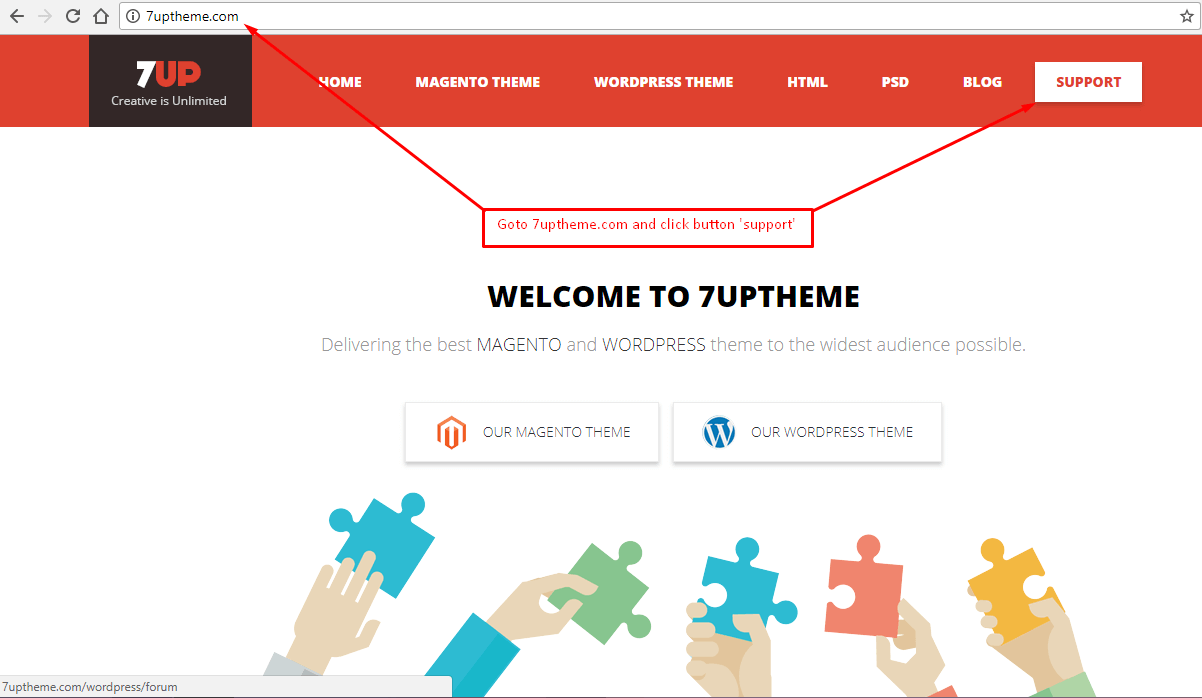
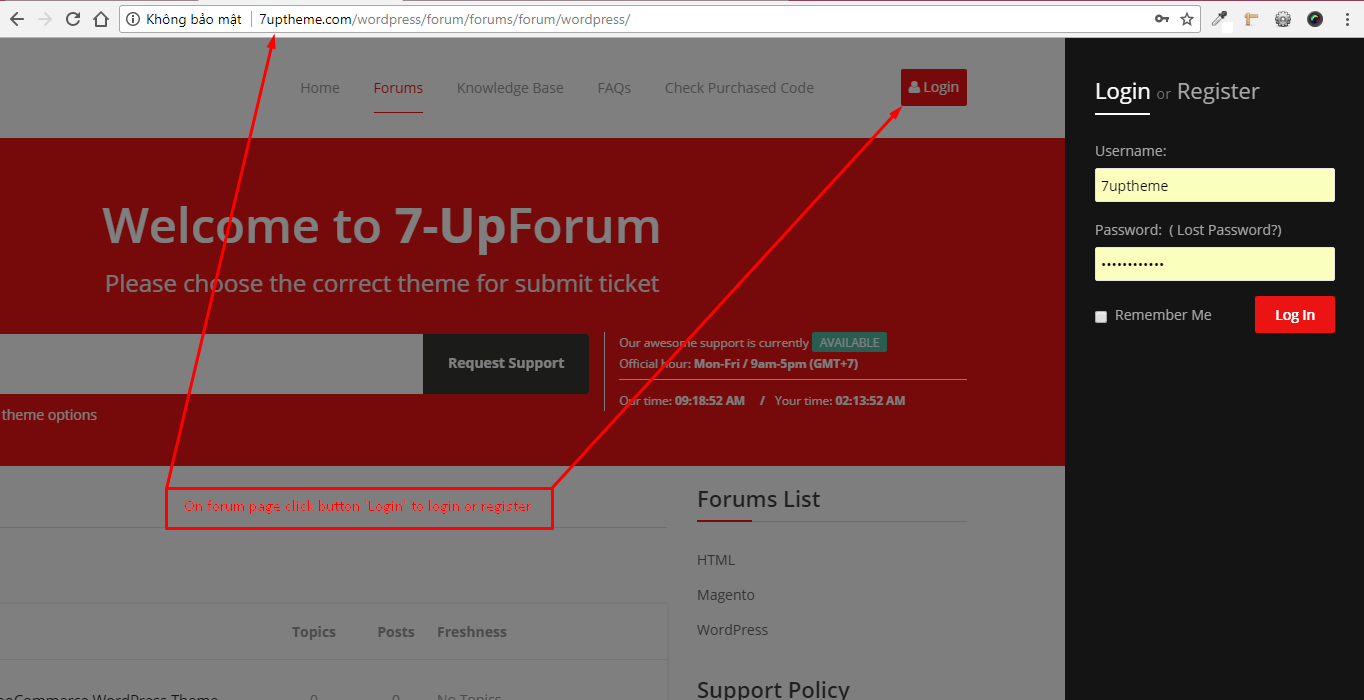
Create account and topic on Sobeau Forum

Customize Service

You can send a custom request to email contact.7uptheme@gmail.com to receive a specific quote

If you face any problems with the installation or customization of our product please do not hesitate to contact us via comment on ThemeForest or send your question to our email: contact.7uptheme@gmail.com

We have done a ton of work to make our template very easy in configuration, updating and customization, please rate it with hight star if possible (on the downloads page). Good mark will be appreciated.

Thank you.

Wish you success.