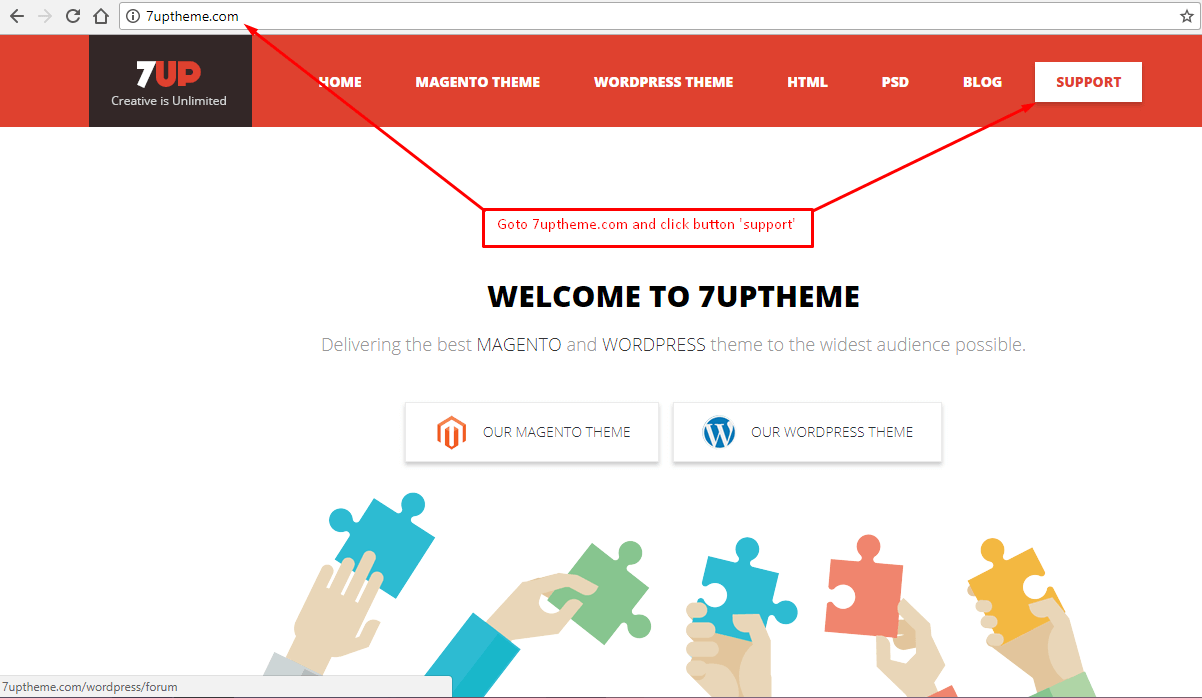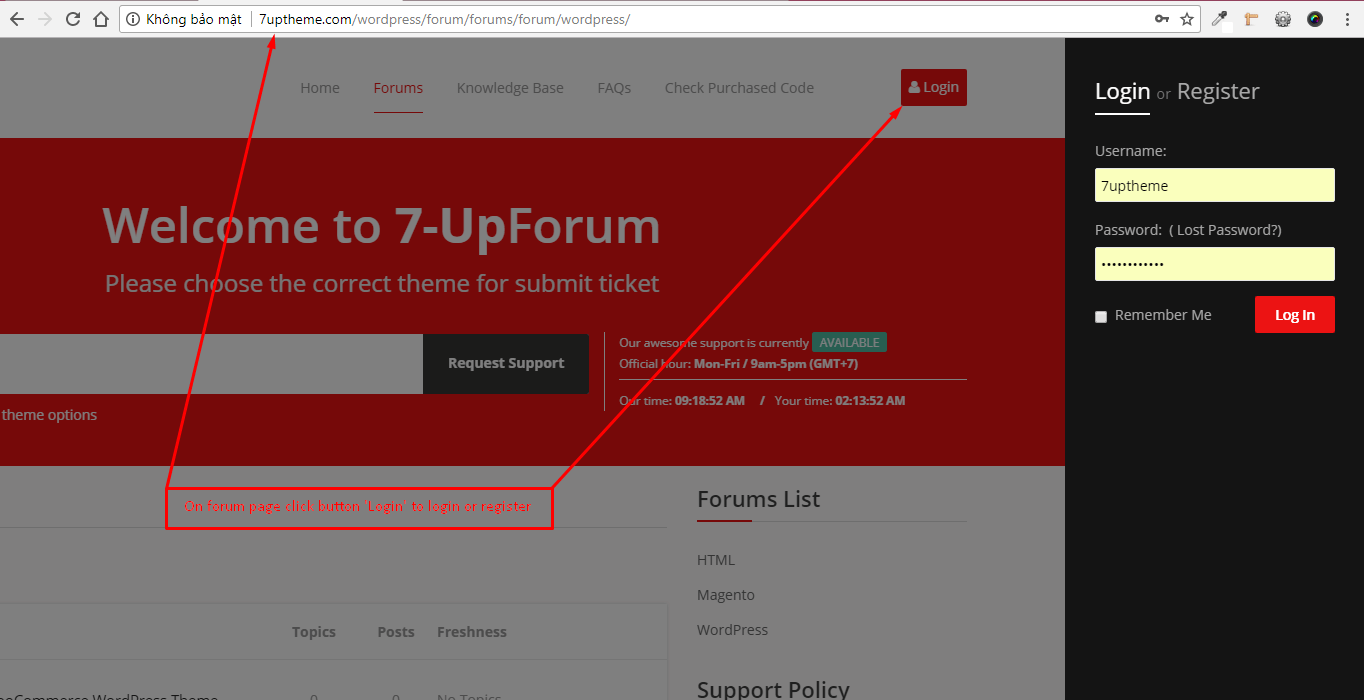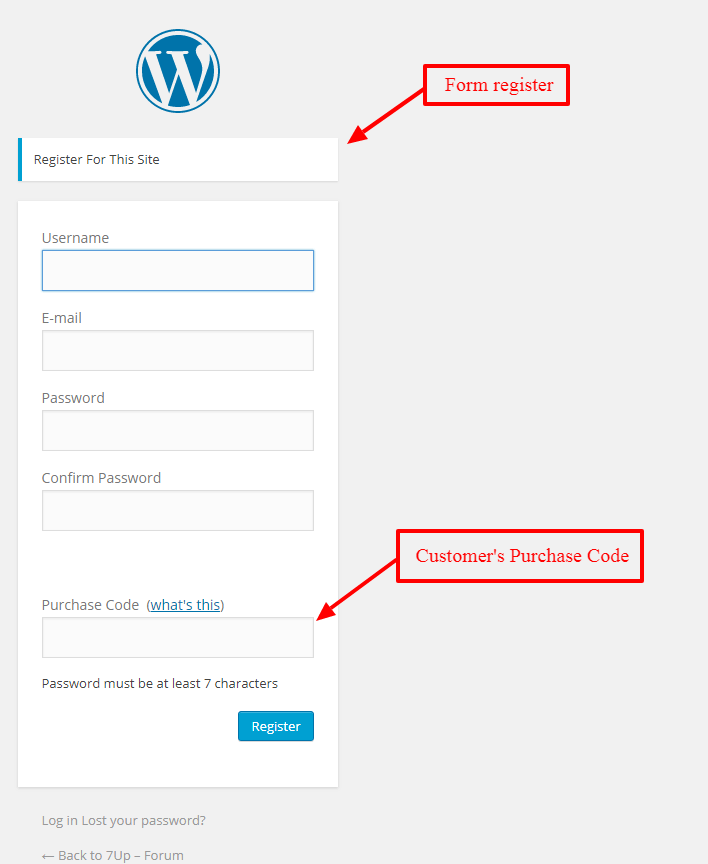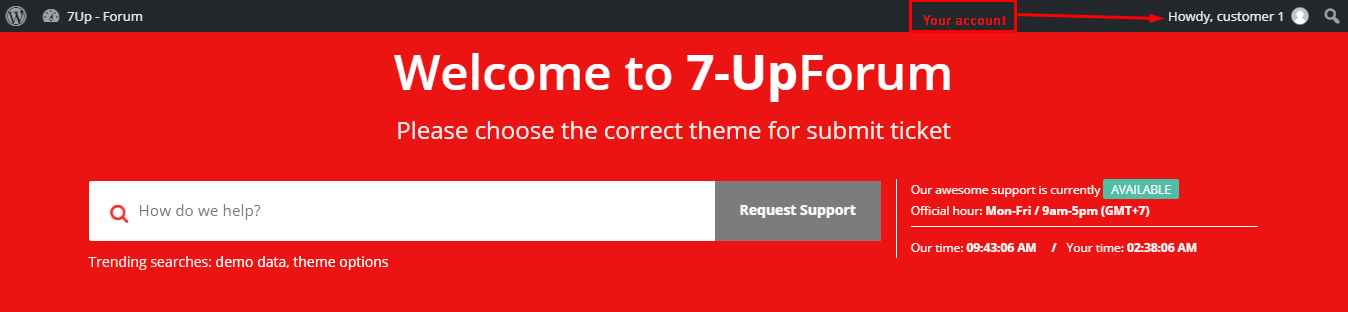

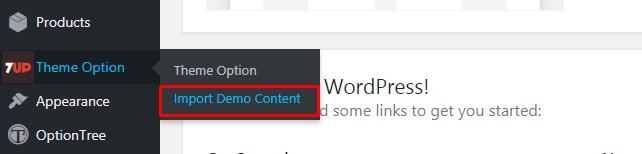
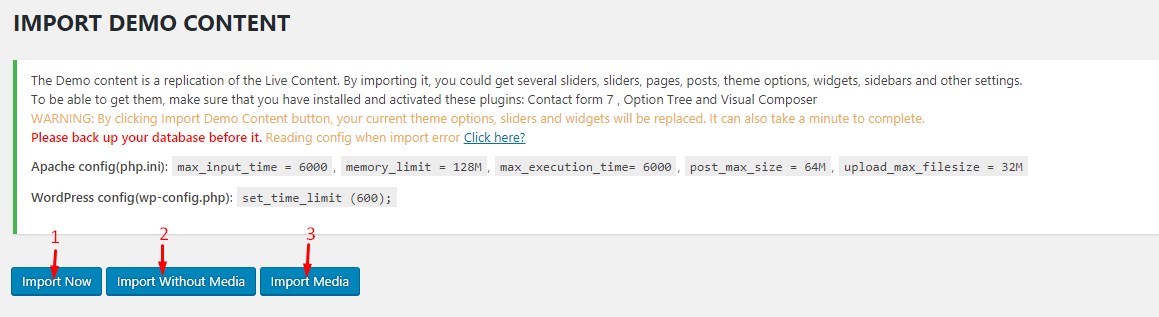
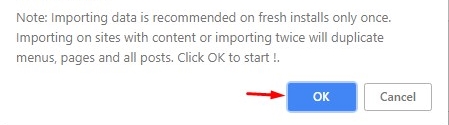
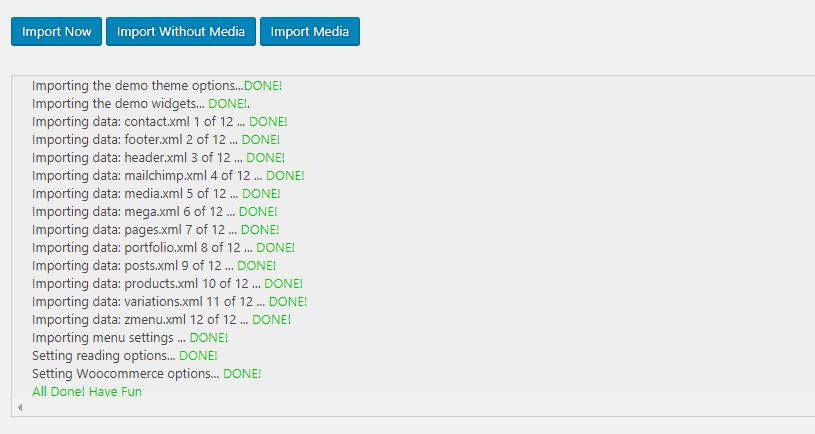
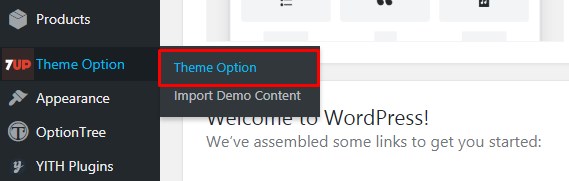


7up Content
1. Header & Footer
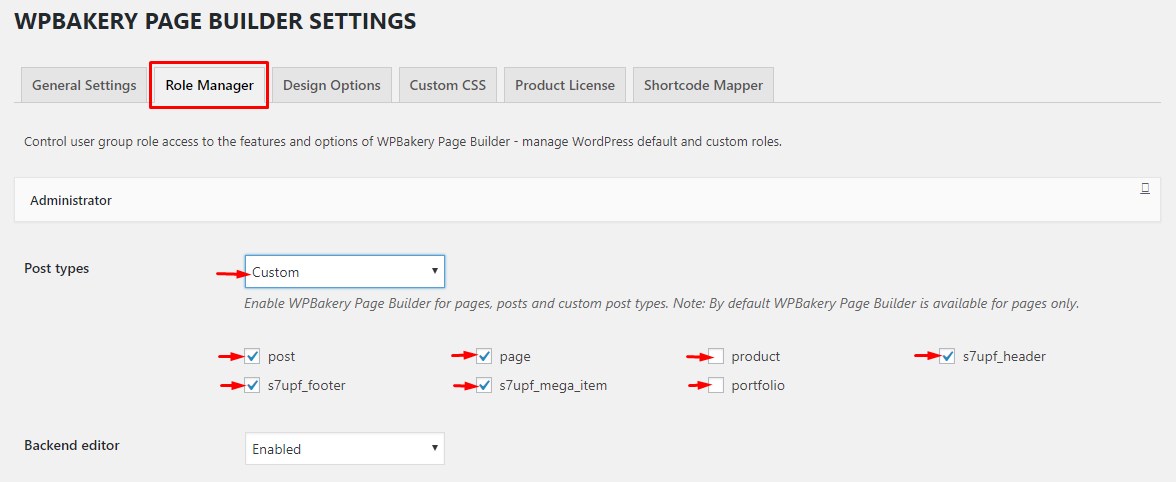
Header & Footer is one of our outstanding features. It allows you to create and edit your web page header/footer content with the page builder. You can easily edit or design your own header/footer for your site with a wide range of customizable features.
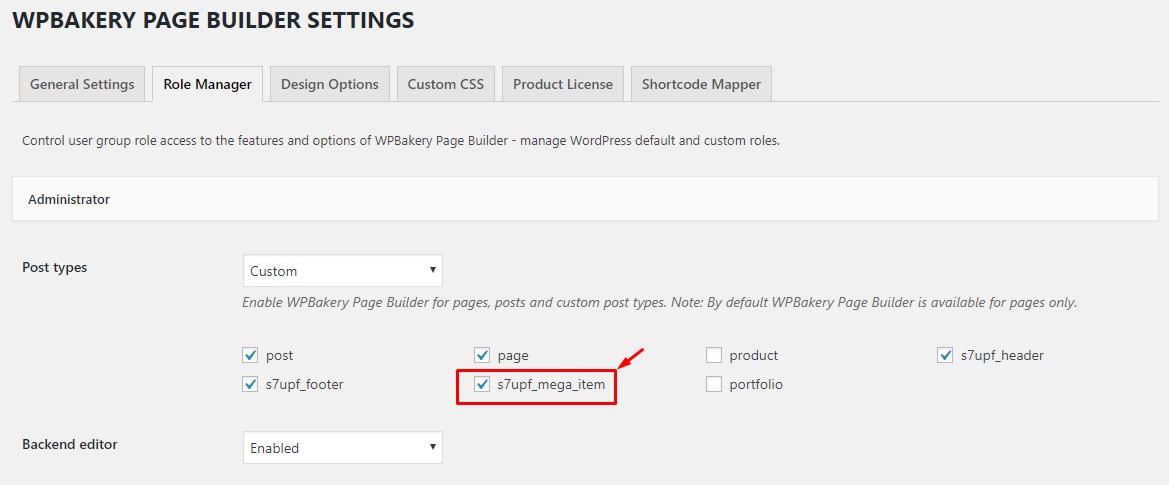
The First, please sure header / footer editing with page builder is active
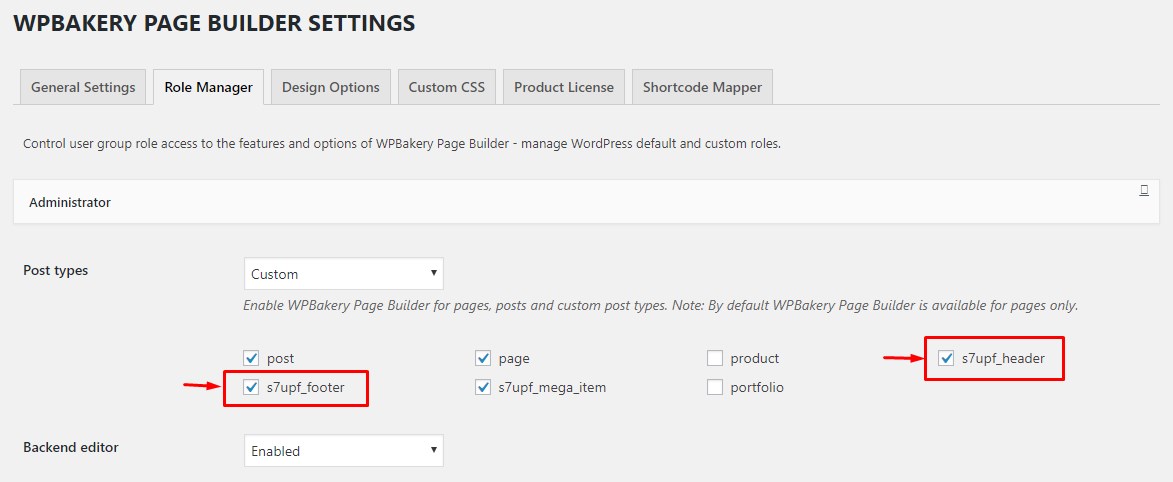
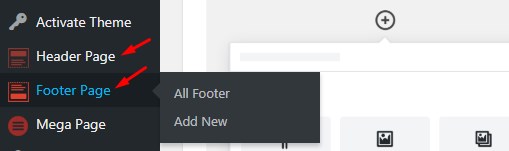
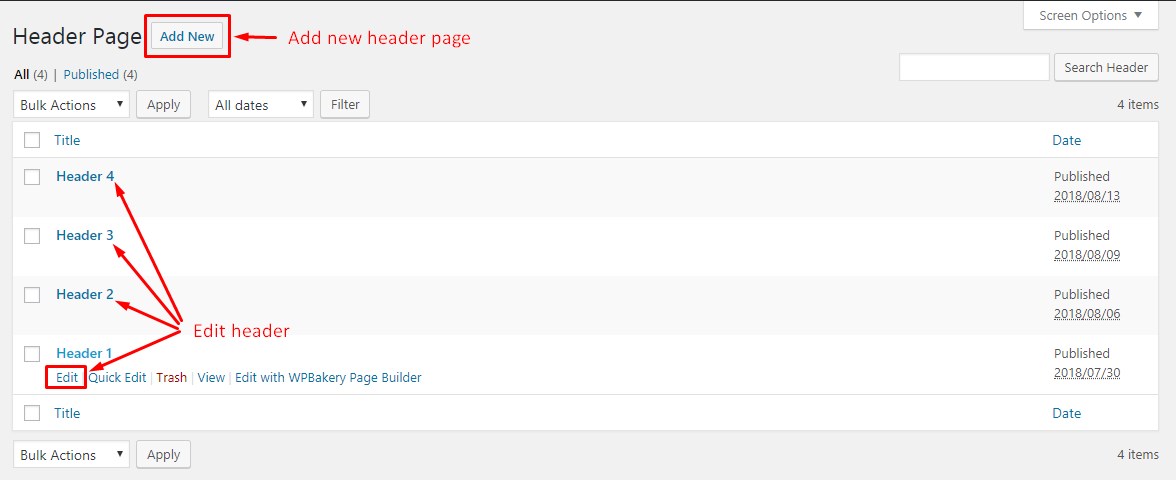
In WordPress Dashboard, You can go to Header Page to edit/create header
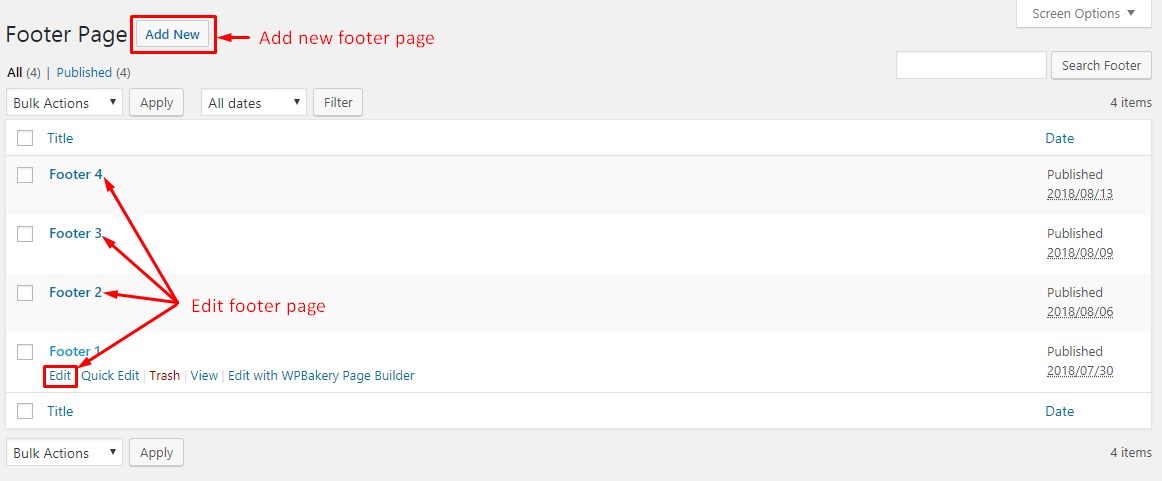
Go to Footer Page to edit/create footer
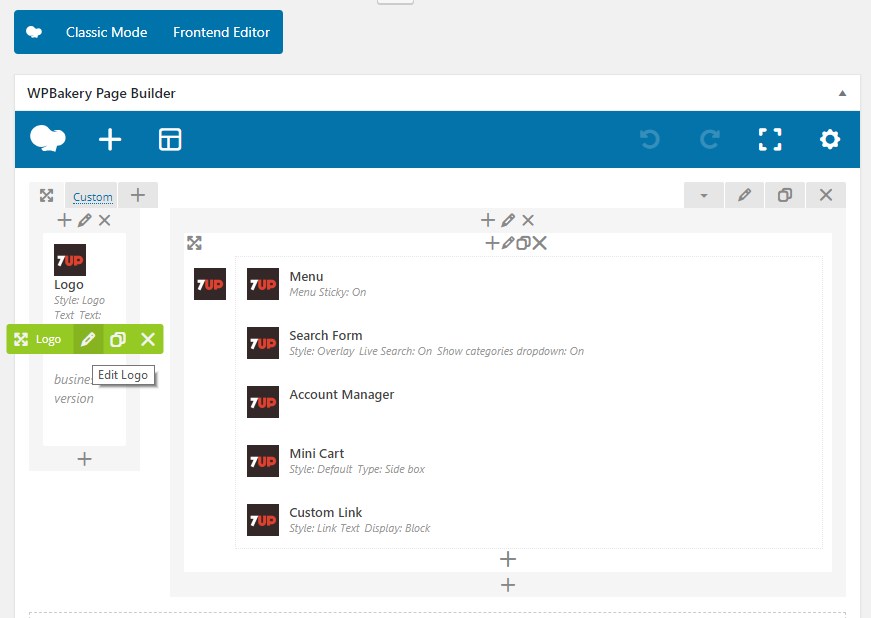
Edit/Create Header Page interface
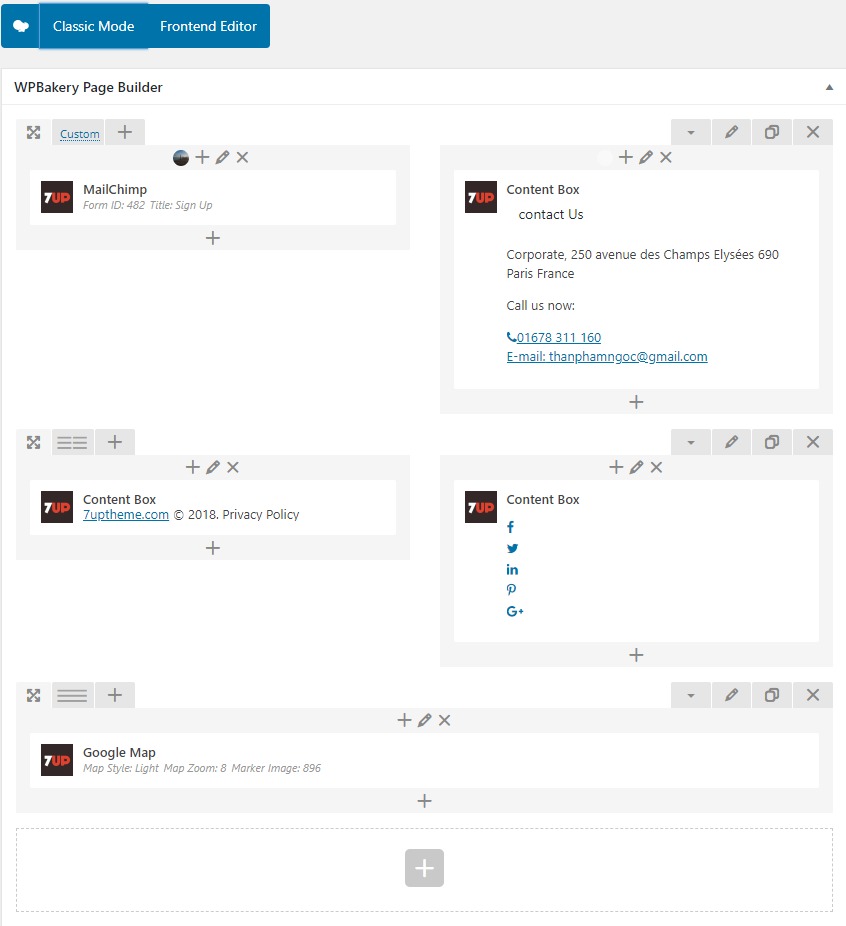
Edit/Create Footer Page interface
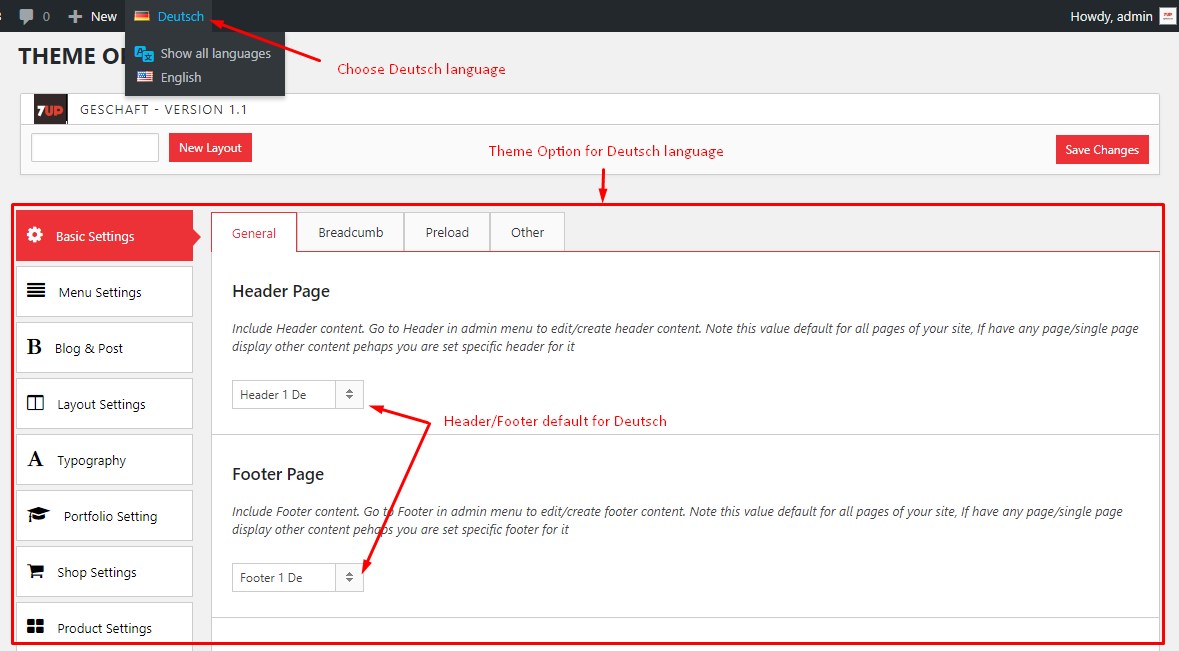
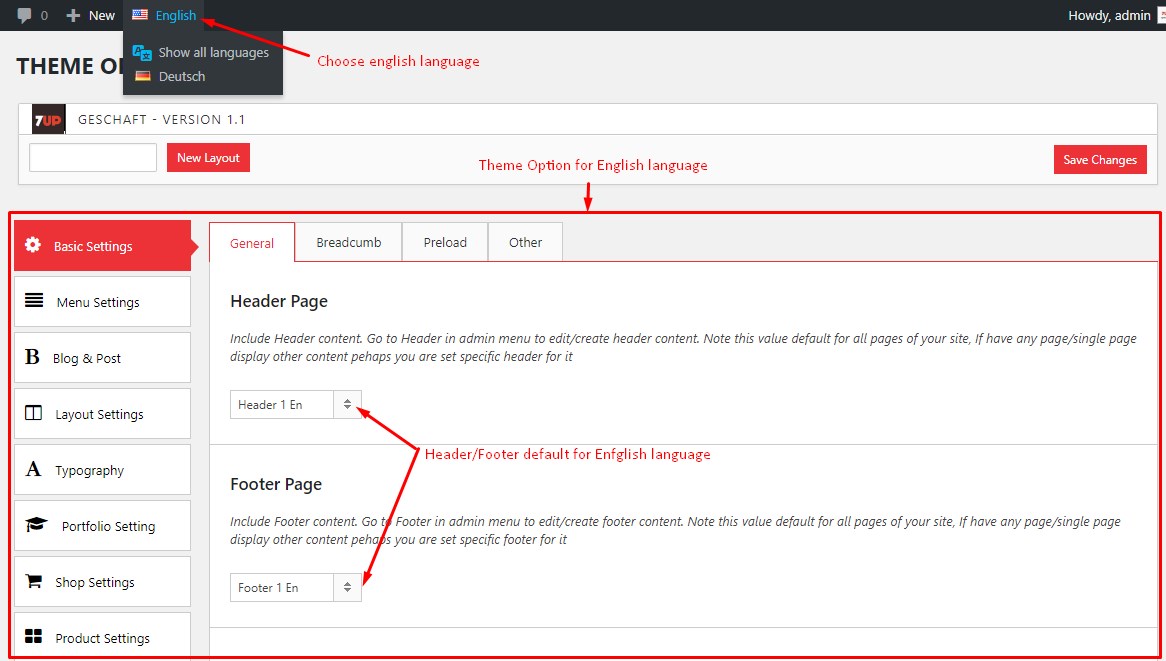
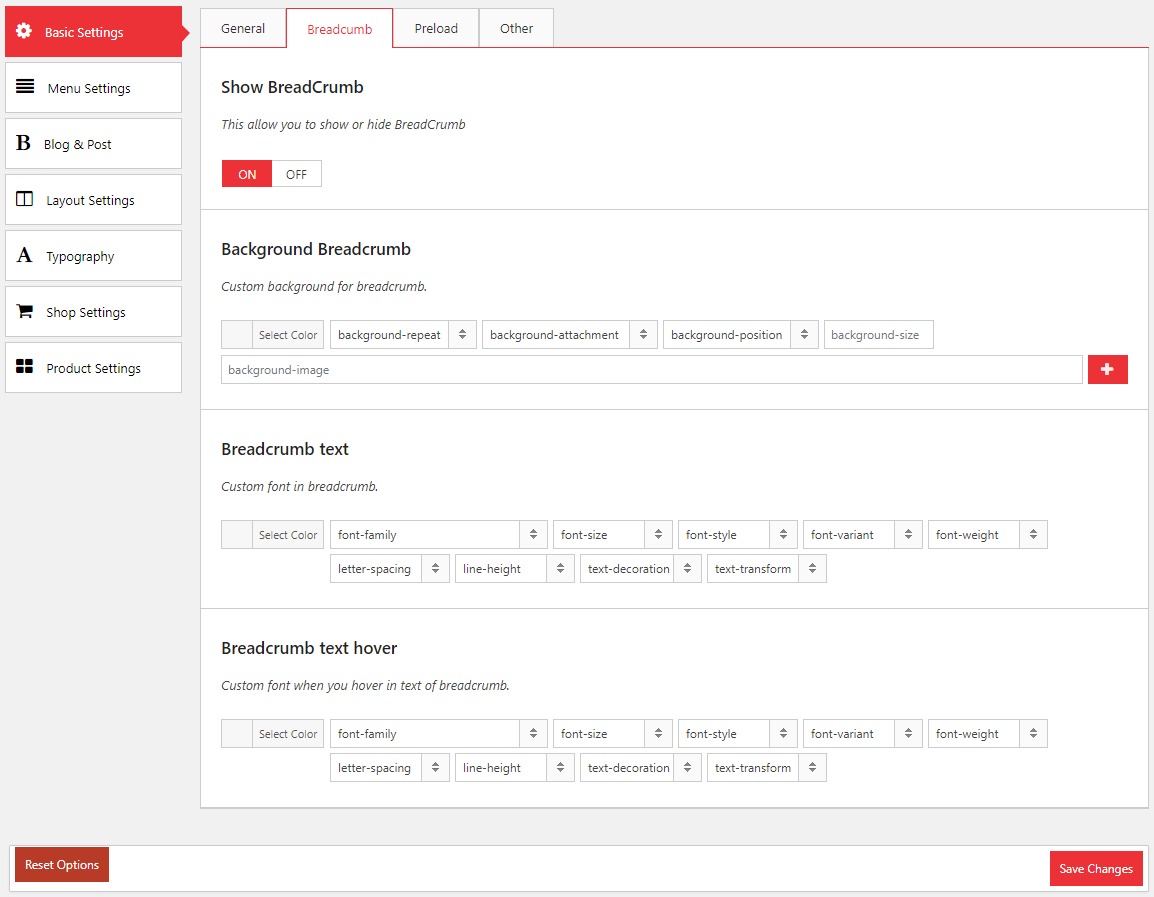
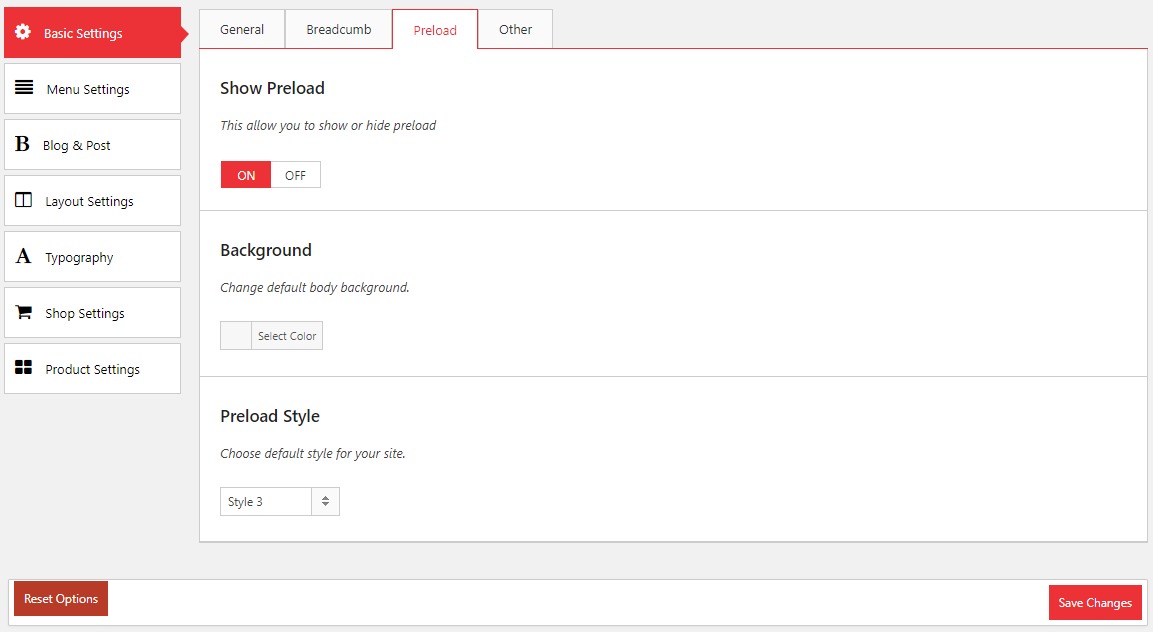
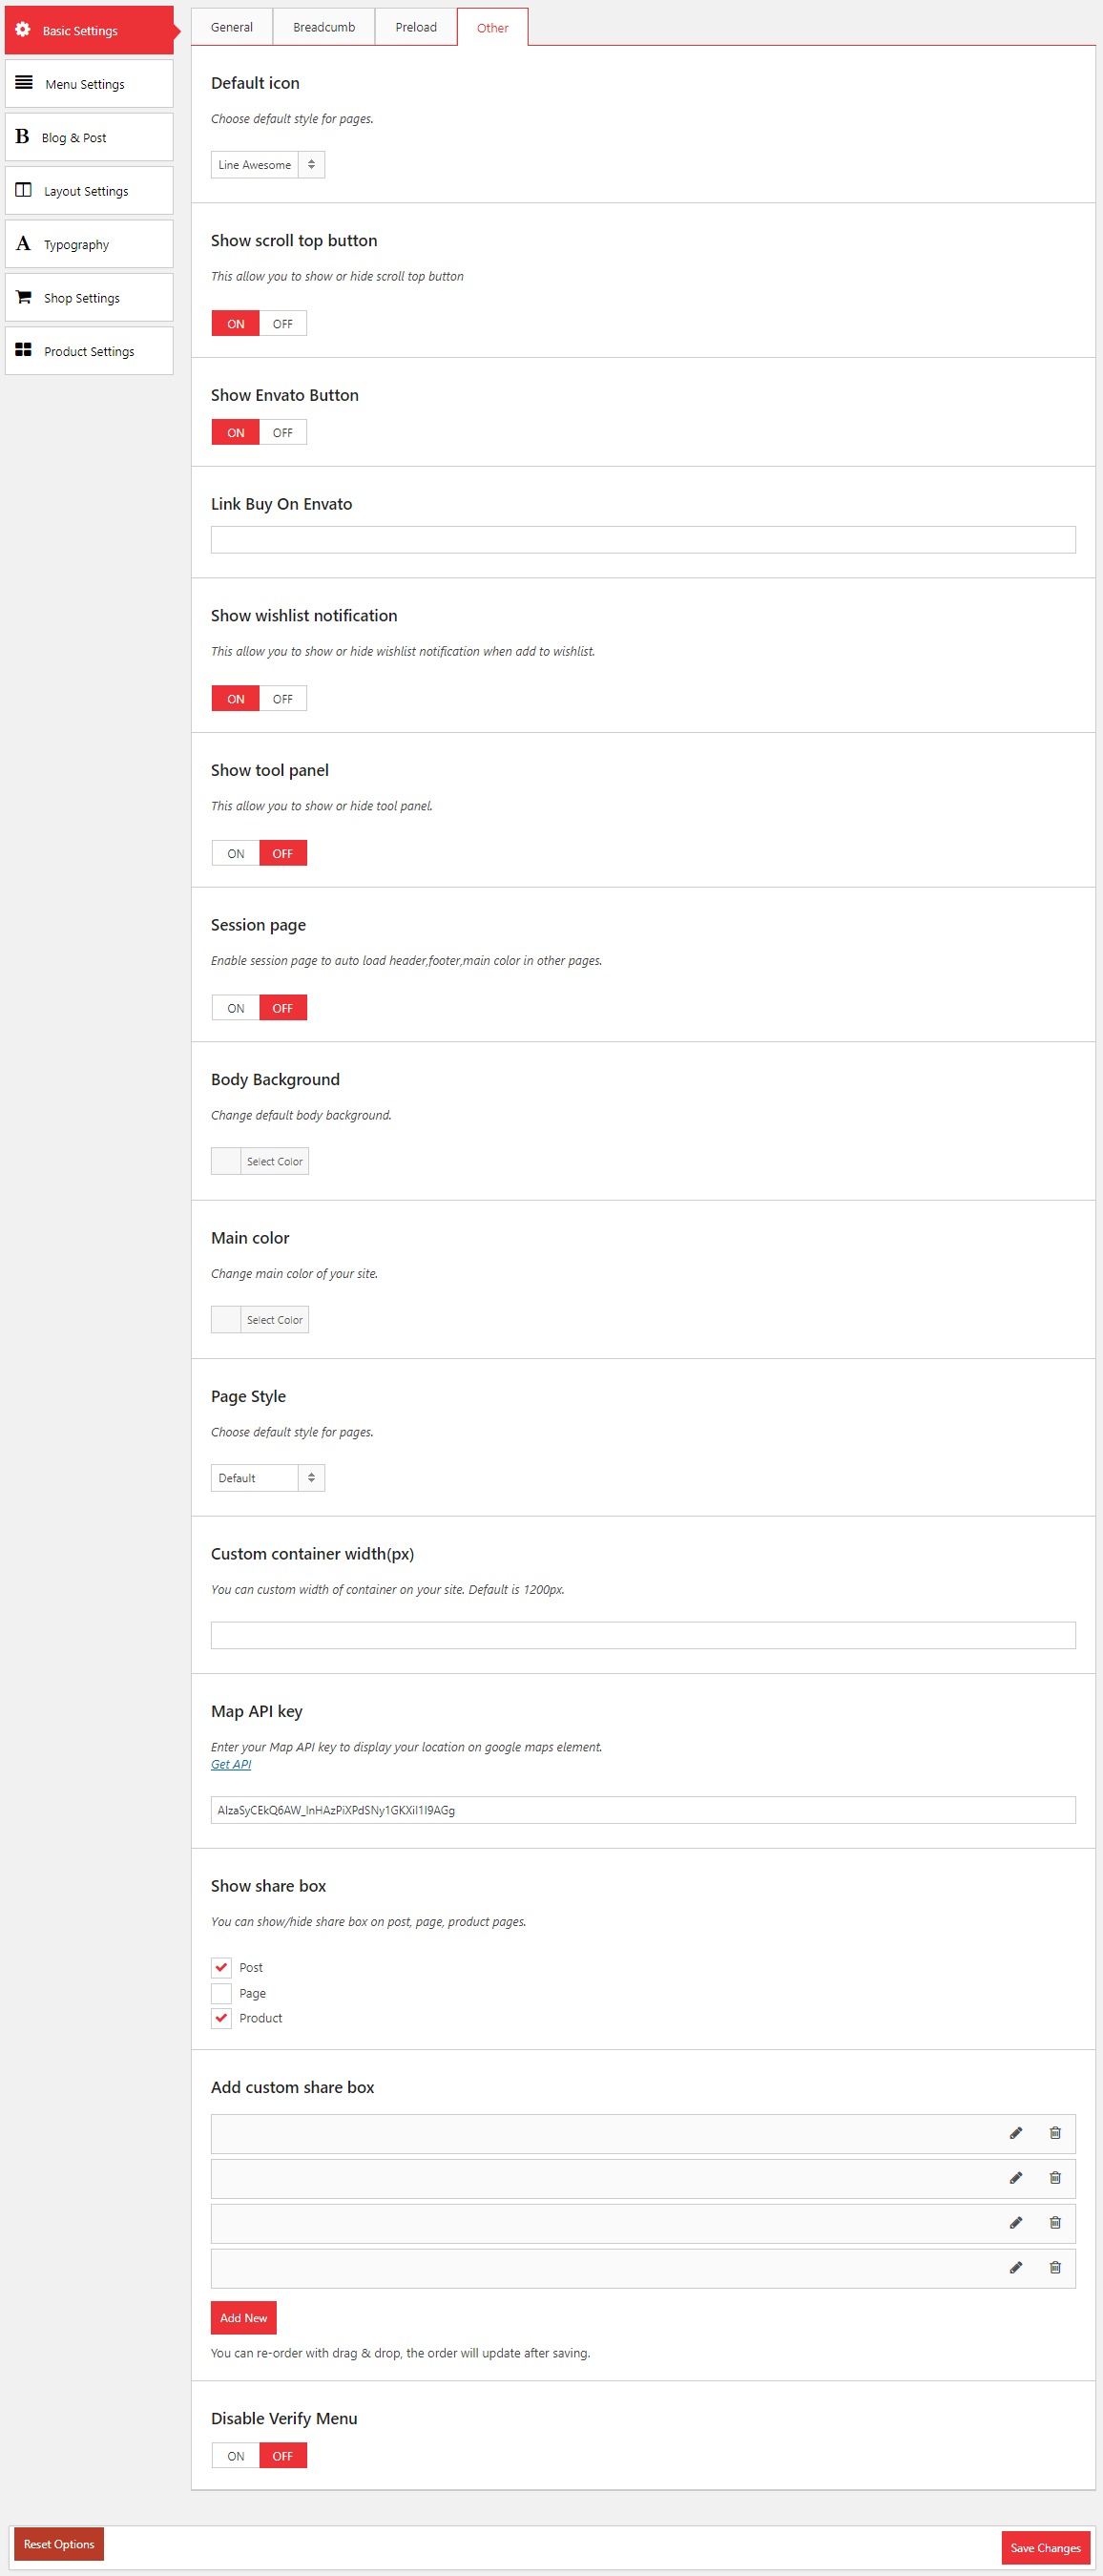
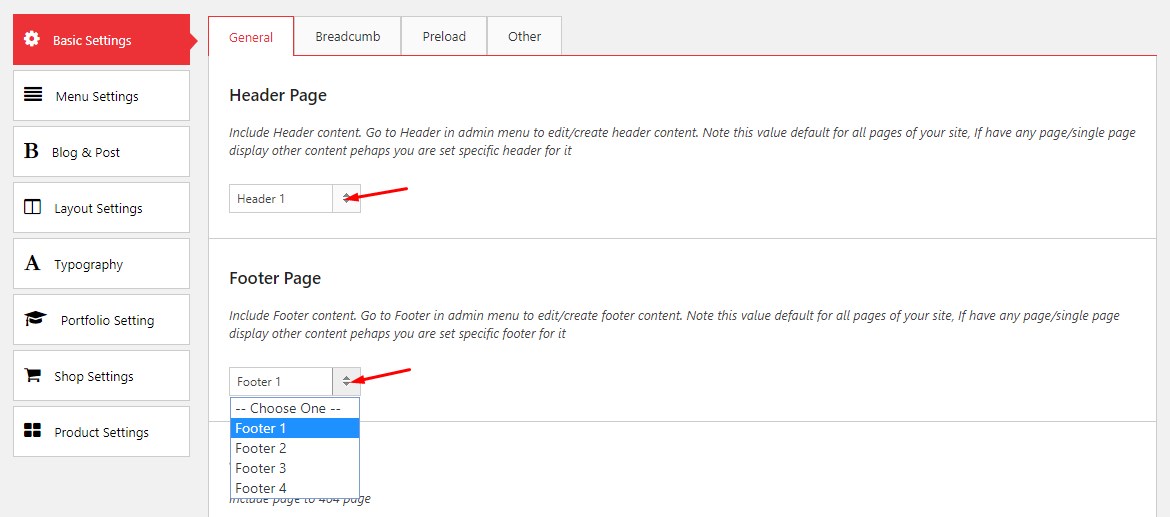
To set Header/Footer default for your site. You can go toTheme Option -> Basic Settings -> General
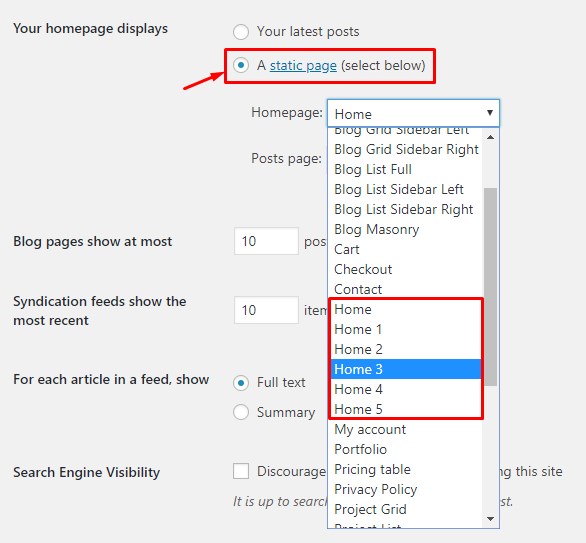
To set Header/Footer for special page(Home page). You can go to edit page area. Find to Page Settings -> General Settings

Video tutorial
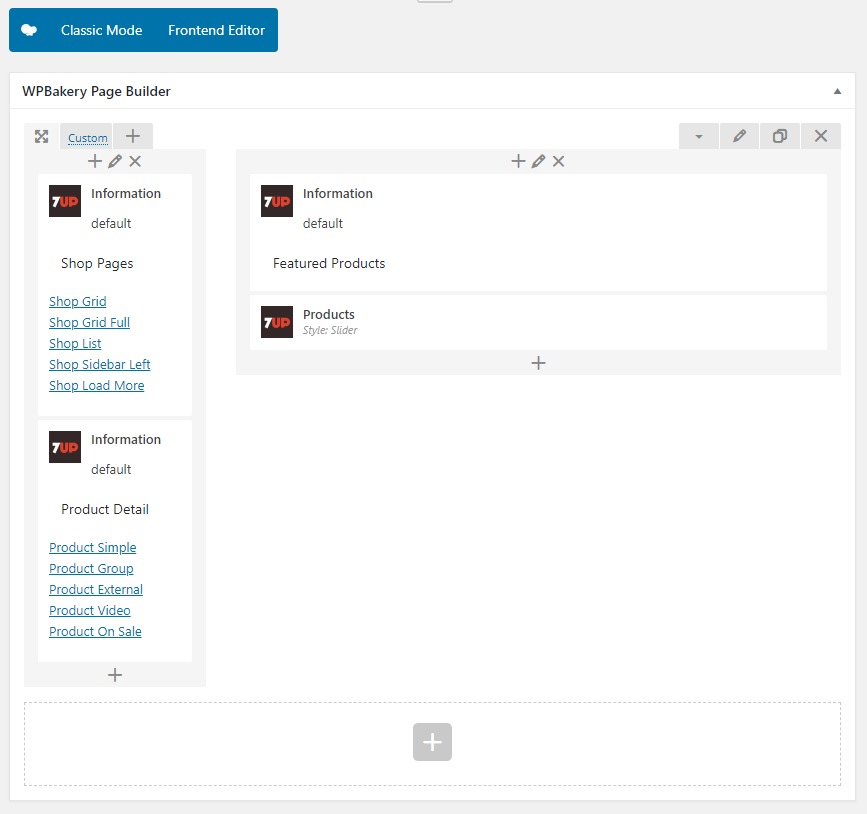
2. Mega Menu
The First, please sure Mega Page editing with page builder is active
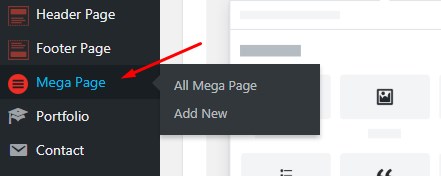
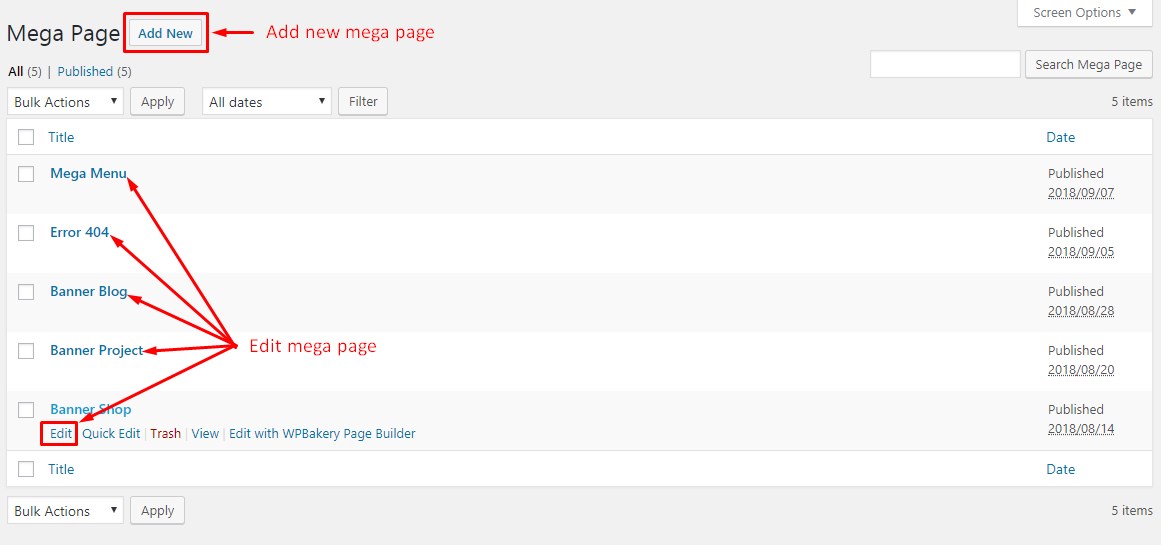
In WordPress Dashboard, You can go to Mega Page to edit/create content of mega menu
This is the editing/create interface of Mega Menu
After you have a Mega Page, the next step is to go to the Menus to configure the display for a mega item.
Step 1. To Dashboard, you can go to Appearance -> Menus
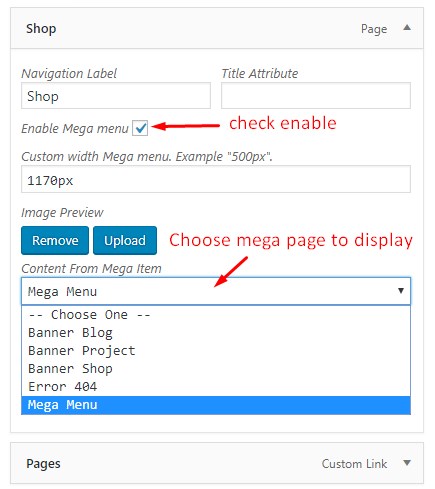
Step 2. Select menu item to display Mega Menu.
1. Check Enable Mega Menu
2. Select the Mega Menu to display
3. Save changes to apply
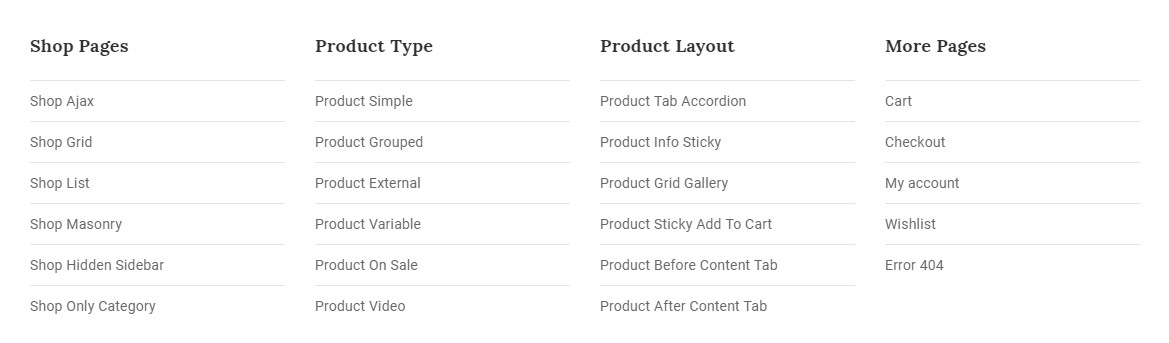
Step 3. This is the front end display interface

Video tutorial
3. Elements (Shortcodes)
List 7up's elements.
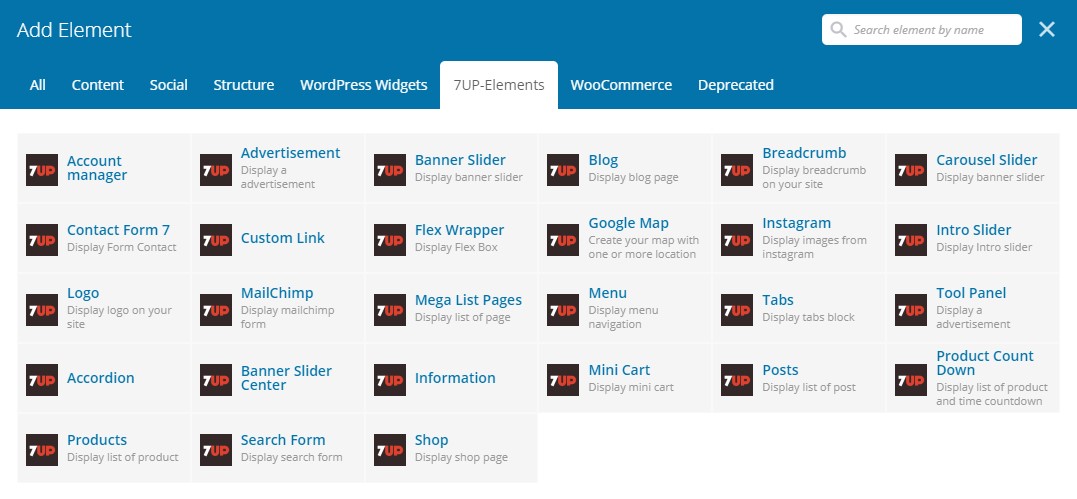
Below is the interface of each element
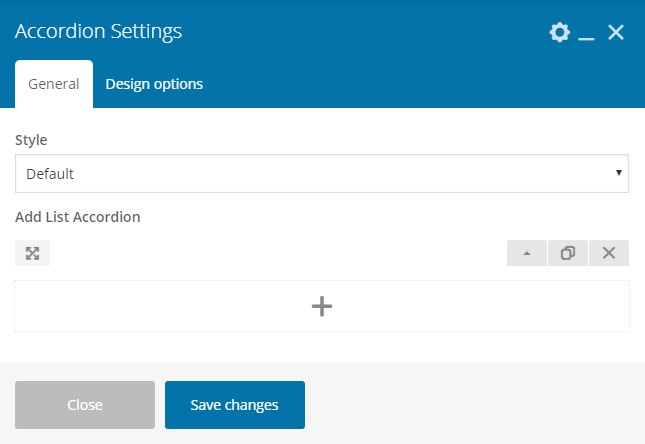
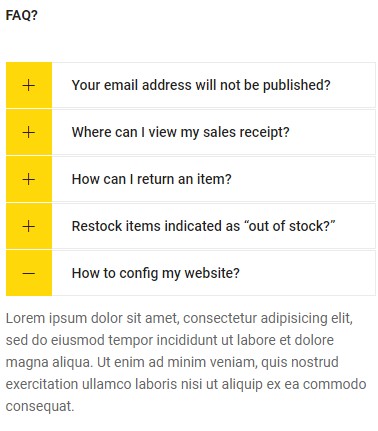
3.1. Accordion
Feature: Used to display accordion.
Edit interface
Front-end views
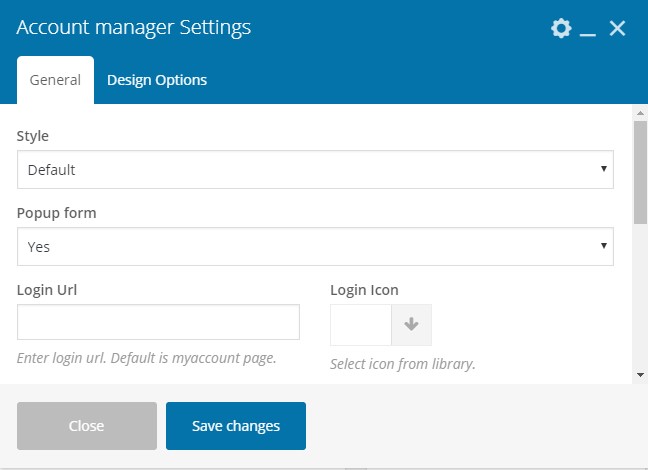
3.1. Account Manager
Feature: Used to display the list of paths that users logged in to are allowed to access. Displayed as a dropdown.
Edit interface
Front-end views
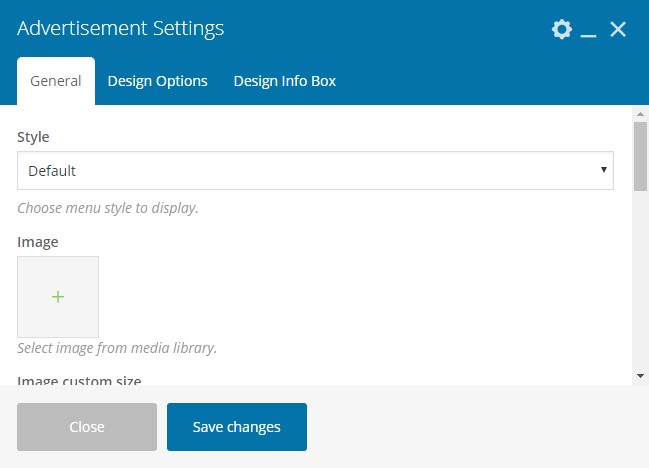
3.2. Advertisement
Feature: Used to display ads, banner images with text content.
Edit interface
Front-end views
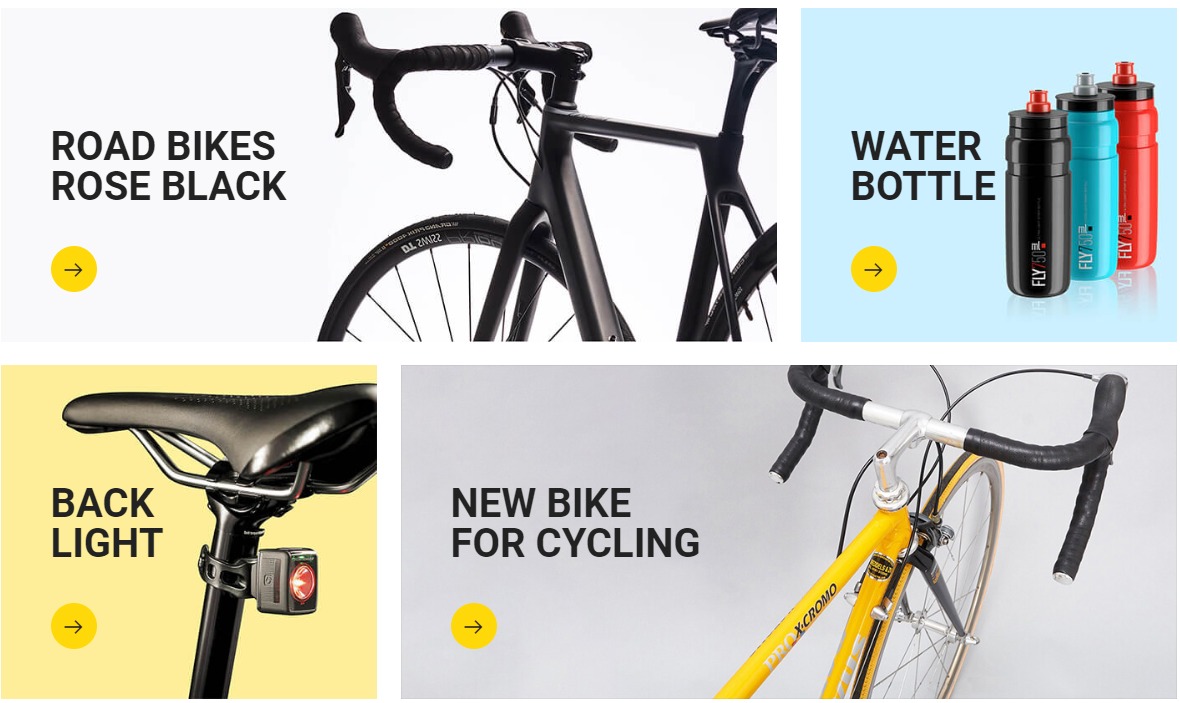
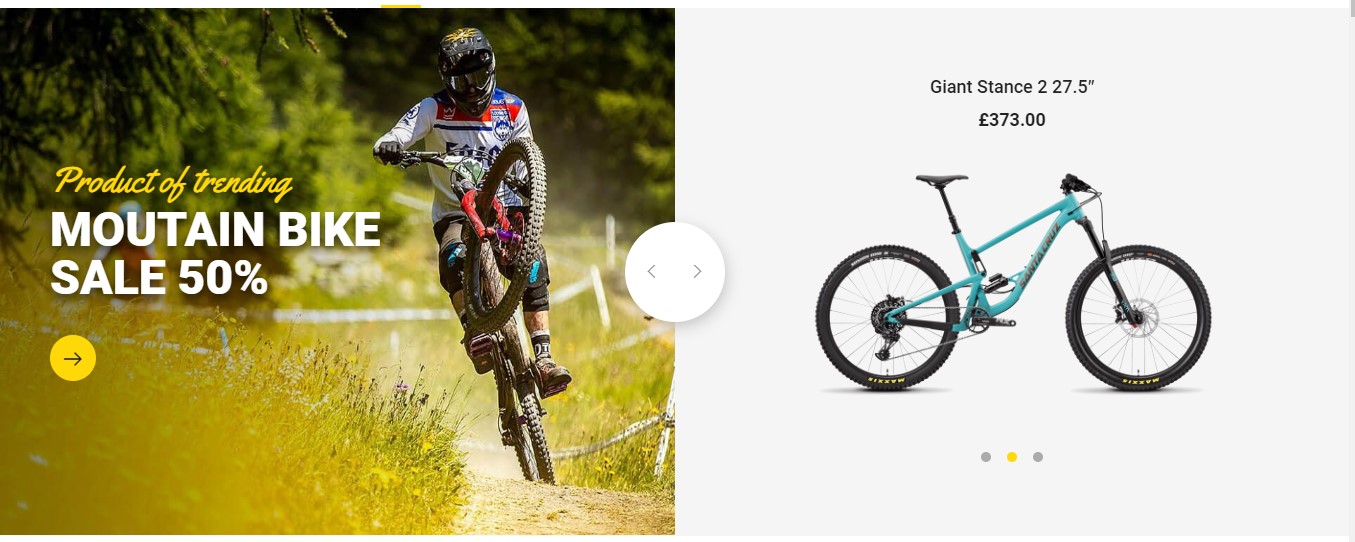
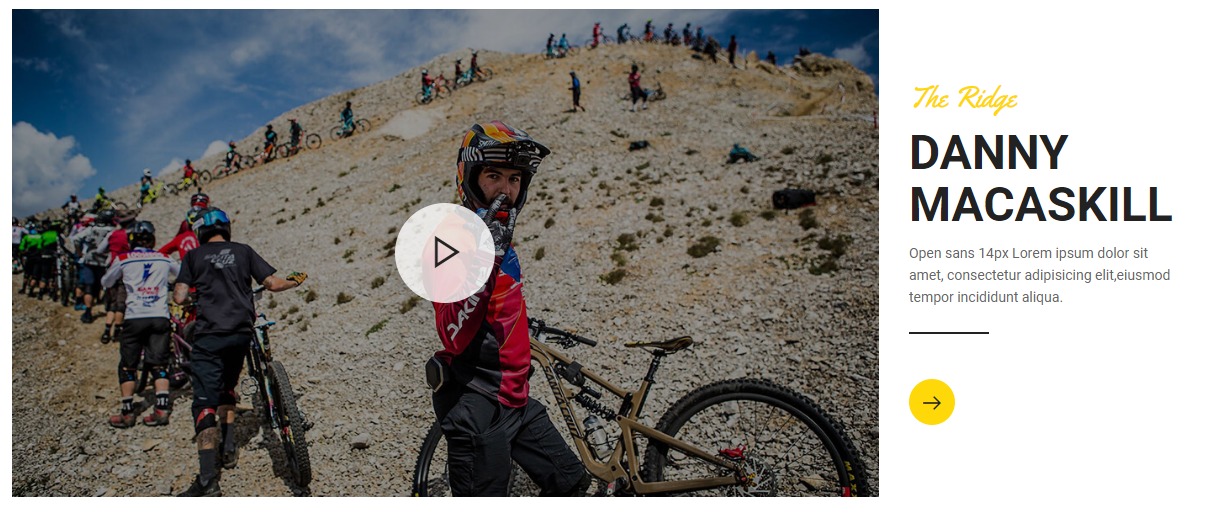
3.3. Banner Slider
Feature: Used to display banner slider.
Edit interface
Front-end views
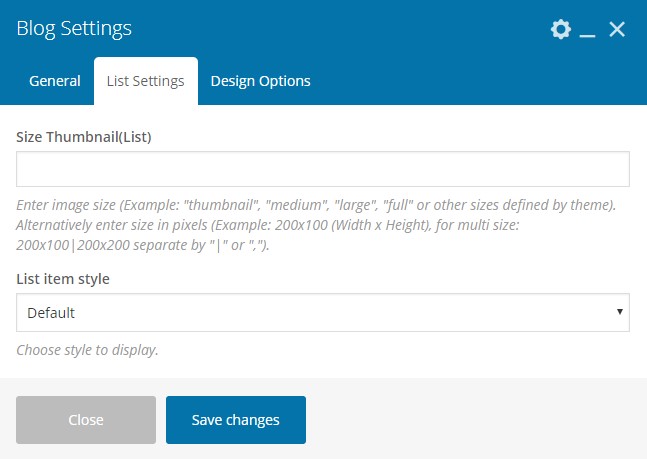
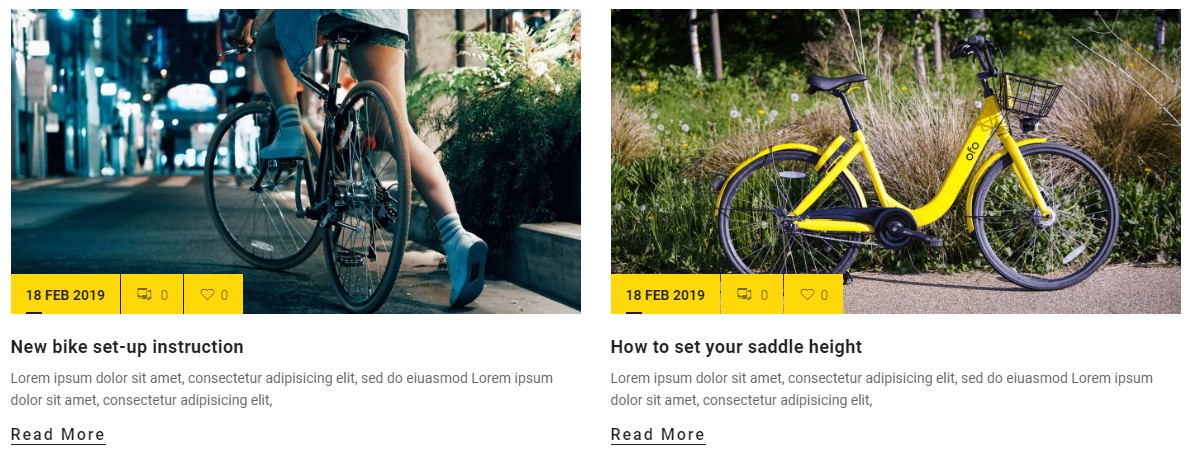
3.4. Blog
Feature: Used to display blog page. You can show grid, list or both.
Edit interface
Front-end views
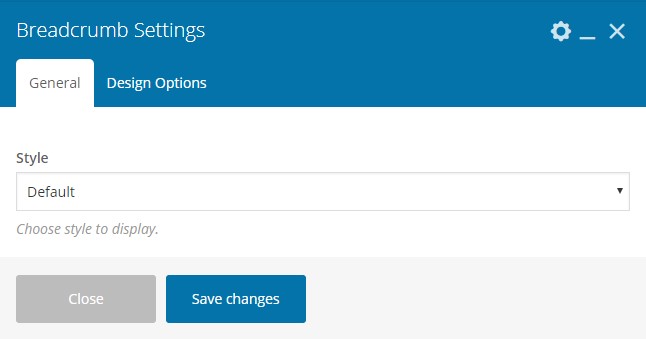
3.5. Breadcrumb
Feature: Used to display breadcrumb any where in page builder.
Edit interface
Front-end views
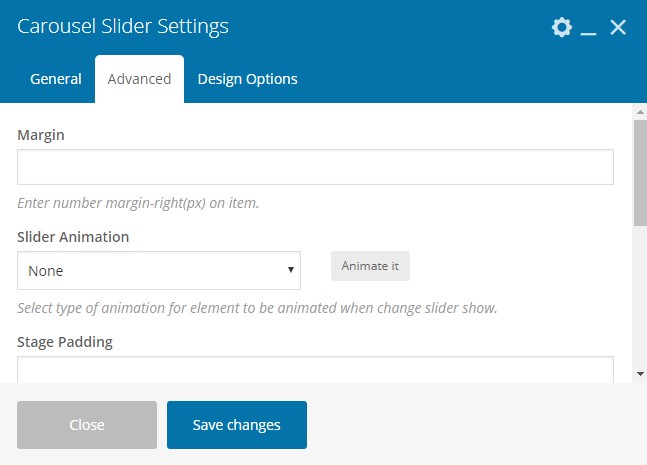
3.6. Carousel Slider
Feature: Used to display carousel slider with any content.
Edit interface
Front-end views
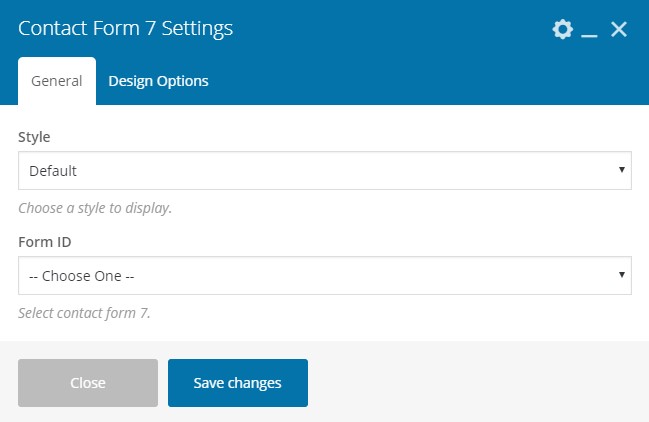
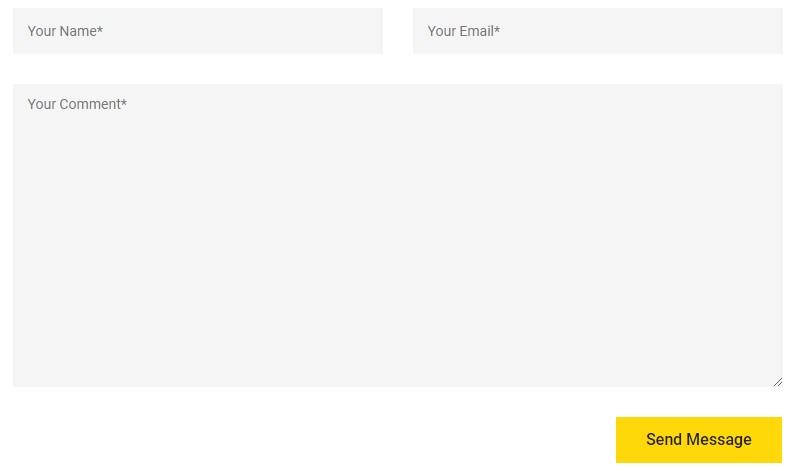
3.7. Contact Form 7
Feature: Used to display form contact.
Edit interface
Front-end views
3.8. Custom Link
Feature: Used to custom link.
Edit interface
3.9. Flex Wrapper
Feature: Used to display flex box.
Edit interface
Front-end views
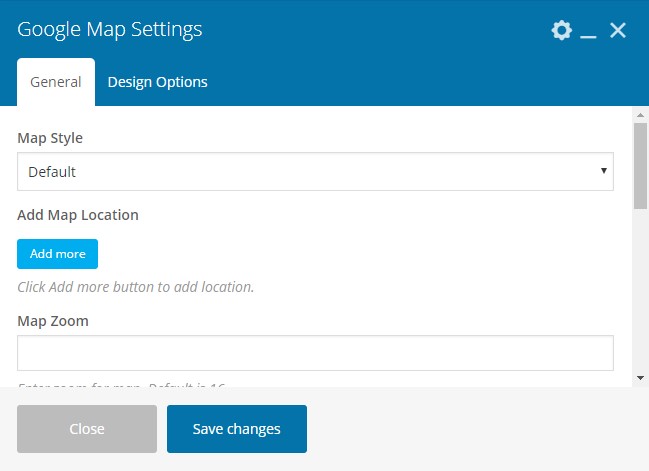
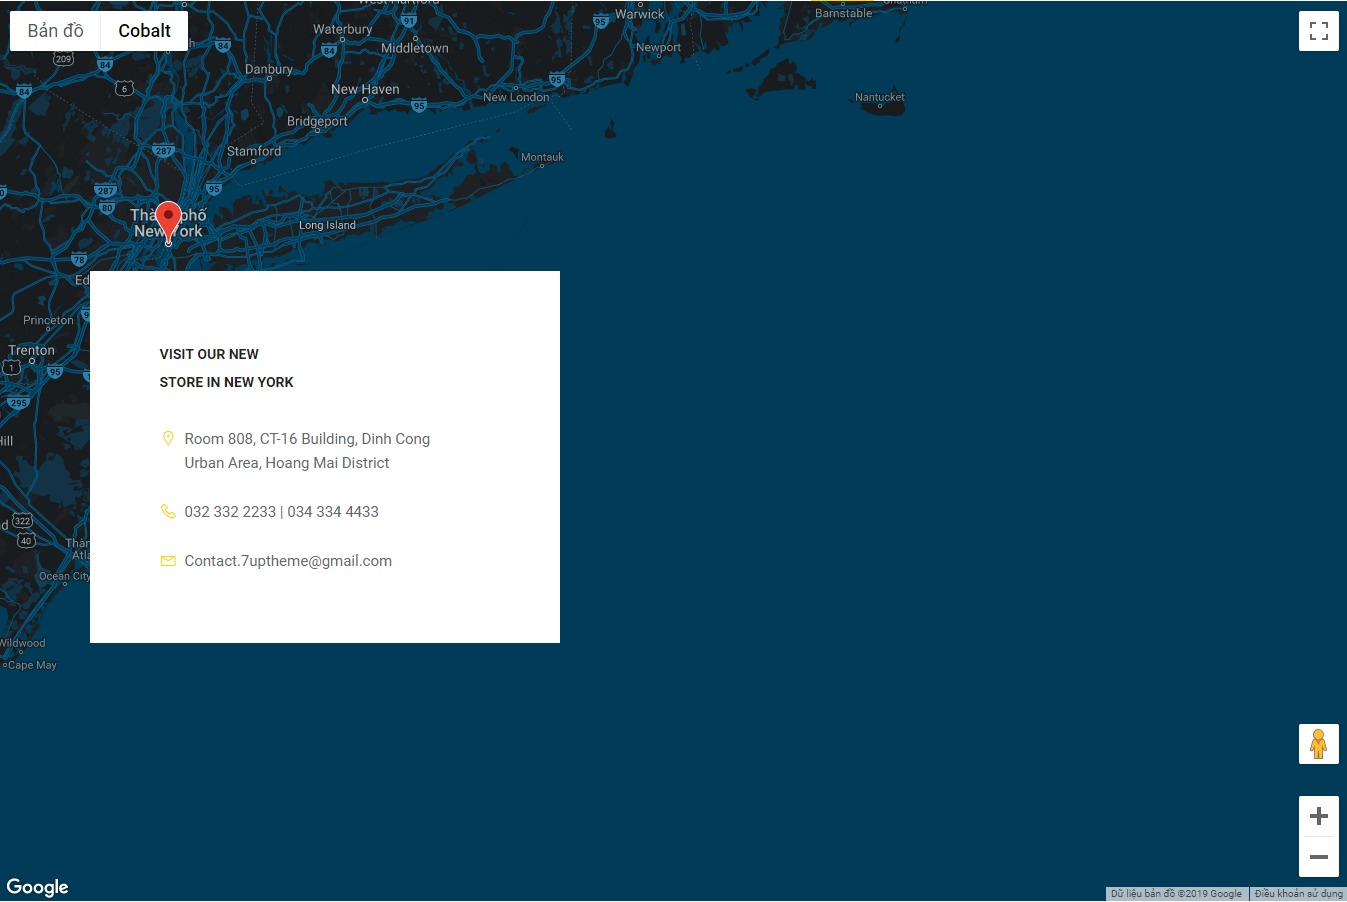
3.10. Google Map
Feature: Used to display google map with custom market, information. You also create map with multi location.
Edit interface
Front-end views
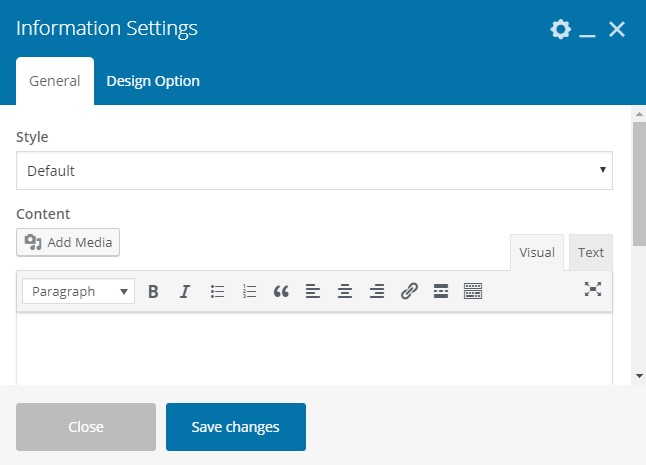
3.11. Information
Feature: Used to display information.
Edit interface
Front-end views
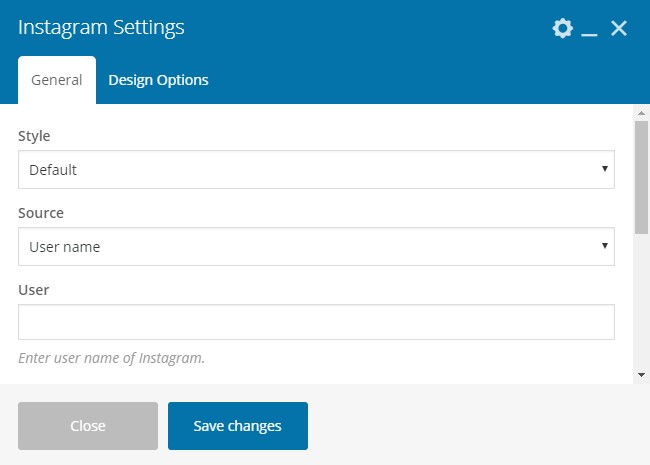
3.11. Instagram
Feature: Used to display images from your instagram.
Edit interface
Front-end views
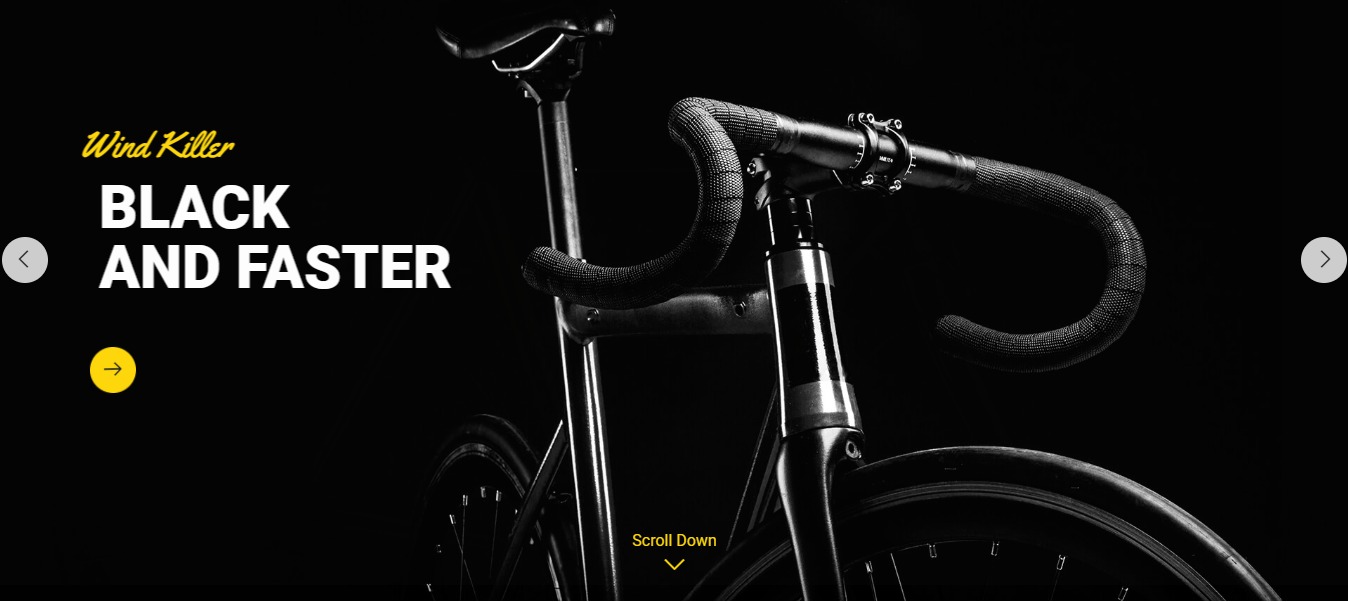
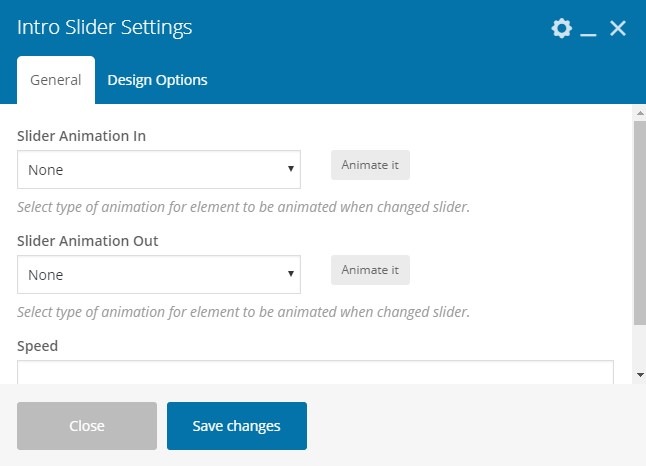
3.11. Intro Slider
Feature: Used to display intro slider.
Edit interface
Front-end views
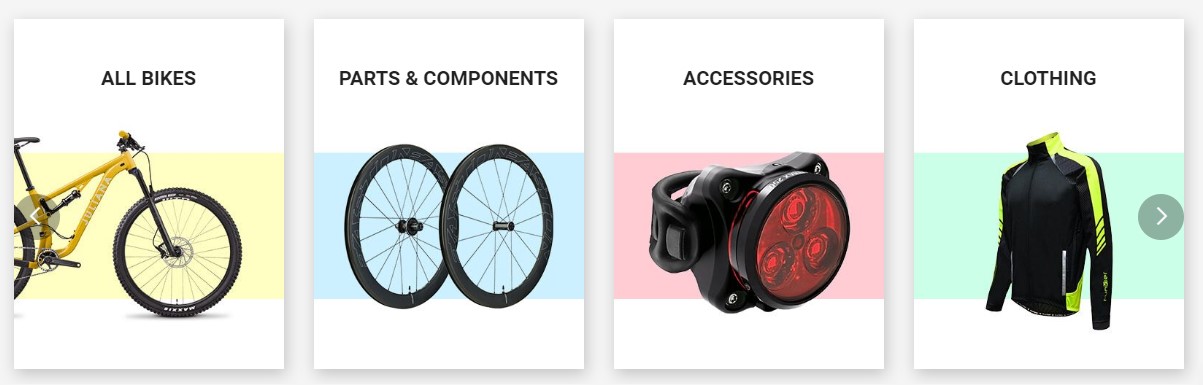
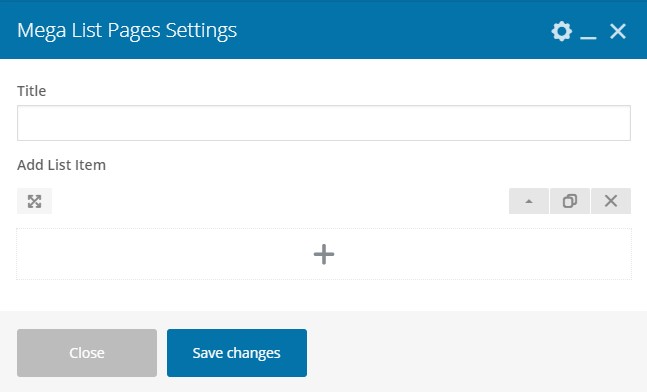
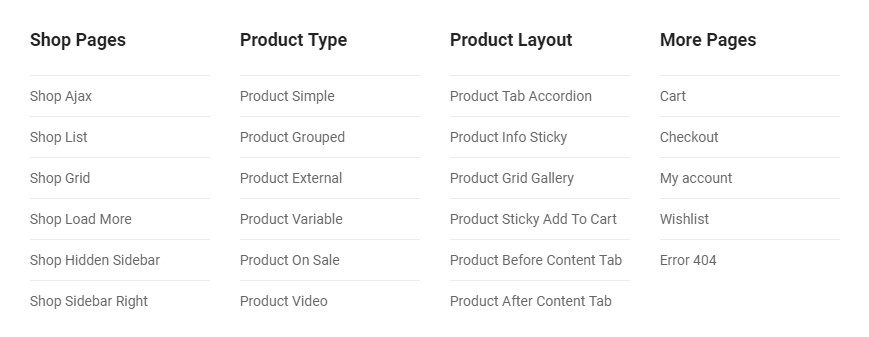
3.14. Mega List Pages
Feature: Used to display list page.
Edit interface
Front-end views
3.12. Logo
Feature: Used to display logo of your site.
Edit interface
Front-end views
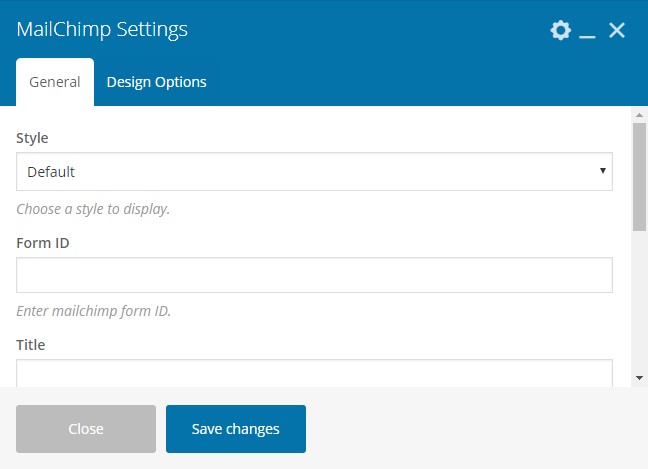
3.13. Mailchimp
Feature: Used to display mailchimp form with MailChimp for WP plugin.
Edit interface
Front-end views
3.15. Menu
Feature: Used to display menu in header or any where in page builder.
Edit interface
Front-end views
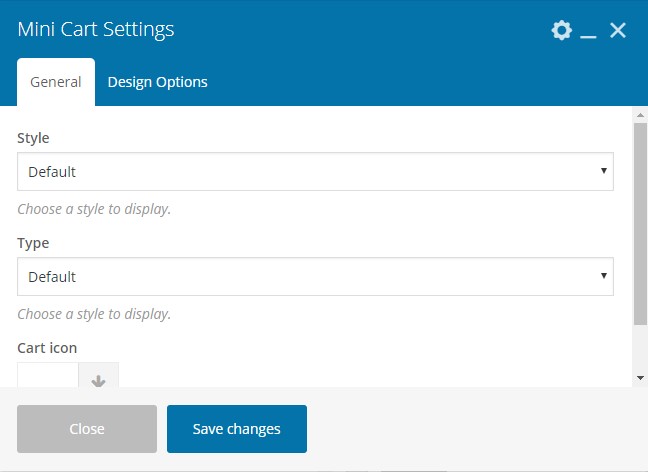
3.19. Mini Cart
Feature: Used to display mini cart any where in your page builder.
Edit interface
Front-end views
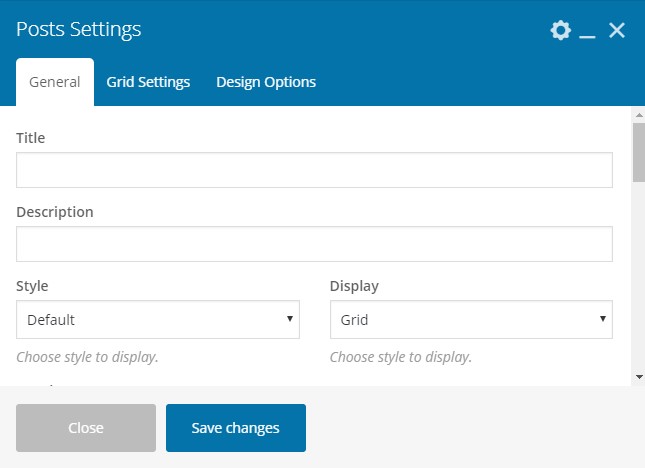
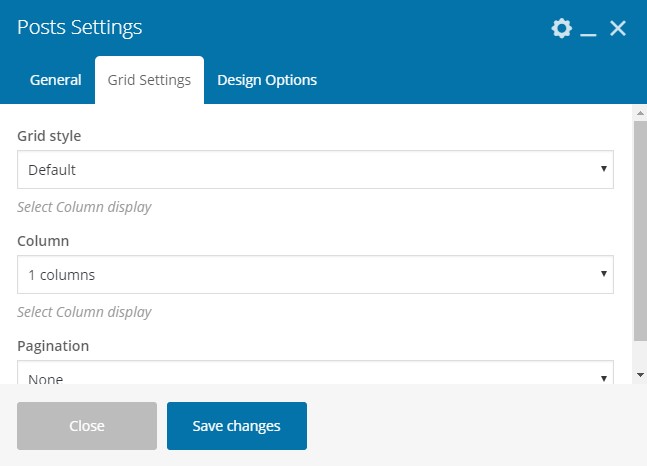
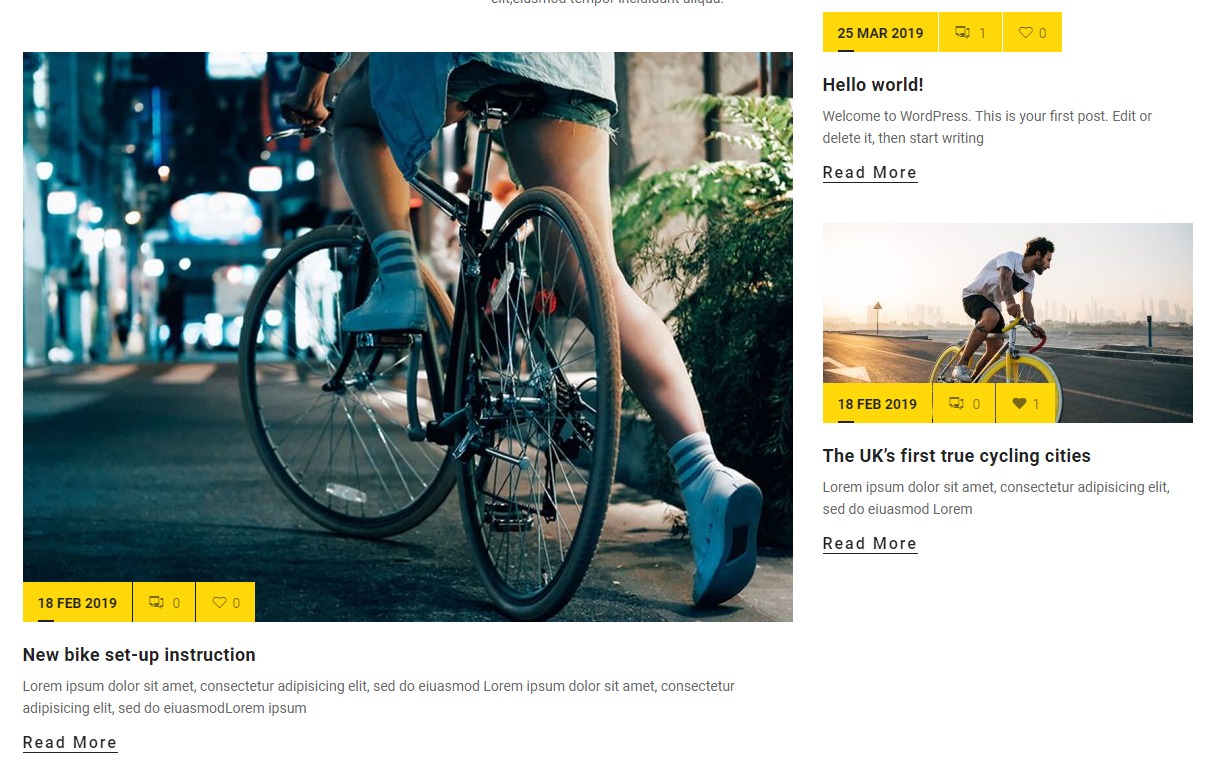
3.20. Posts
Feature: Used to display one more posts with many styles defined (grid, slider). Allows customization of column number, item slider, row number, animation thumbnail, pagination, loadmore, masonry ....
Edit interface
Front-end views
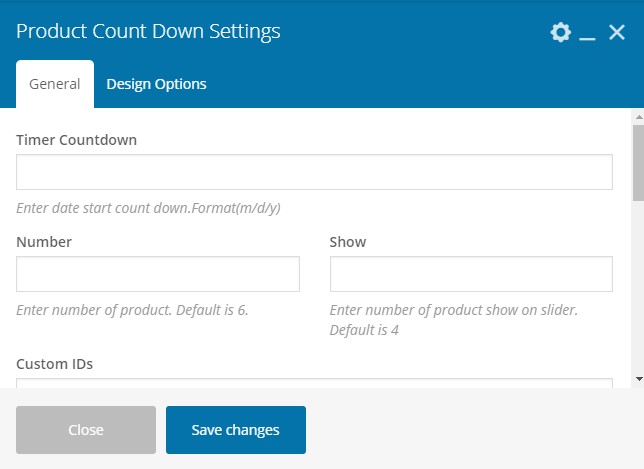
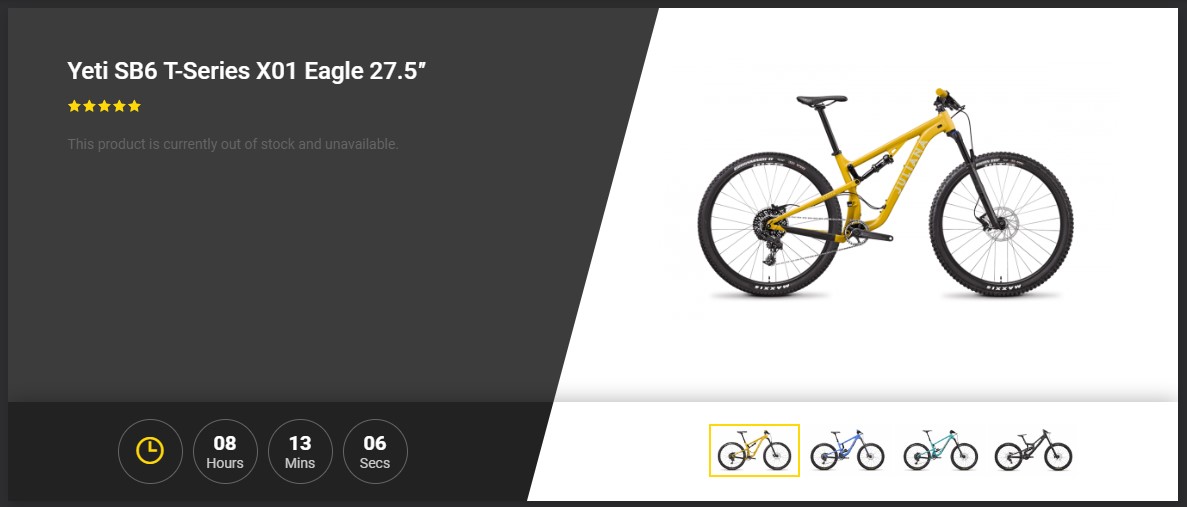
3.16. Product Countdown
Feature: Used to display product countdown.
Edit interface
Front-end views
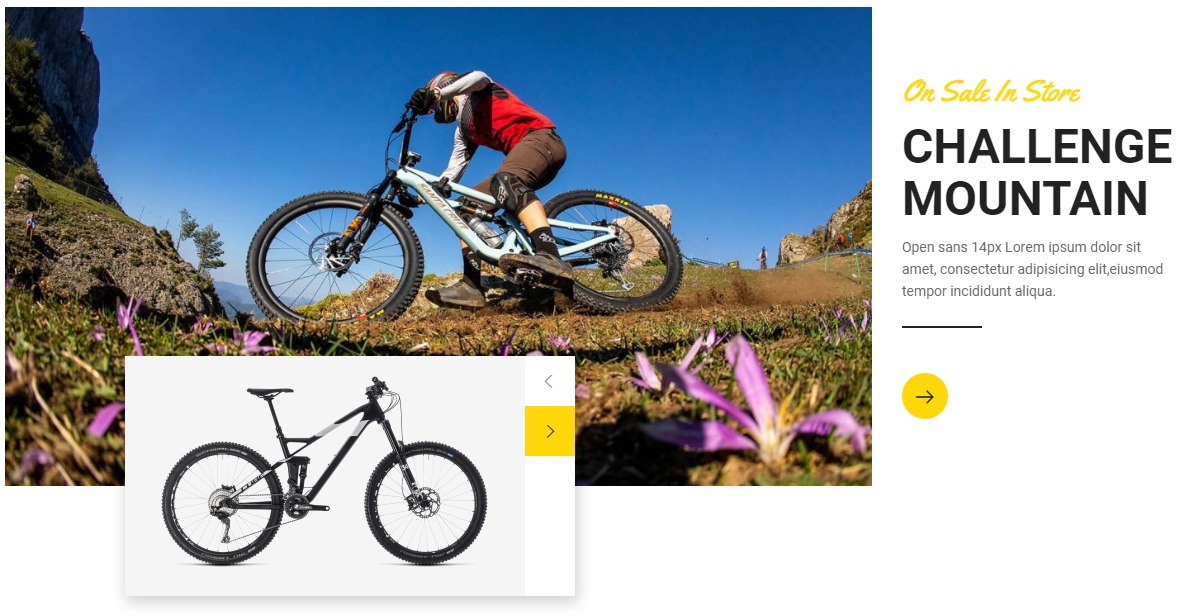
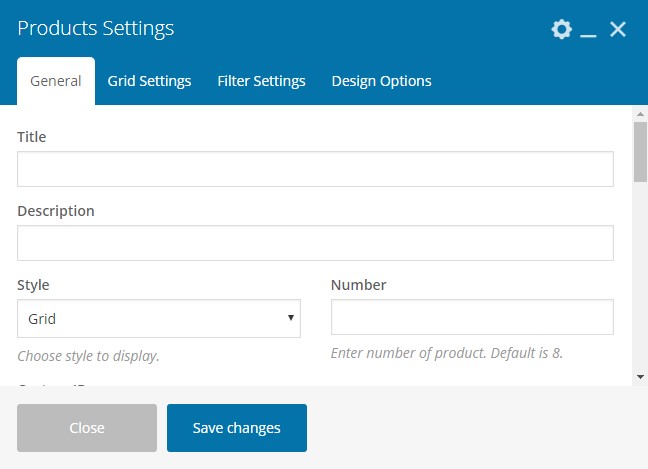
3.21. Products
Feature: Used to display one more product with many styles defined (grid, slider). Allows customization of column number, item slider, row number, animation thumbnail, pagination, loadmore, masonry ....
Edit interface
Front-end views
3.22. Search Form
Feature: Used to display search form. You can custom search for post,product or all of your post type with categories list. Live search feature already in this element.
Edit interface
Front-end views
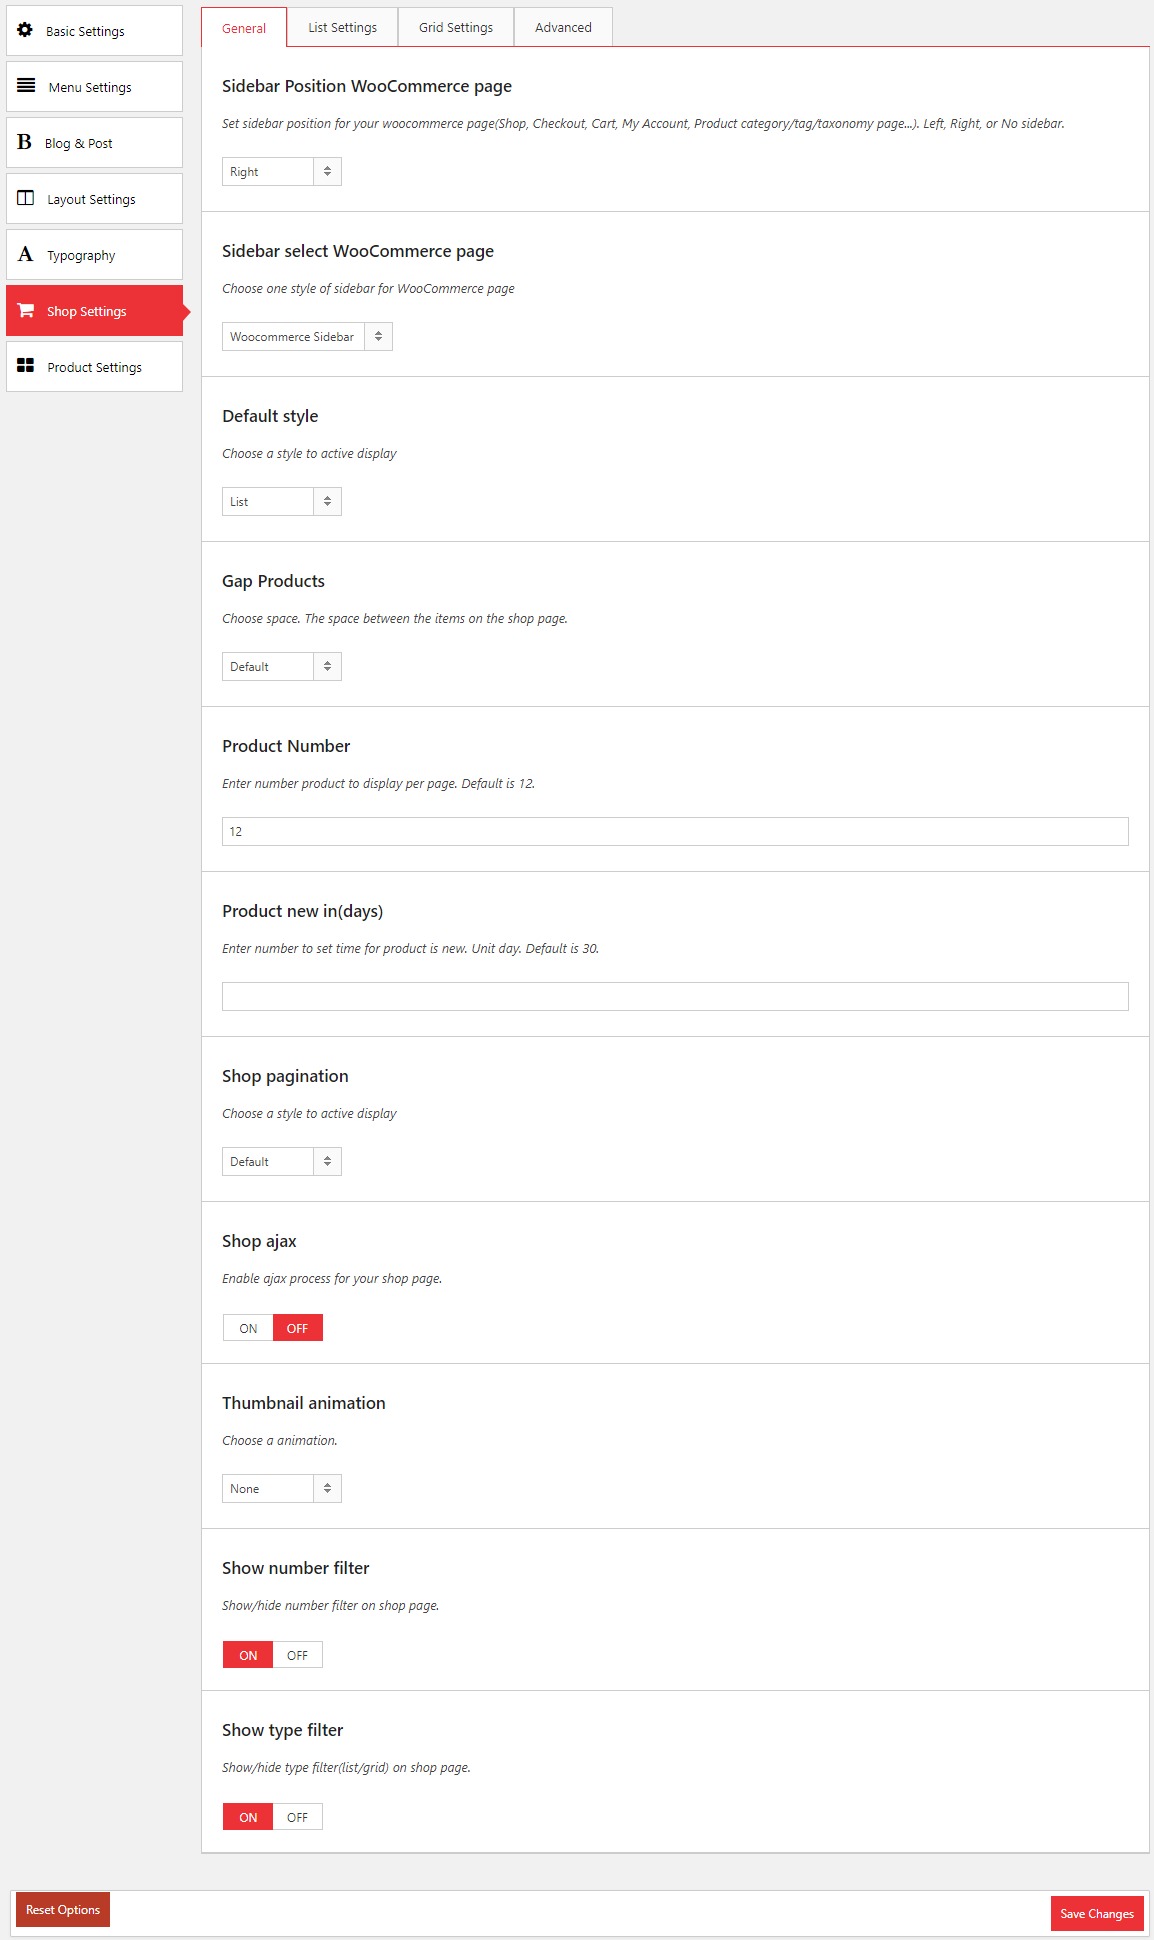
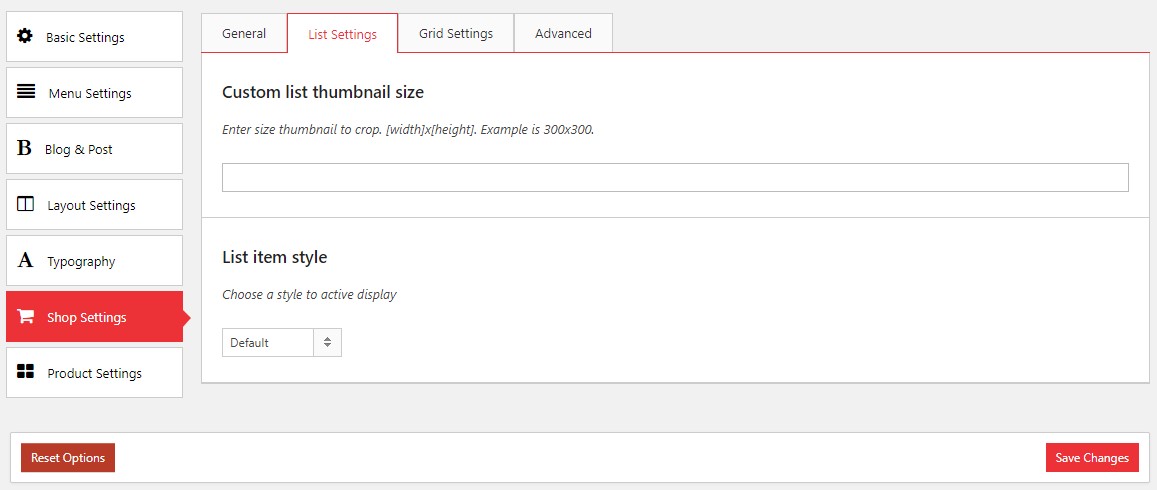
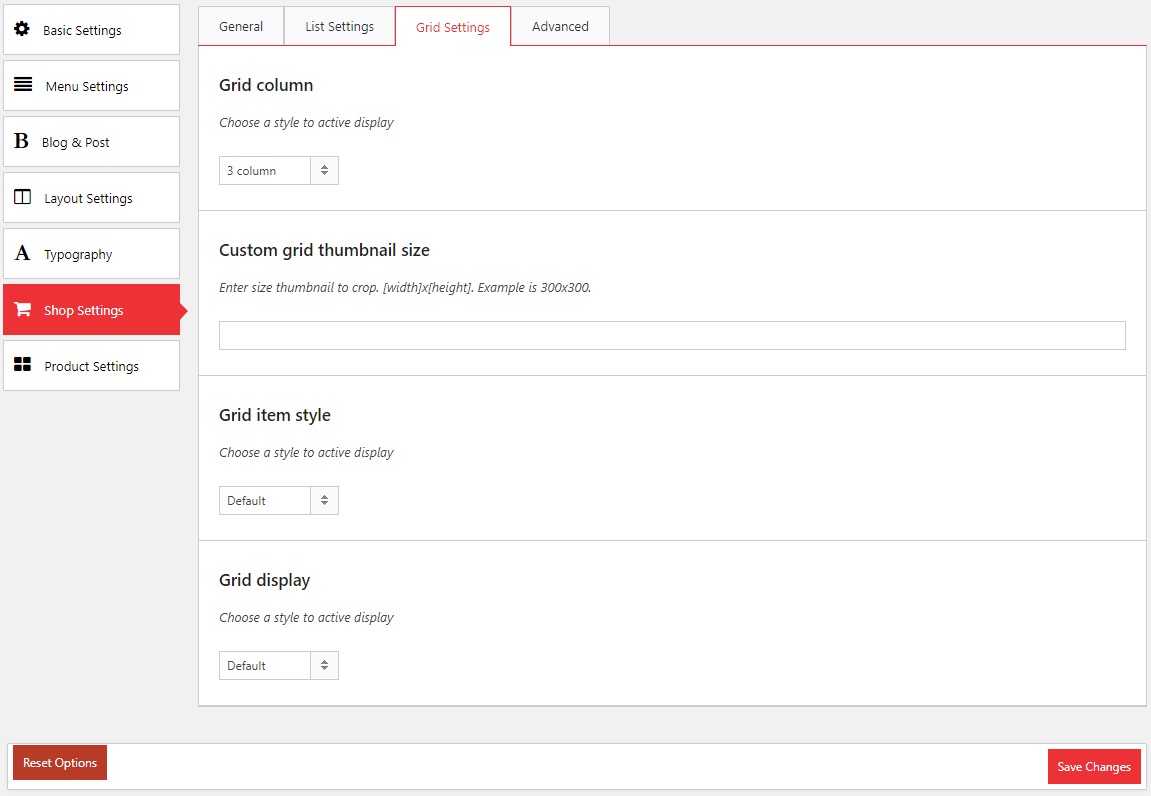
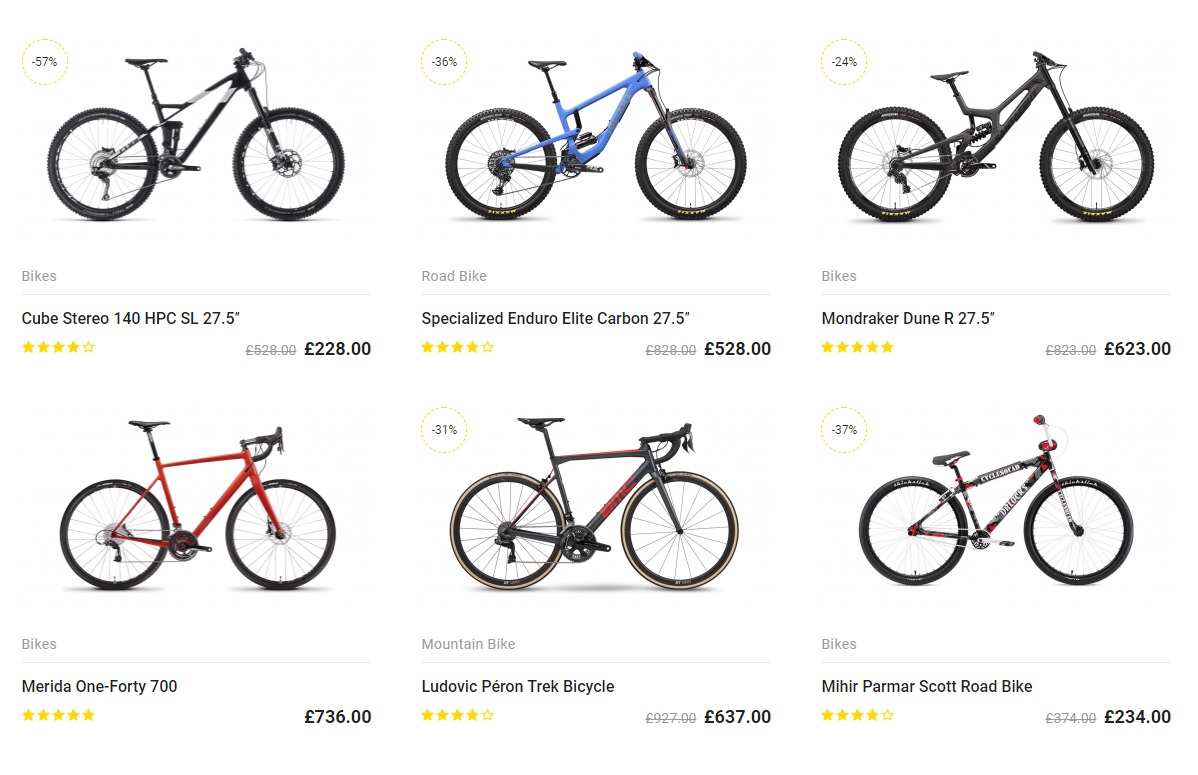
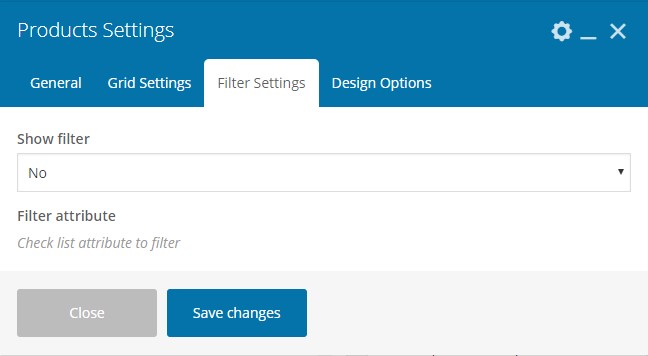
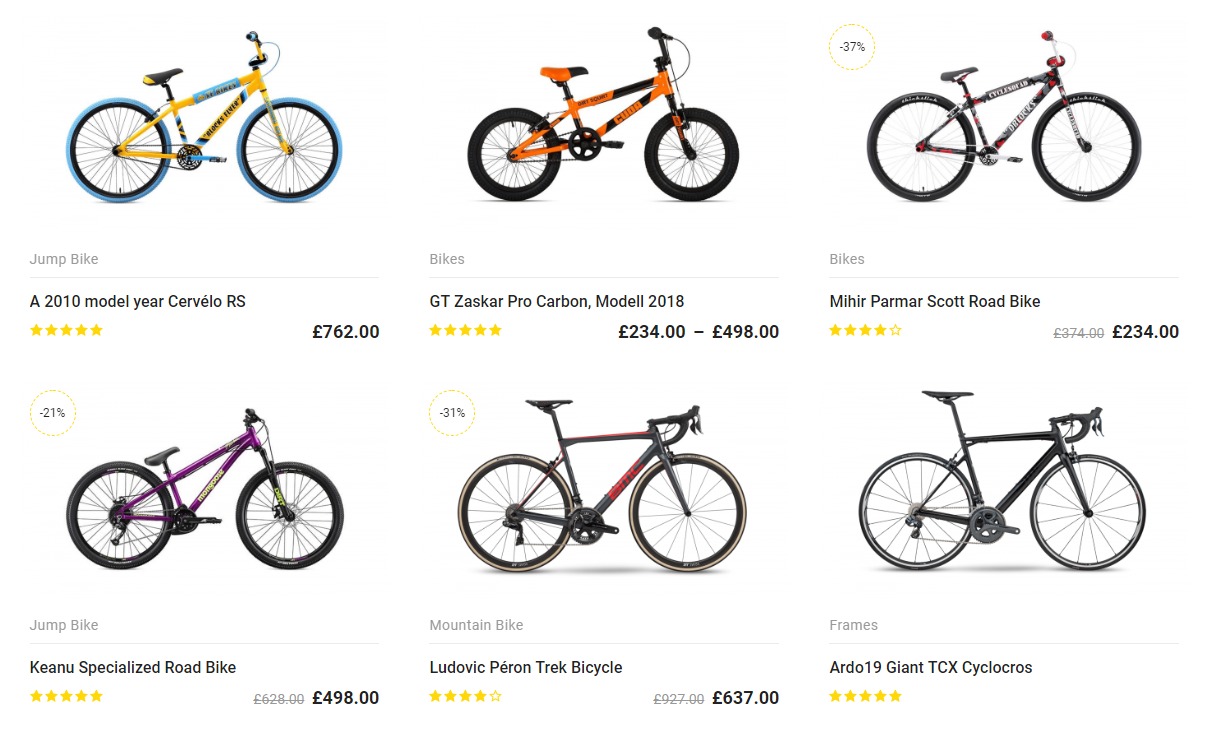
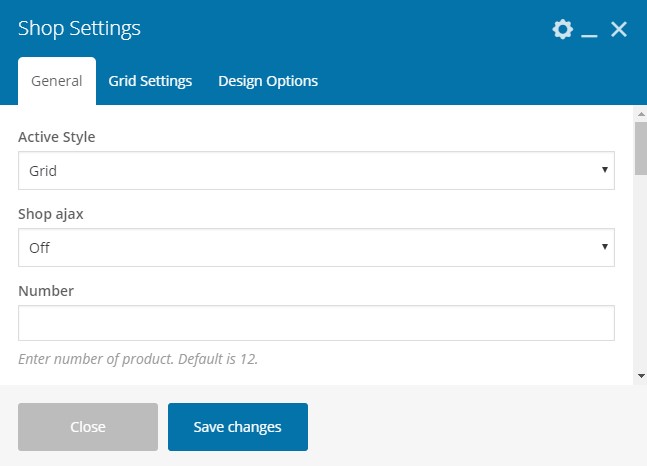
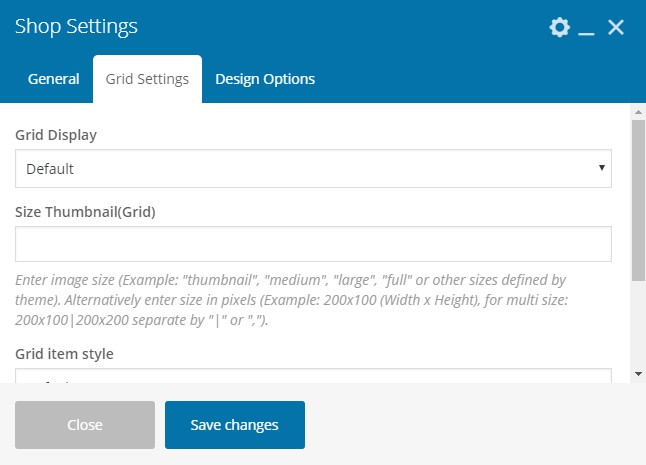
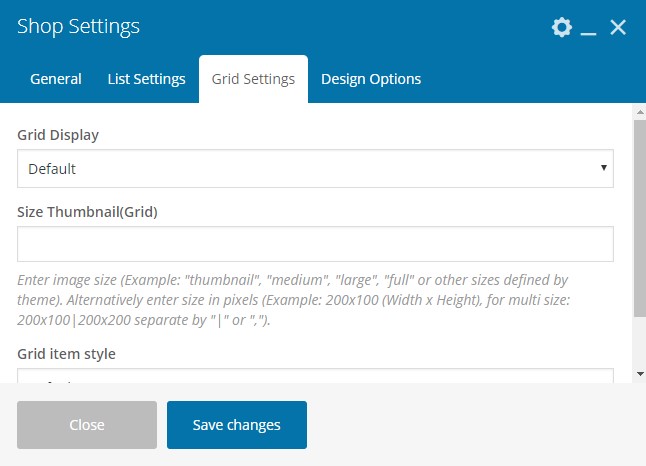
3.23. Shop
Feature: Used to display shop page. You can use enable shop ajax in this element.
Edit interface
Front-end views
3.16. Tabs
Feature: Used to display tab with 7uptheme style.
Edit interface
Front-end views
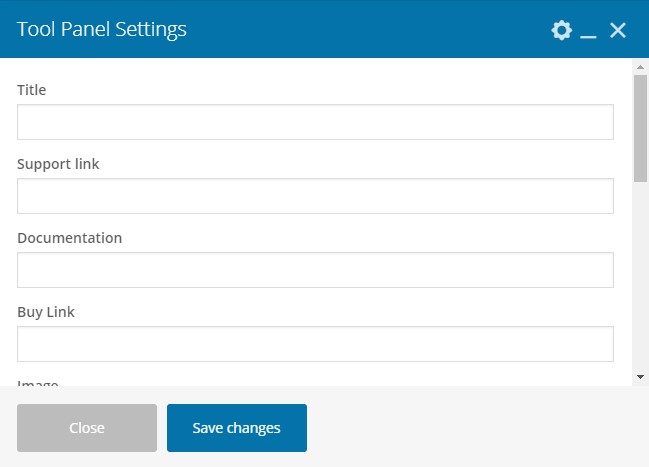
3.17. Tool Panel
Feature: Used to display a advertisement
Edit interface


4. Create/Edit page
In WordPress Dashboard you can go to Pages -> All Pages and choose page want to edit. Or you can choose Pages -> Add New to create new page.
Pages template:
Default template: create a page with default space top and bottom.
Visual template: create a page with page builder and no default space top and bottom.
Video tutorial
Edit Page
Create Page
5. Create post/product
Create post
In WordPress Dashboard you can go to Posts --> Add New to create new post. Or Posts --> All Posts and choose a post to edit.
Create product
In WordPress Dashboard you can go to Products --> Add New to create new product. Or Products --> All Products and choose a product to edit.
Note: you can enable page builder for post/product to create/edit with Bakery page builder.
6. Responsive
All products using 7uptheme framework 2 (from 7/2018) will have additional advanced responsive functions. Helps you improve visibility for mobile devices.
Base responsibe for column: when you create page builder content from rows and columns. You can divide the width of the columns you want to display for each screen.
In Column Settings, you can choose Responsive Options
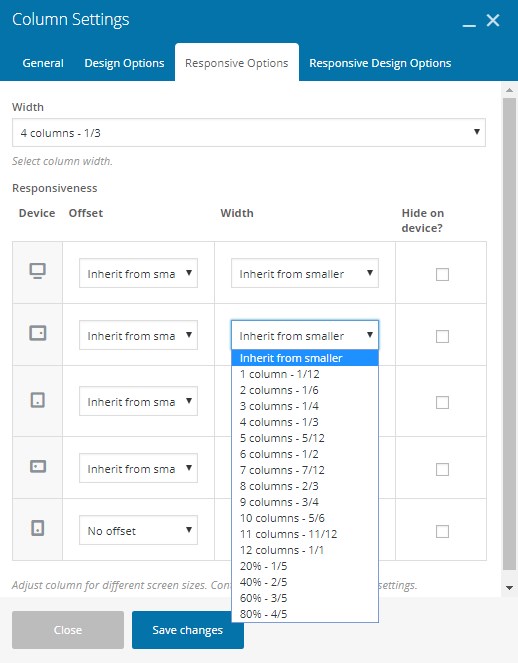
Width: default width. Apply for small device.
Responsiveness: responsibe settings for 5 type of device.
1: Large device
2: Medium device
3: Small device(default)
4: Small 2 device: Mobile lanscape
5: Extra Small: Mobile default
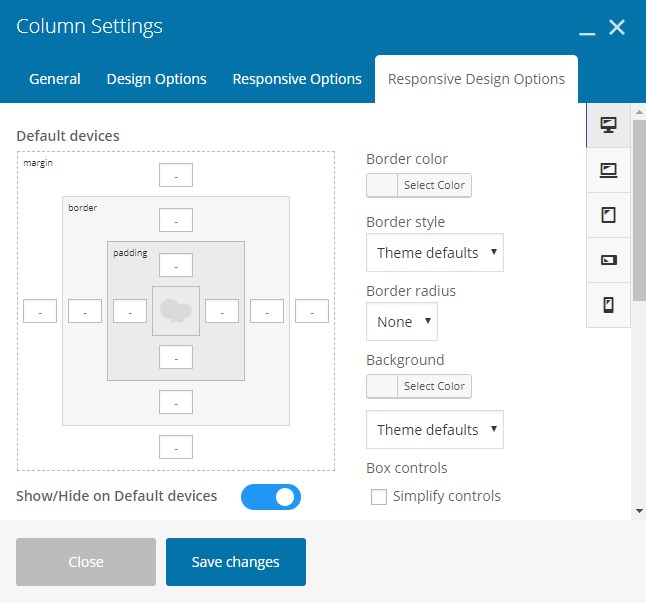
Advanced responsive:: Applies to some special items or all items depending on your settings.
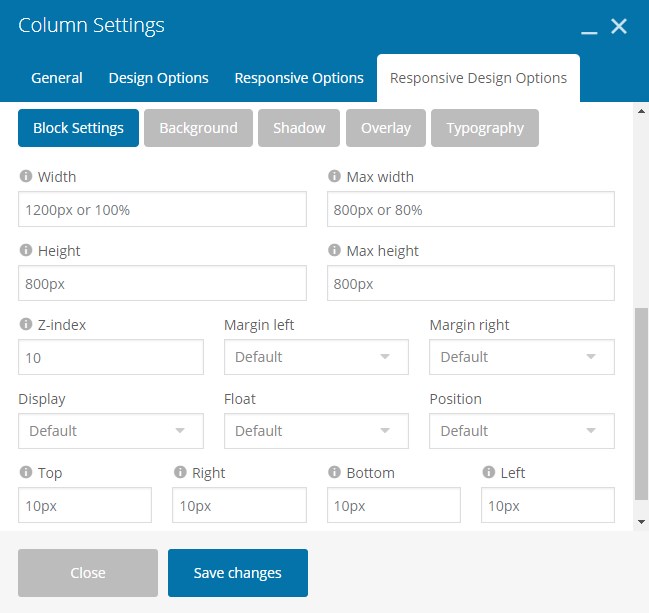
In elements setting, You can choose Responsive Design Option: you can change padding, margin, background, width ... and alot of css attribute for each device.
7. Meta Data
7.1 Meta General
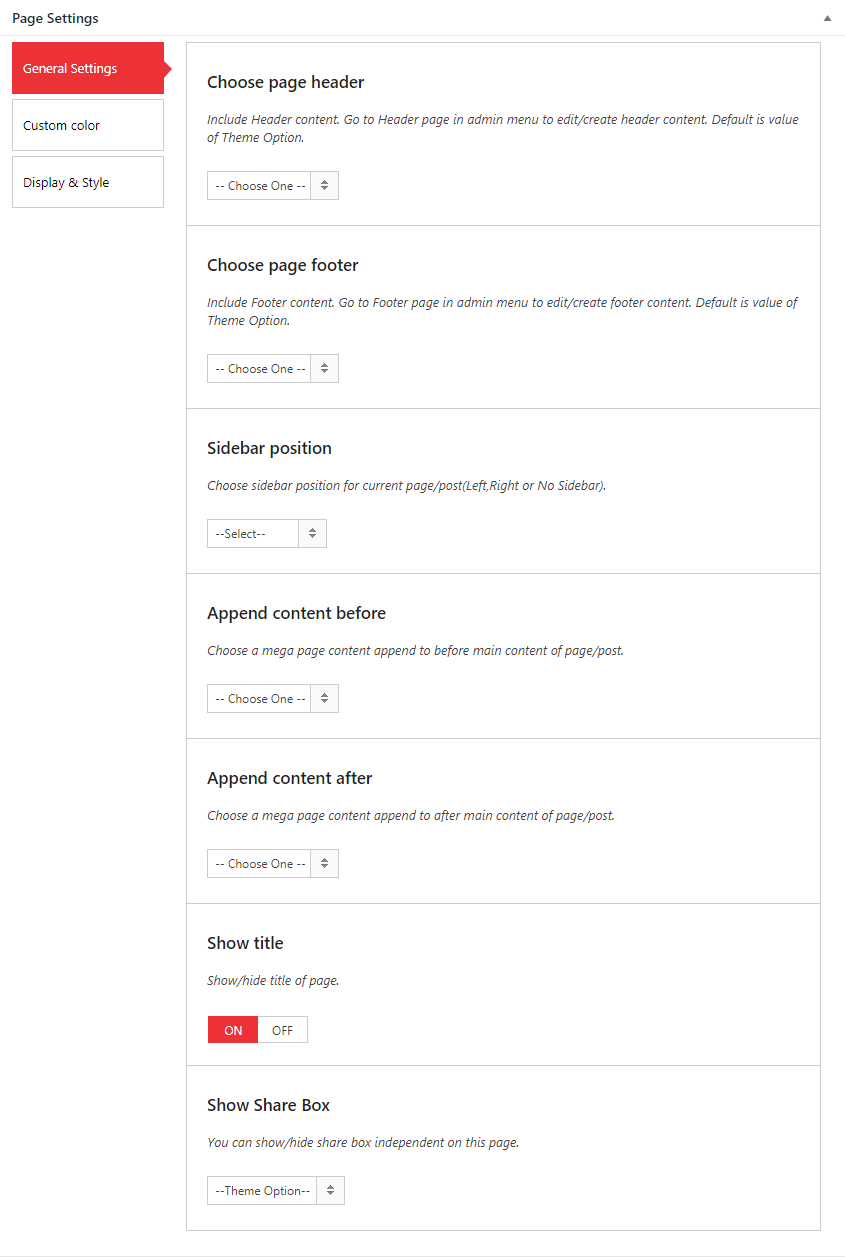
1. Tab General Settings: used to setting header, footer, sidebar, append content before and affter, show/hide title and social network sharing for each page/post/product
2. Tab Custom Color: used to setting background and main color for each page/post/product.
3. Tab Display & Style: used to select style display and edit width of page container for each page/post/product


7.2 Meta Post
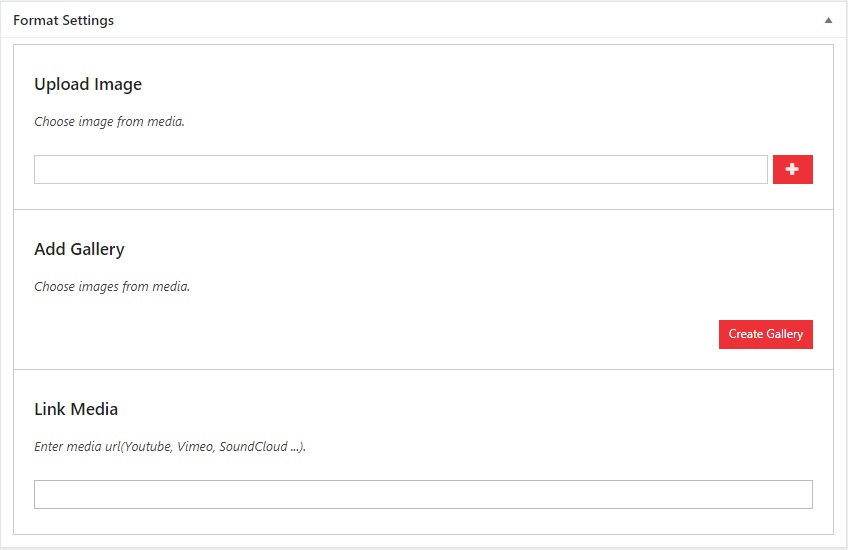
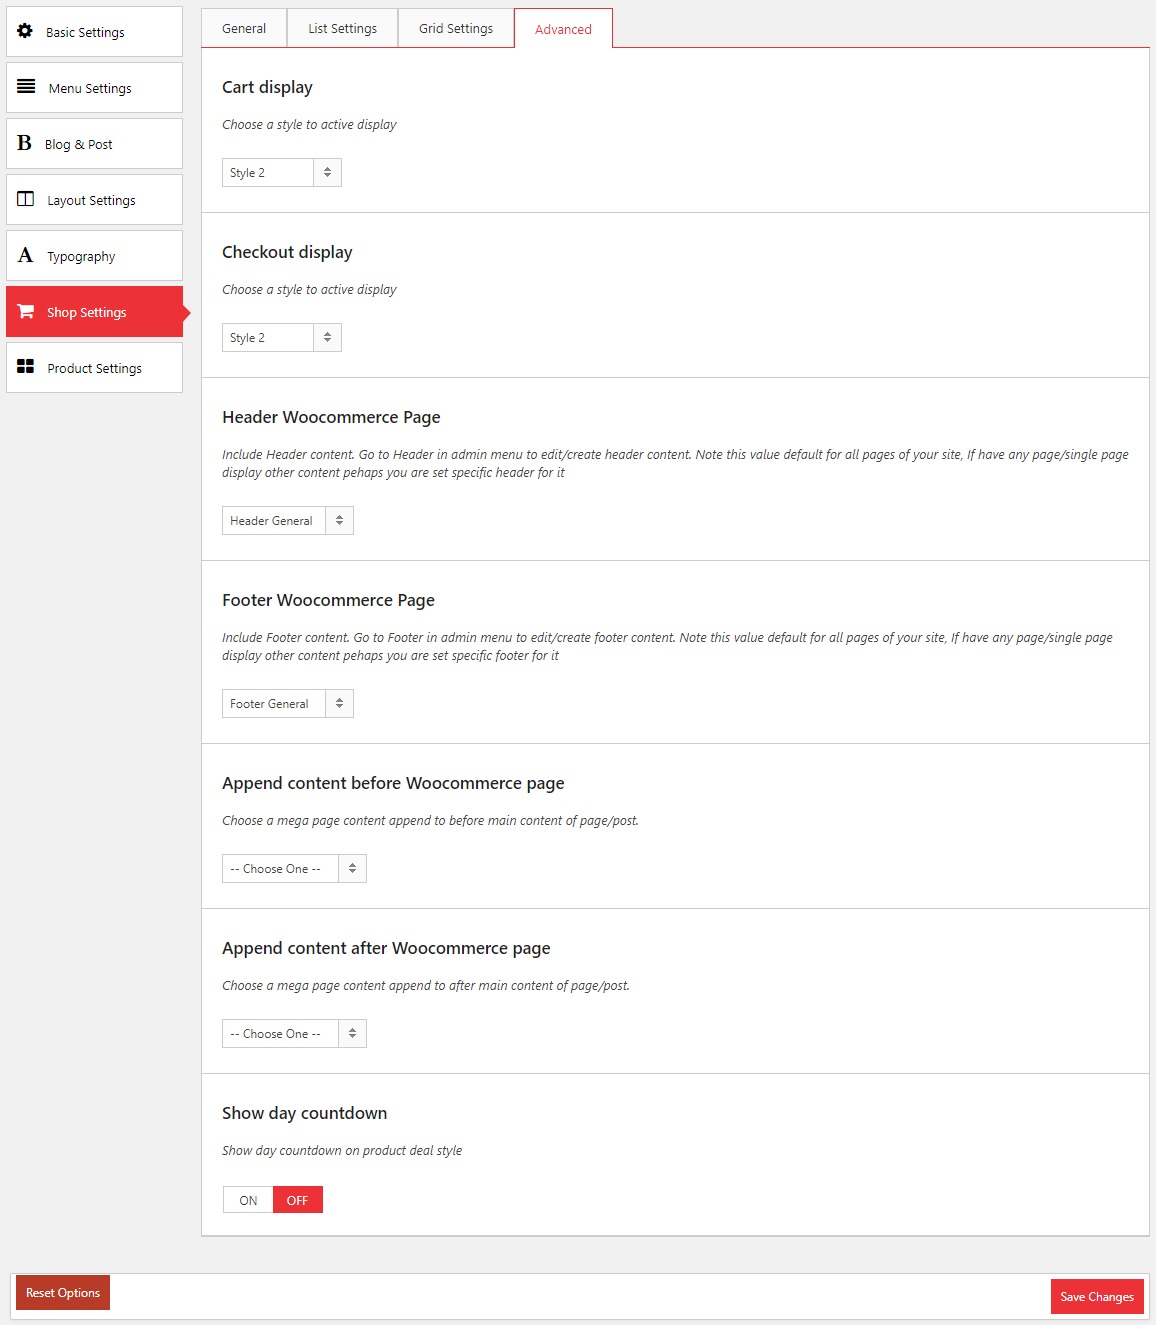
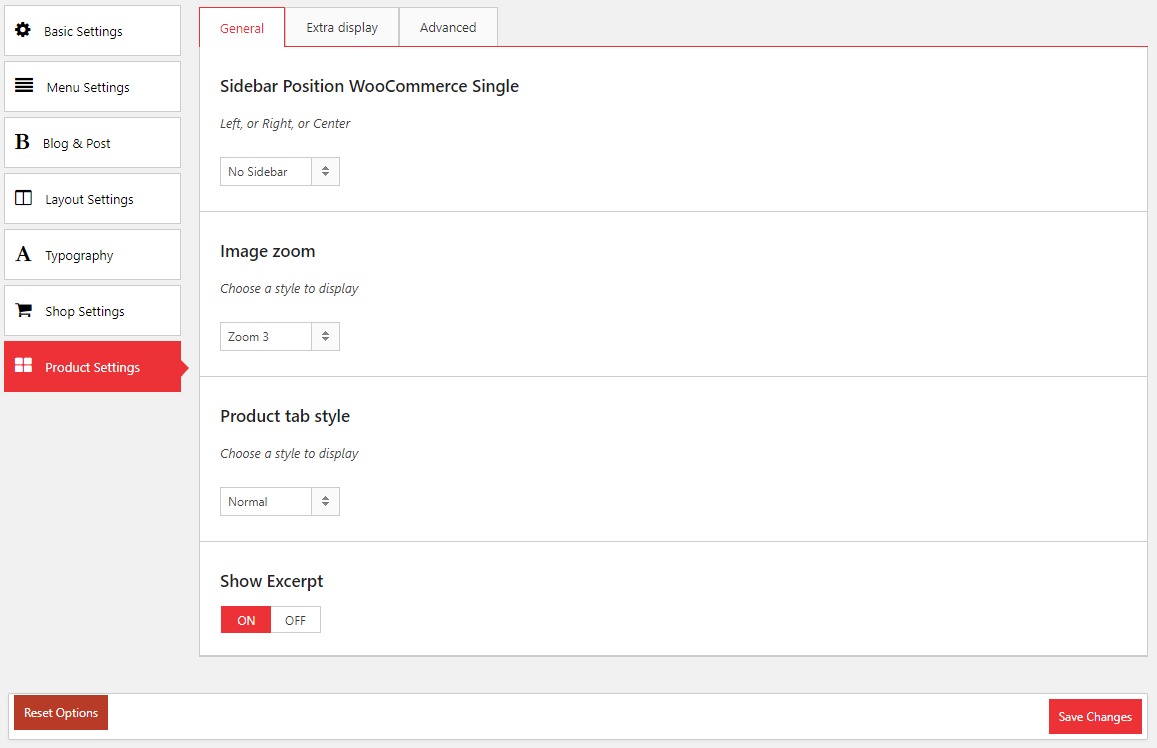
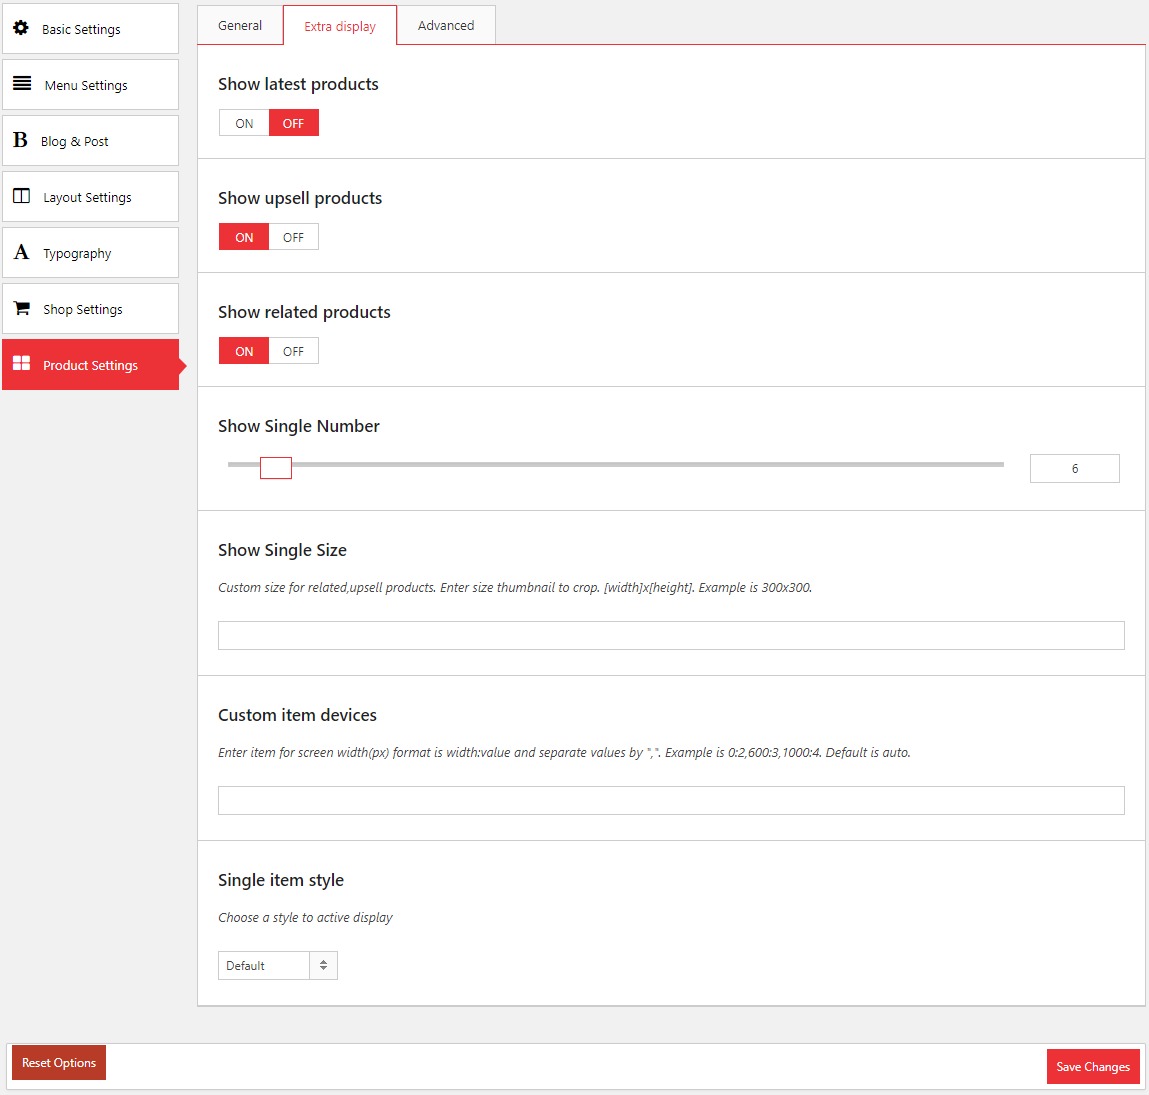
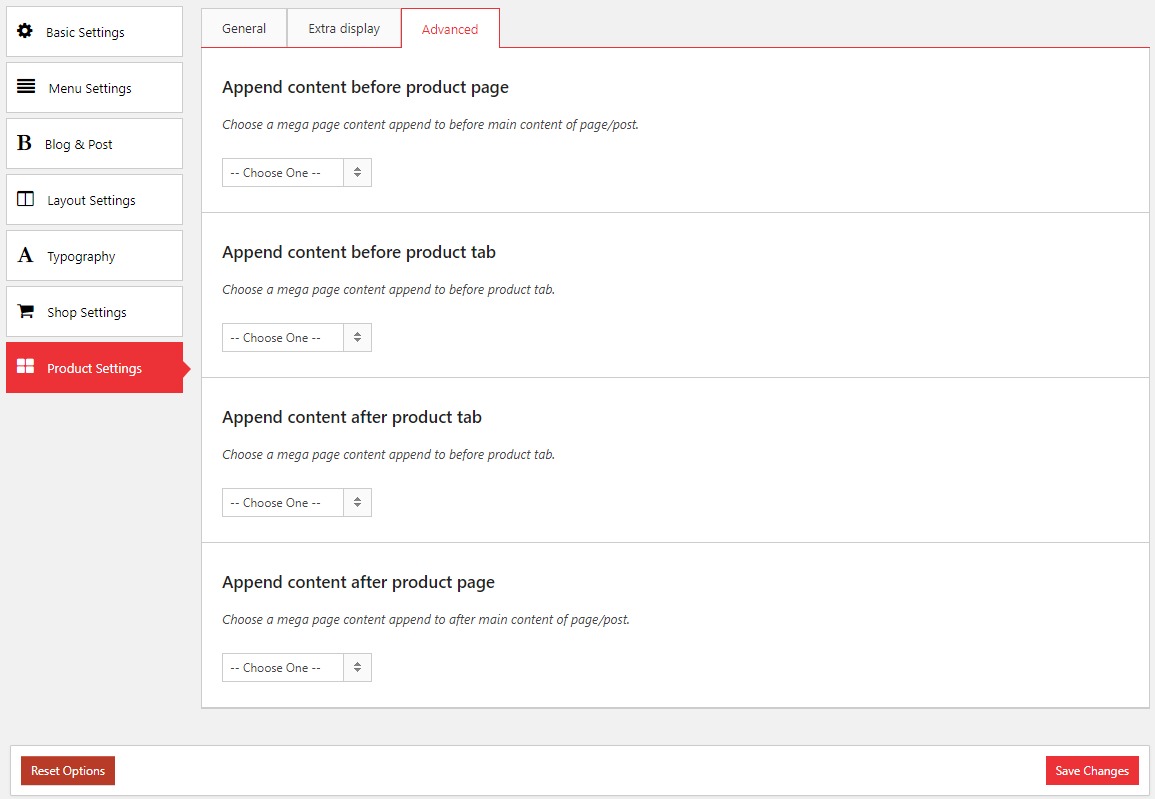
7.3 Meta Product
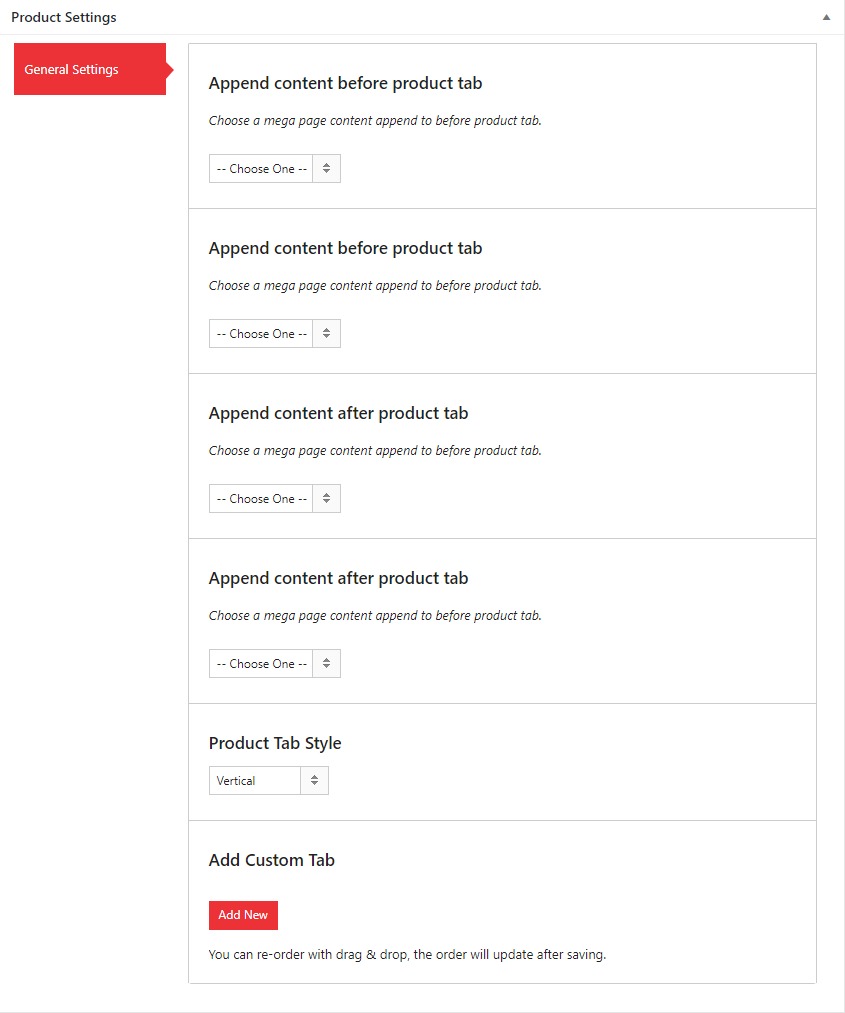
1. Product Settings
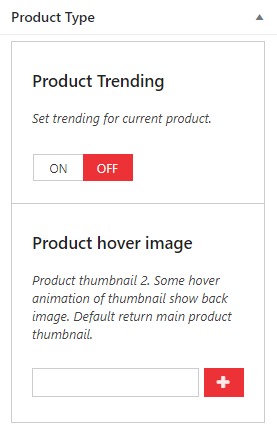
2. Product Type: used to set trending for current product and add more image thumbnail on hover product
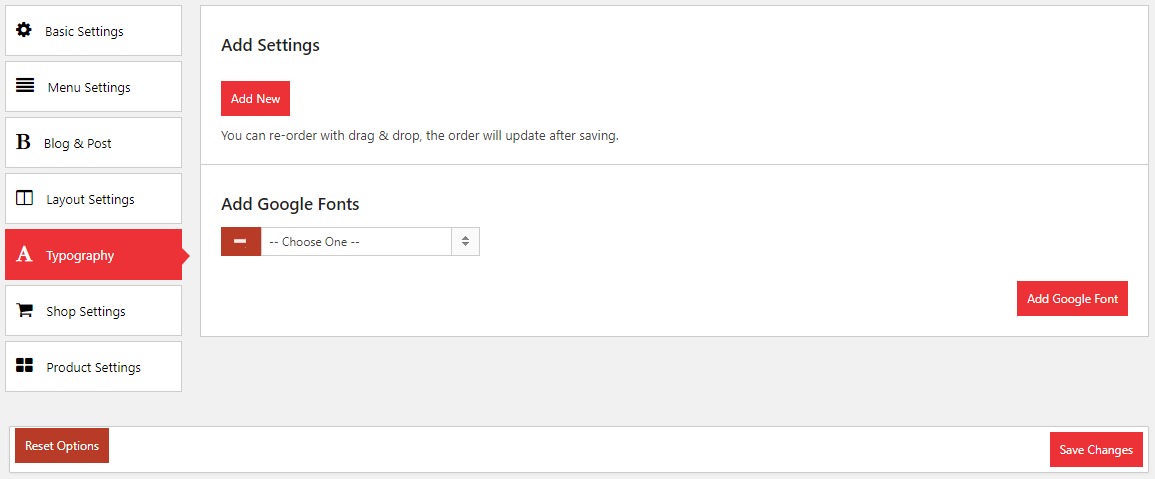
8. Widget
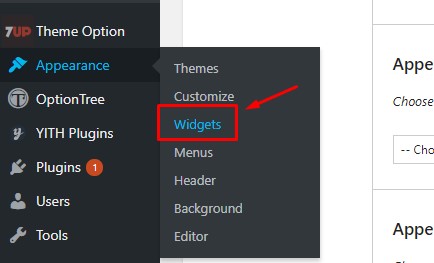
List 7up's widget
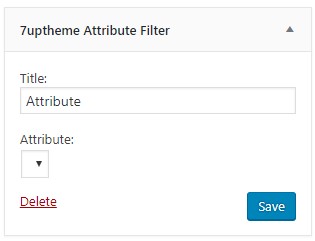
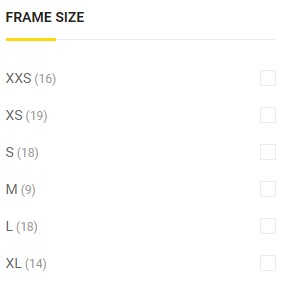
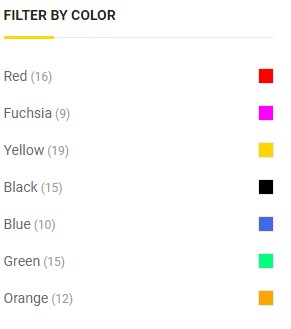
8.1. Attribute Filter
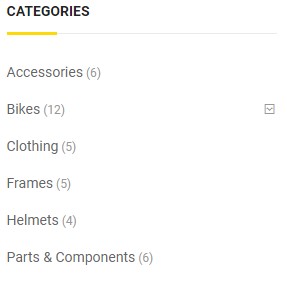
8.2. Categories Filter
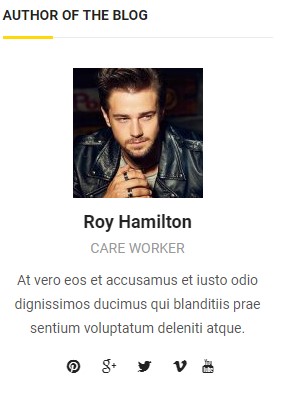
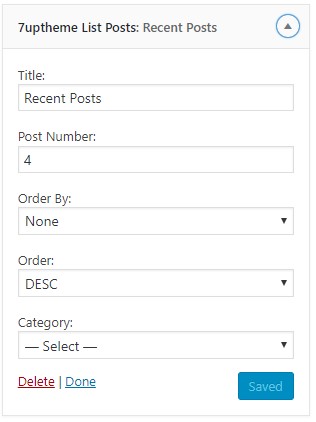
8.4. Post List
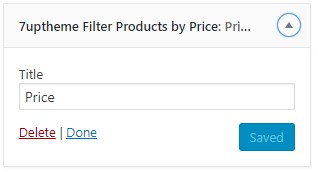
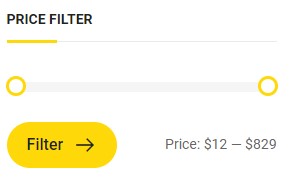
8.5. Price Filter